Topic how to format sd card on sony a7iv: Unlock the full potential of your Sony A7IV with our comprehensive guide on how to format your SD card, ensuring optimal performance and reliability for your photography adventures.
Table of Content
- How do I format an SD card on the Sony A7IV camera?
- Accessing the Format Menu
- Selecting the Memory Card Slot
- Formatting the Memory Card
- Confirmation and Data Backup Reminder
- Formatting SD Card Using a PC or Mac
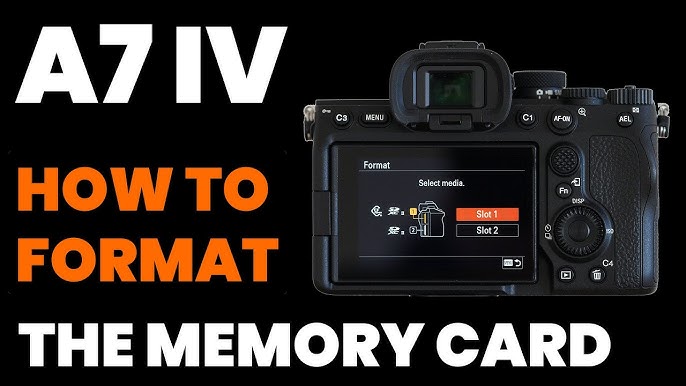
- YOUTUBE: Sony A7 IV | How to Format the Memory Card
- Memory Card Compatibility and Recommendations
- Troubleshooting Common Formatting Issues
- System Software Update Information
- Additional Camera Settings Post-Formatting
How do I format an SD card on the Sony A7IV camera?
To format an SD card on the Sony A7IV camera, follow these steps:
- Turn on the camera and navigate to the menu.
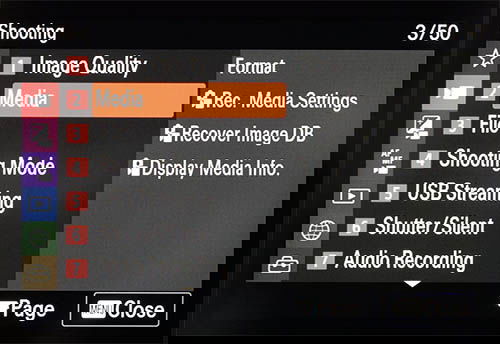
- Select the \"Shooting\" option from the menu.
- Scroll down and choose the \"Media\" option.
- Within the \"Media\" sub-menu, locate and select the \"Format\" option.
- Choose the desired memory card slot if your camera has multiple slots.
- Press the \"Enter\" button to begin the formatting process.
After completing these steps, the SD card will be formatted and ready for use with your Sony A7IV camera.
READ MORE:
Accessing the Format Menu
To format an SD card on your Sony A7IV, begin by ensuring your camera is turned off. Insert the SD card into one of the two available slots. If you\"re using both slots, decide which card you want to format as this process will erase all data on the card.
- Power on your Sony A7IV.
- Press the \"Menu\" button located on the back of the camera to enter the main menu.
- Use the control wheel to navigate to the \"Setup\" tab, indicated by a toolbox icon.
- Scroll through the options until you find \"Format\" and select it. This option is typically found under the \"Setup4\" or \"Setup5\" menu, depending on your camera\"s firmware version.
- You will then see options for \"Slot 1\" and \"Slot 2\". Choose the slot corresponding to the SD card you wish to format.
- Confirm your choice. The camera will warn you that all data on the SD card will be erased. To proceed, select \"OK\".
After a few moments, your SD card will be formatted and ready for use. This process is essential for maintaining the health of your SD card and ensuring optimal performance of your Sony A7IV.

Selecting the Memory Card Slot
Choosing the correct memory card slot is crucial for formatting your SD card in the Sony A7IV, as the camera features two slots for memory cards. Follow these steps to select the right slot for formatting:
- After accessing the Format menu, you\"ll be presented with options for both memory card slots: Slot 1 and Slot 2.
- Slot 1 is typically used for primary storage and is compatible with faster UHS-II cards, while Slot 2 may support UHS-I cards.
- Determine which card needs formatting. If you are using both slots, consider which slot\"s card contains data you wish to erase.
- Select the corresponding slot by navigating with the camera\"s dial or touchscreen. The selection will be highlighted on the camera\"s display.
- Once the slot is selected, proceed with the formatting option. Remember, formatting will erase all data on the card, so ensure any important data is backed up beforehand.
It\"s important to regularly format your SD cards within the camera to maintain optimal performance and to prevent data corruption issues. Always make sure the battery is sufficiently charged before starting the formatting process to avoid interruptions.

Formatting the Memory Card
Formatting the memory card in your Sony A7IV is a straightforward process that ensures your card is free of data and ready for use. Follow these detailed steps to securely format your SD card:
- Ensure your camera is powered on and that the SD card you wish to format is inserted into the correct slot.
- Press the \"Menu\" button to enter the camera’s main menu system.
- Navigate to the \"Setup\" tab (represented by a toolbox icon), then scroll to find the \"Format\" option. The location of this option may vary slightly depending on your camera\"s firmware version.
- Select \"Format\" and then choose the slot containing the SD card you wish to format. You will be prompted to confirm your choice.
- A warning message will appear, reminding you that all data on the card will be erased. Confirm your intention to proceed with the format by selecting \"OK\".
- Wait for the process to complete. This may take a few moments. Once done, your memory card will be formatted and ready for use.
Remember, formatting your memory card will permanently erase all data, so ensure to back up any important files before proceeding. Regular formatting is recommended to maintain your SD card\"s health and performance.
Confirmation and Data Backup Reminder
Before proceeding with formatting your SD card on the Sony A7IV, it\"s critical to ensure all valuable data is backed up. Formatting will permanently erase all files, making recovery impossible. Follow these reminders and steps to secure your data:
- Backup Your Data: Transfer all photos and videos to a computer or cloud storage service. Consider using software that can automate backups for future convenience.
- Double-Check the Card: Ensure you are formatting the correct SD card, especially if you use multiple cards or cameras.
- Confirm the Action: When you select \"OK\" to format, the Sony A7IV will ask for confirmation. This is your last chance to cancel if you\"re not ready to erase the card.
Additionally, consider this process an opportunity to organize and review your stored photos and videos. Keeping your digital files well-organized can save time and ensure you don\"t lose precious memories.
Finally, regular formatting and data backup can significantly extend the life of your SD card and secure your files against potential data loss or corruption.
_HOOK_
Formatting SD Card Using a PC or Mac
Formatting your Sony A7IV SD card using a PC or Mac is a simple process that prepares your card for use with your camera. Here\"s how to safely format your SD card on both operating systems:
- Using a PC:
- Insert the SD card into your computer\"s SD card reader.
- Open \"This PC\" and right-click on the SD card drive.
- Select \"Format\" from the context menu.
- Choose the desired file system, typically FAT32 for SD cards 32GB and smaller, or exFAT for SD cards larger than 32GB.
- Click \"Start\" to begin the format process, then \"OK\" to confirm.
- Using a Mac:
- Insert the SD card into your Mac\"s SD card slot or use an external card reader.
- Open \"Disk Utility\" from the Applications > Utilities folder.
- Select the SD card from the sidebar, then click the \"Erase\" button.
- Choose the desired format (MS-DOS (FAT) for 32GB and smaller, or exFAT for larger than 32GB) and a name for the card.
- Click \"Erase\" to start the format process.
Remember to backup any important data before formatting, as this process will erase all content on the SD card.

Sony A7 IV | How to Format the Memory Card
Format+ is a game-changing software that takes your editing skills to the next level. Join us in our video as we explore the endless possibilities of this innovative tool, allowing you to effortlessly enhance your photos and videos with professional-looking effects and adjustments.
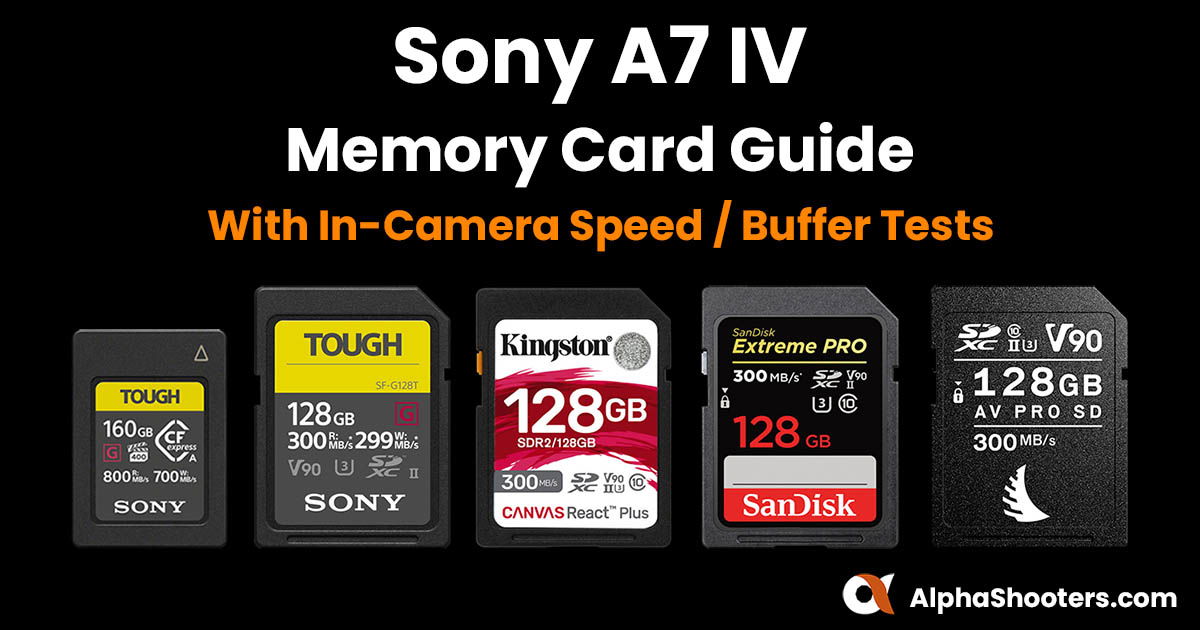
Memory Card Compatibility and Recommendations
Choosing the right memory card for your Sony A7IV is essential for maximizing the camera\"s performance. Here are the compatibility details and recommendations:
- Card Types: The Sony A7IV supports both SDXC/SDHC cards (UHS-I and UHS-II) and CFexpress Type A cards. For video recording, especially in high bitrates or 4K, UHS-II SD cards or CFexpress Type A cards are recommended for their faster write speeds.
- Capacity: It\"s advisable to use cards with a minimum of 64GB of storage to ensure you have enough space for high-resolution images and video. However, for extended shoots or video recording, 128GB or larger is preferable.
- Speed Class: Look for cards with a V60 or V90 speed class rating if you\"re shooting video, as these cards are designed to handle higher bitrate video without dropping frames. For photography, UHS Speed Class 3 (U3) should suffice for most needs.
- Brand Recommendations: Reliable brands like SanDisk, Sony, Lexar, and ProGrade Digital offer memory cards that are compatible with the A7IV. Choosing cards from reputable brands can minimize the risk of data loss and ensure the best performance.
Before purchasing a memory card, consider your shooting needs. Photographers primarily shooting stills may find SDXC/SDHC cards sufficient, while videographers or those using the camera\"s high-speed burst mode might benefit from the added speed of CFexpress Type A cards.

How to Format a Memory Card on Sony A7 IV
Looking for the perfect memory card for your digital storage needs? Look no further! In our video, we review and compare various memory cards and their performance, helping you make an informed decision and find the one that suits your requirements.
Troubleshooting Common Formatting Issues
Encountering issues while trying to format an SD card in your Sony A7IV can be frustrating. Here are solutions to some common problems:
- Card Not Recognized: Ensure the SD card is properly inserted into the slot. If the camera still doesn\"t recognize it, try inserting the card into a computer to check if it\"s working.
- Formatting Error Message: This could be due to a locked SD card. Check the side of the card for the lock switch and ensure it\"s in the unlocked position.
- Slow Formatting Process: If formatting takes longer than usual, the card may be nearing the end of its lifespan or suffering from corruption. Try formatting it using a computer, and if the issue persists, consider replacing the card.
- Card Errors After Formatting: Ensure you\"re using a file system compatible with the Sony A7IV. Format the card again in the camera to resolve file system mismatches.
- Incomplete Formatting: Interruptions during formatting can lead to errors. Ensure your camera battery is fully charged before starting the format process to avoid power interruptions.
If problems continue after trying these solutions, the SD card may be defective or incompatible with the Sony A7IV. Testing with another card can help determine if the issue is with the card or the camera.
System Software Update Information
Keeping your Sony A7IV\"s system software (firmware) up to date is crucial for ensuring optimal performance and access to the latest features and improvements. Follow these steps to check for and install system software updates:
- Check Current Firmware Version: Access the camera\"s menu and navigate to the \"Setup\" section. Find and select \"Version\" to see the current firmware version installed on your Sony A7IV.
- Download Firmware Update: Visit the official Sony support website to check for available firmware updates for the A7IV. Download the latest firmware version if it\"s higher than the one currently installed on your camera.
- Prepare for Update: Ensure your camera\"s battery is fully charged, or connect the camera to a power source to prevent it from turning off during the update process. Save any settings or customizations, as some may be reset to default during the update.
- Transfer Firmware to SD Card: Follow the instructions provided with the download to transfer the firmware update to an SD card using a computer.
- Install the Update: With the firmware on an SD card, insert the card into your Sony A7IV, navigate to the \"Setup\" menu, and select the firmware update option. Follow on-screen instructions to complete the update.
After updating, verify the firmware version through the camera menu to ensure the update was successful. Regularly checking for and installing firmware updates can enhance your camera\"s functionality, fix bugs, and improve overall performance.

READ MORE:
Additional Camera Settings Post-Formatting
After formatting your SD card in the Sony A7IV, certain camera settings may need to be reviewed or adjusted to ensure optimal performance. Here are some key settings to consider:
- Date and Time: Verify the date and time settings are correct. Formatting can sometimes reset these settings to default.
- File Numbering: Check the file numbering settings (continuous or reset) to organize your new files as desired.
- Image Quality: Reconfirm your preferred image quality settings, including RAW or JPEG formats, to ensure your photos are captured with the desired resolution and file type.
- Custom Settings: If you had previously customized any settings, such as custom buttons, autofocus settings, or menu favorites, ensure they are still configured to your preference.
- Wi-Fi/Bluetooth Connections: Ensure any previously established Wi-Fi or Bluetooth connections with smartphones or other devices are still active or reconnect as necessary.
Regularly formatting your SD card and adjusting these settings can help maintain your camera\"s efficiency and ensure your photography workflow remains uninterrupted.
Mastering the art of formatting your SD card on the Sony A7IV enhances your camera\"s performance, ensuring you capture every moment flawlessly. Embrace these steps for a seamless photography experience, keeping your memories safe and your creativity boundless.
_HOOK_