Topic tutorial sony vegas: Discover the art of video editing with our comprehensive "Tutorial Sony Vegas" guide, designed to empower beginners and professionals alike to unleash their creative potential effortlessly.
Table of Content
- How long does it take to learn Sony Vegas Pro?
- Choosing Your Software
- Getting Started with VEGAS Pro
- Basic Editing Techniques
- Advanced Editing Techniques
- Audio Editing and Enhancement
- Adding Special Effects
- YOUTUBE: VEGAS Pro Tutorial for Beginners in 12 Minutes
- Color Correction and Grading
- Working with Chroma Key and Green Screen
- Exporting and Rendering Your Video
- Useful Tips and Tricks
How long does it take to learn Sony Vegas Pro?
Learning Sony Vegas Pro can take varying amounts of time depending on your prior knowledge and dedication to learning. Here are the steps you can follow to learn Sony Vegas Pro:
- Start by watching tutorials: Look for tutorials on YouTube or other websites that provide step-by-step instructions on how to use Sony Vegas Pro. Be sure to watch tutorials specifically designed for beginners to get a solid understanding of the basics.
- Practice with sample projects: Once you have learned the basics, start practicing by working on sample projects. This will help you become familiar with the different features and tools in Sony Vegas Pro.
- Experiment with your own projects: Once you feel comfortable with the software, start working on your own projects. This will allow you to apply what you have learned and further enhance your skills.
- Keep learning and exploring: Sony Vegas Pro is a powerful tool with many advanced features. To continue improving your skills, keep exploring tutorials, forums, and other resources to learn new techniques and stay updated with the latest features.
With consistent practice and dedication, you can become proficient in Sony Vegas Pro within a few weeks or months. However, the learning process may vary for each individual.
READ MORE:
Choosing Your Software
Embarking on your video editing journey begins with selecting the right software. Sony Vegas stands out for its user-friendly interface, making it an excellent choice for both beginners and professionals. This section will guide you through considerations to ensure Sony Vegas meets your editing needs.
- Evaluate Your Requirements: Assess the complexity of your projects. Sony Vegas offers a range of versions, each catering to different levels of expertise and needs.
- Compare Features: Sony Vegas provides a comprehensive set of editing tools, effects, and support for various formats. Ensure it has the features you need, such as advanced color grading, special effects, and audio editing capabilities.
- Consider the Learning Curve: While Sony Vegas is known for its intuitive design, consider the availability of tutorials and resources to help you master the software efficiently.
- Check System Requirements: Ensure your computer meets the hardware requirements for running Sony Vegas smoothly, including processor speed, memory, and graphics capabilities.
- Budget: Compare the pricing models of Sony Vegas versions to find one that fits your budget without compromising on the necessary features.
By carefully considering these factors, you\"ll be well on your way to choosing Sony Vegas as your go-to video editing software, unlocking endless creative possibilities.
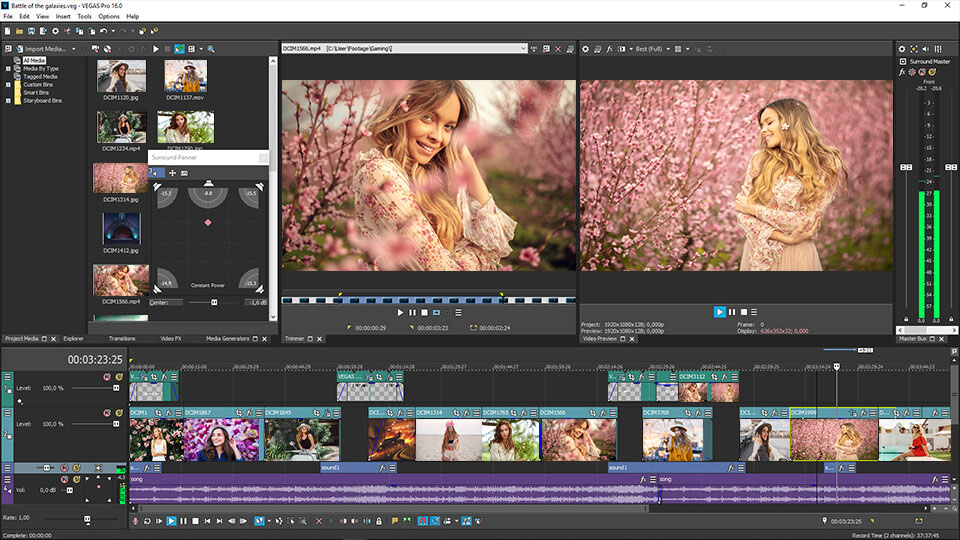
Getting Started with VEGAS Pro
Welcome to the world of VEGAS Pro, a comprehensive video editing software that brings your creative visions to life. Whether you\"re a beginner or an experienced editor, this section will guide you through the initial steps of setting up and navigating VEGAS Pro. Follow these steps to start your video editing journey.
- Download and Install VEGAS Pro: Begin by purchasing or downloading a trial version of VEGAS Pro from the official website. Follow the installation instructions to install the software on your computer.
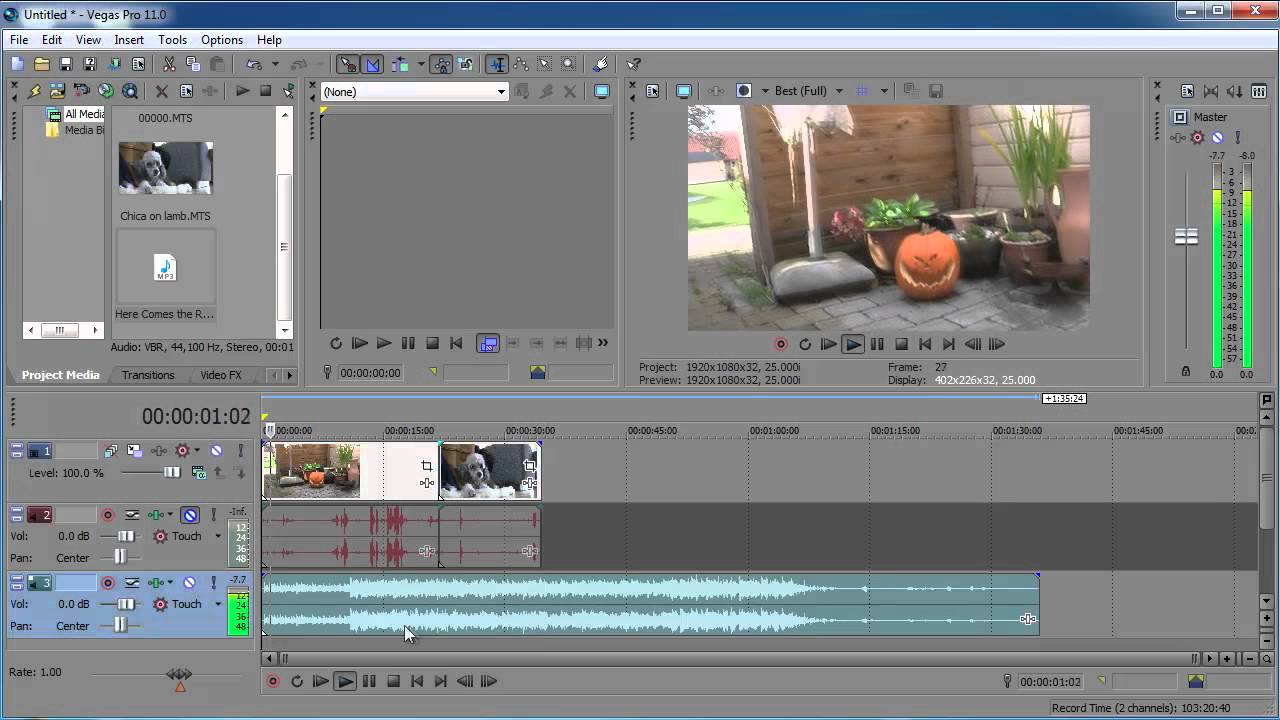
- Explore the Interface: Upon launching VEGAS Pro, take some time to familiarize yourself with its interface. You\"ll find the timeline at the bottom, the preview window on the right, and the media explorer and project media windows on the left. Understanding these components is crucial for efficient editing.
- Import Media: Import your video clips, images, and audio files by dragging them into the project media window or by using the \"Import\" option under the \"File\" menu. Organizing your media in bins can help keep your project tidy.
- Create a New Project: Go to \"File\" > \"New\" to create a new project. Here, you can set your project properties such as frame rate, resolution, and audio settings. These settings should match your source footage for optimal editing.
- Add Media to Timeline: Drag your media files from the project media window to the timeline to start editing. You can arrange, cut, and layer your clips on the timeline to build your video sequence.
- Basic Editing Tools: Familiarize yourself with the basic editing tools such as the cut tool, selection tool, and trim tool. These are essential for manipulating clips on the timeline.
- Preview Your Work: Use the preview window to monitor your edits in real-time. This feature allows you to make precise adjustments and ensure that your video looks exactly how you want it.
- Save Your Project: Regularly save your project by clicking \"File\" > \"Save\" or by pressing Ctrl+S (Cmd+S on Mac) to avoid losing any progress in case of a software crash or power failure.
- Explore VEGAS Pro Features: VEGAS Pro is packed with advanced features such as color grading, special effects, and audio editing tools. Take the time to explore these features to enhance your video projects.
- Seek Help and Resources: If you encounter any difficulties, consult the VEGAS Pro help documentation or online tutorials. There\"s a vast community of VEGAS Pro users and forums where you can find tips, tricks, and advice.
By following these steps, you\"ll be well on your way to producing professional-quality videos with VEGAS Pro. Remember, practice and experimentation are key to mastering any new software, so don\"t hesitate to explore and try out different features as you become more comfortable with the program.
Basic Editing Techniques
Mastering basic editing techniques in VEGAS Pro is essential for creating polished and engaging videos. This section will guide you through fundamental editing skills, from cutting and trimming to adding transitions and text. Let\"s dive into these essential editing steps to elevate your video projects.
- Splitting Clips: To split a clip, position the cursor where you want the split, and press the \"S\" key. This allows you to remove unwanted parts or rearrange sections of your footage.
- Trimming Clips: Click and drag the edges of a clip in the timeline to trim the beginning or end. Trimming helps you refine the timing and flow of your video.
- Adding Transitions: To add a transition between two clips, drag a transition from the \"Transitions\" tab and drop it between them. Transitions help smooth the change from one scene to another, enhancing the storytelling.
- Using the Fade In/Out Effect: Add a fade in or fade out to your clips for a professional touch. Click the top corner of a clip and drag it towards the center to create a fade effect.
- Adjusting Clip Speed: Right-click on a clip, choose \"Properties\", and then adjust the \"Playback Rate\" to speed up or slow down a clip. This technique is perfect for creating slow-motion or time-lapse effects.
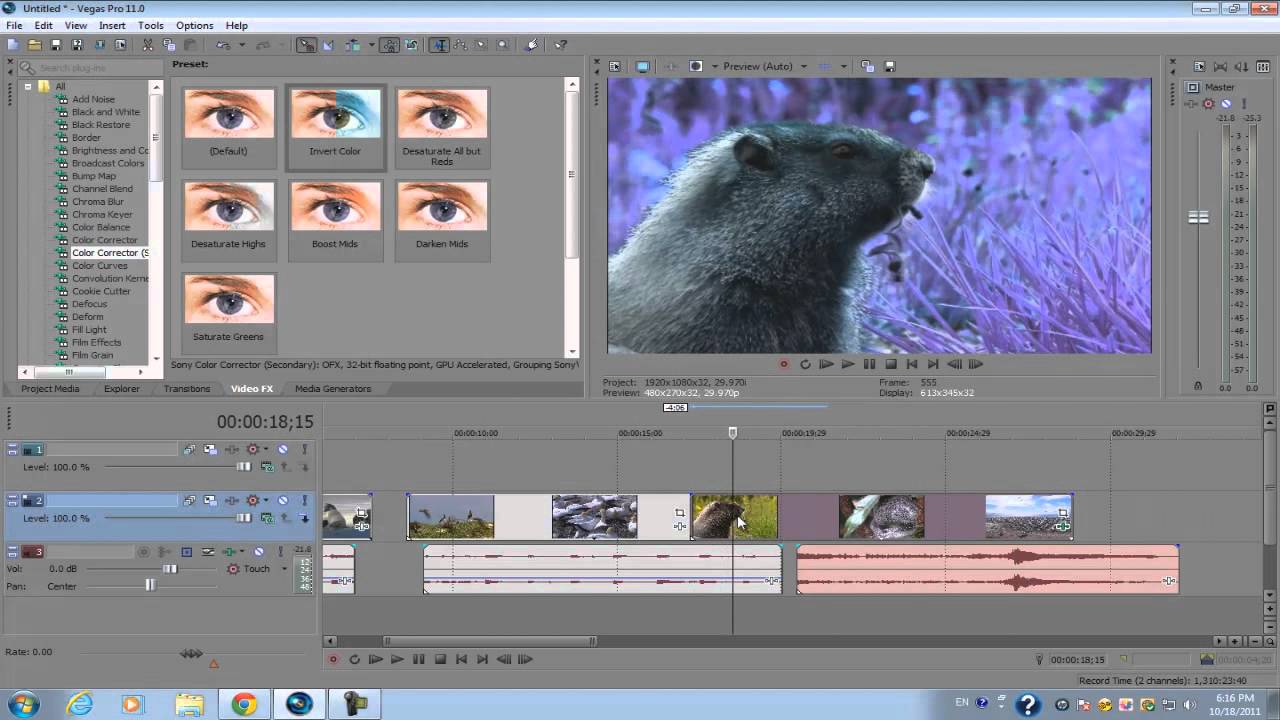
- Applying Video Effects: Browse the \"Video FX\" tab for various effects. Drag an effect onto a clip to apply it. Use effects sparingly to enhance your narrative without overwhelming the viewer.
- Inserting Text: To add text, go to \"Media Generators\", select \"Text\", and drag it onto the timeline. Customize the text using the properties window to add titles, captions, or credits to your video.
- Adjusting Audio Levels: Click the audio track to select it, then drag the volume line up or down to adjust the volume. Right-click the audio track for advanced options like fade in, fade out, and mute.
- Keyframe Animation: Keyframes allow you to create animation for video and audio effects. Click the \"Animate\" button next to an effect in the video or audio track to start adding keyframes and adjusting parameters over time.
- Saving and Exporting: After editing, save your project frequently. When finished, export your video by going to \"File\" > \"Render As\" and choose the appropriate format and settings for your video\"s destination.
With these basic editing techniques, you can start to craft your video stories in VEGAS Pro. Practice each technique to become proficient and develop your unique editing style. Remember, effective storytelling is at the heart of every great video, so focus on how your edits contribute to the narrative you want to tell.
Advanced Editing Techniques
Once you\"ve mastered the basics, it\"s time to elevate your video editing skills with some advanced techniques in VEGAS Pro. These methods will help you create more dynamic, professional-looking videos that can captivate your audience. From complex color grading to sophisticated effects, learn how to utilize VEGAS Pro\"s powerful features to their full potential.
- Color Grading and Correction: Use the Color Grading panel to adjust the color balance, contrast, and saturation of your footage. This can significantly enhance the visual appeal of your video, making it look more cinematic.
- Compositing and Masking: Learn how to composite multiple layers of video or use masking to create special effects. Masking allows you to isolate and manipulate specific parts of your video, such as creating a vignette effect or changing the background.
- Motion Tracking: VEGAS Pro\"s motion tracking feature enables you to track the movement of objects in your video. You can attach text, effects, or other elements to move with the tracked object, adding a professional touch to your projects.
- 3D Editing: Delve into 3D editing with VEGAS Pro by using stereoscopic 3D tools. This allows you to create engaging 3D content that can be viewed with appropriate hardware or 3D glasses.
- Advanced Audio Editing: Utilize VEGAS Pro\"s extensive audio editing tools for noise reduction, audio effects, and surround sound mixing. Proper audio editing can drastically improve the quality of your video by ensuring clear, dynamic sound.
- Using LUTs for Quick Color Grading: Apply Look-Up Tables (LUTs) to instantly give your video a specific look or film style. LUTs are a quick way to apply complex color grades to your footage.
- Creating Custom Transitions and Effects: Beyond using the built-in transitions and effects, you can create your own custom transitions and effects with VEGAS Pro\"s scripting and plugin capabilities, giving your videos a unique look.
- Multi-Camera Editing: For projects with footage from multiple cameras, use the multi-camera editing feature to easily switch between angles, synchronizing them based on audio or timecode.
- Advanced Rendering Options: Explore advanced rendering options to optimize your final video for various platforms. Understanding bitrates, codecs, and container formats is crucial for exporting your video with the best quality and compatibility.
- Keyboard Shortcuts for Efficient Editing: Increase your editing speed by mastering keyboard shortcuts in VEGAS Pro. Customize shortcuts to suit your workflow and reduce your editing time significantly.
By incorporating these advanced editing techniques, you can push the boundaries of your creative expression and produce standout videos that reflect your skills and vision. Remember, the key to mastery is practice and experimentation, so don\"t be afraid to explore the depths of VEGAS Pro\"s capabilities.

_HOOK_
Audio Editing and Enhancement
Audio quality is just as important as video quality in creating an engaging and professional-looking video. VEGAS Pro offers a suite of powerful tools for audio editing and enhancement. From basic adjustments to sophisticated effects, this section will guide you through improving your project\"s sound quality. Let\"s explore how to utilize VEGAS Pro\"s audio capabilities to create clear, dynamic, and immersive soundscapes for your videos.
- Adjusting Audio Levels: Begin by adjusting the volume of your audio tracks to ensure clear dialogue and balanced sound. Use the volume control points on the audio track to manually adjust levels or the audio mixer for more precise control.
- Audio FX for Enhancement: Apply audio effects to improve sound quality or create a specific atmosphere. VEGAS Pro includes effects like EQ (equalization), reverb, and compression. You can access these from the \"Audio FX\" tab and drag them onto your audio track.
- Noise Reduction: To remove unwanted background noise, use the Noise Reduction plugin. Select a portion of your audio where the noise is present without dialogue or important sounds, then apply the noise reduction tool to clean up your audio.
- Audio Synchronization: If you\"re working with audio and video recorded separately, synchronize them in VEGAS Pro by aligning the audio waveforms, ensuring that your video and audio are perfectly in sync.
- Adding Background Music: Enhance the emotional impact of your video by adding background music. Adjust the music track\"s volume to complement, not overpower, your primary audio.
- Using Audio Envelopes: Audio envelopes allow you to automate volume changes within a track. This is useful for fading music in and out or adjusting volume levels for specific sections without affecting the entire track.
- Surround Sound Mixing: For projects requiring immersive audio, VEGAS Pro supports 5.1 surround sound mixing. Position your audio in a 3D space to enhance the viewer\"s experience, perfect for film and game projects.
- Exporting Audio: When your audio editing is complete, you can export your audio separately from your video in various formats. This is useful for podcasts or if you need to further process your audio in a dedicated audio editing software.
- Keyframe Audio Effects: Just like video effects, you can keyframe audio effects to change over time. This advanced technique allows you to create dynamic audio transitions and effects that evolve throughout your video.
- Audio Restoration: Use the audio restoration tools to repair clipped audio, remove pops and clicks, or restore vintage recordings. These tools are invaluable for improving the quality of less-than-perfect audio recordings.
By mastering these audio editing and enhancement techniques in VEGAS Pro, you\"ll be able to create a more polished and professional final product. The right balance and quality of audio can significantly impact your audience\"s engagement and emotional response to your video.
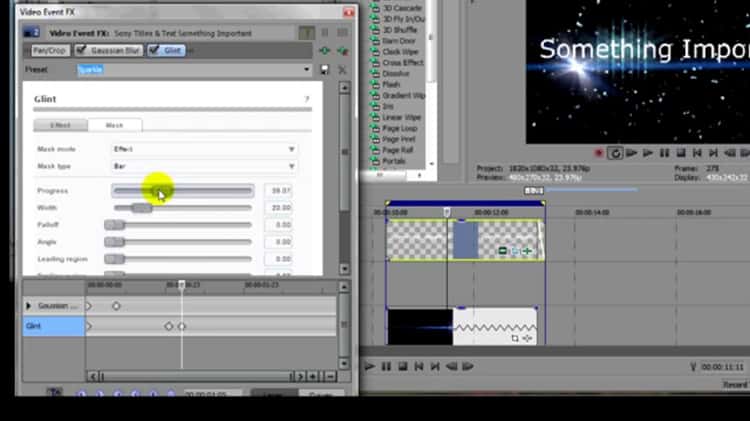
Adding Special Effects
Special effects can transform a simple video into a visually stunning masterpiece. VEGAS Pro offers a wide array of effects that can enhance the visual appeal of your projects, from basic filters to complex compositing and 3D effects. This section will guide you through the process of adding and customizing special effects in VEGAS Pro to elevate your video production to the next level.
- Accessing the Video FX Tab: Start by exploring the \"Video FX\" tab, where you\"ll find a variety of effects categorized for easy access. Browse through the list to find the effect that suits your project\"s needs.
- Applying Effects to Clips: To apply an effect, simply drag it from the \"Video FX\" tab onto the clip on your timeline where you want the effect to be applied. You can also apply effects to the entire track by dragging the effect to the track header.
- Customizing Effects: Once you\"ve applied an effect, adjust its properties in the pop-up window that appears. Most effects offer a range of parameters that you can customize to achieve the desired look. Experiment with different settings to see how they impact your video.
- Keyframing Effects: For dynamic effects that change over time, use keyframing. This allows you to set the effect parameters at different points in your clip, creating animation or progression in the effect\"s intensity or behavior.
- Using Chroma Key: To replace a green screen with a background image or video, use the Chroma Key effect. Select the color you want to remove using the dropper tool, and adjust the settings to cleanly remove the background.
- Adding Text and Titles: Enhance your video with animated text and titles using the \"Media Generators\" tab. Customize the font, size, color, and animation to fit the style of your video.
- Creating Transitions with Effects: Beyond the standard transitions, you can create custom transitions using video effects. For example, animate a blur or dissolve effect to transition between scenes smoothly.
- 3D Effects: For projects requiring a 3D look, explore VEGAS Pro\"s 3D effects. You can create 3D text or simulate 3D movements within your video, adding depth and dimension.
- Combining Effects: Layer multiple effects on a single clip to create complex visual styles. Adjust the order and settings of each effect to achieve the perfect combination.
- Previewing and Adjusting: Always preview your effects in real-time to ensure they achieve the desired outcome. Be prepared to make adjustments as necessary to fine-tune the look of your video.
Adding special effects in VEGAS Pro can be a fun and creative process. Whether you\"re looking to add simple stylistic enhancements or complex visual narratives, the key is to experiment and find what works best for your project. With practice, you\"ll be able to leverage these tools to create truly compelling and visually engaging videos.
VEGAS Pro Tutorial for Beginners in 12 Minutes
Are you new to this topic and looking for a comprehensive introduction? Our video is perfect for beginners like you, offering step-by-step instructions and easy-to-understand explanations that will have you mastering the basics in no time!
VEGAS Pro Full Guide Beginner Tutorial 2022
If you\'re searching for a complete guide that covers every aspect of this topic, look no further! Our video provides a full guide, from the absolute fundamentals to the advanced techniques, ensuring you have all the knowledge and expertise you need for success. Don\'t miss out on this invaluable resource!
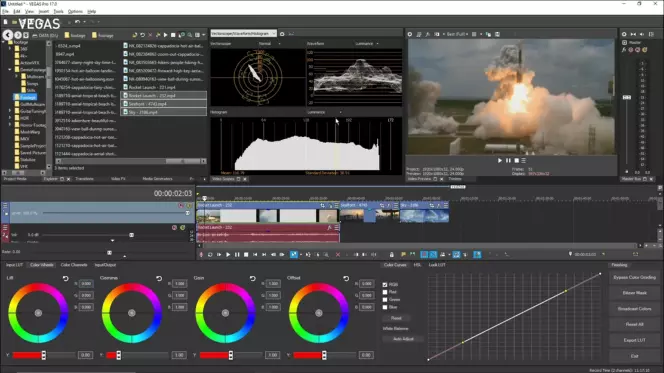
Color Correction and Grading
Color correction and grading are critical post-production processes that enhance and unify the visual tone of your video projects. VEGAS Pro provides robust tools for adjusting colors, contrast, and brightness to achieve a professional look. This section will guide you through the basics of color correction and grading in VEGAS Pro, helping you to bring a cinematic quality to your videos.
- Understanding Color Correction: Start by correcting any color imbalances in your footage. This includes adjusting the white balance to ensure that whites appear white, correcting exposure to bring out detail in shadows and highlights, and adjusting the colors to make them look natural.
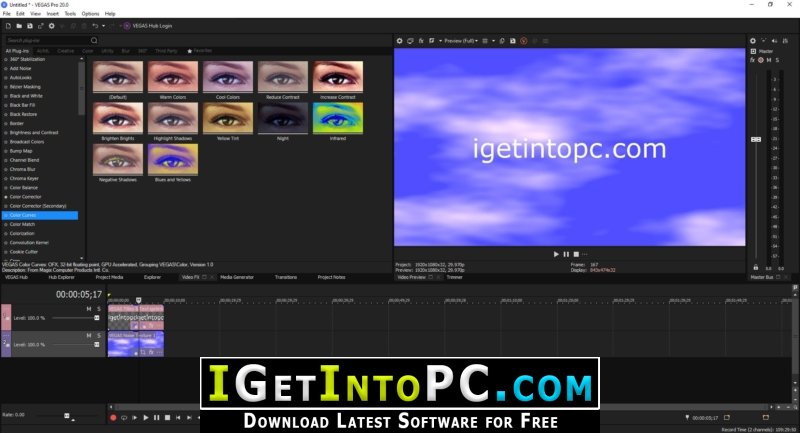
- Accessing Color Correction Tools: Use the \"Color Corrector\" and \"Color Corrector (Secondary)\" effects from the \"Video FX\" tab. These tools allow you to adjust the hue, saturation, and brightness levels of your footage.
- Adjusting White Balance: Use the \"White Balance\" effect to correct the color temperature of your footage. Select a reference point in your video that should be white or neutral grey to automatically adjust the color balance.
- Working with Color Curves: The \"Color Curves\" tool allows for more precise control over the color grading process. Adjust the curves for each color channel (red, green, blue) to fine-tune the color intensity and contrast of your video.
- Utilizing LUTs: Look-Up Tables (LUTs) are a quick way to apply a color grade to your footage. Import a LUT that matches your desired look and apply it to your video for instant cinematic quality.
- Creating a Cinematic Look: Use color grading to give your video a specific mood or style. This can involve creating a warmer, cooler, or more desaturated look, depending on the emotion or tone you want to convey.
- Enhancing Skin Tones: Pay special attention to skin tones to ensure they appear natural. Use the \"Color Corrector (Secondary)\" effect to isolate and adjust skin tones without affecting the rest of your video.
- Applying Vignettes: Add a vignette effect to focus the viewer\"s attention on the center of the frame. This can be done by applying a \"Mask\" to a color correction effect and feathering the edges.
- Using Scopes and Histograms: For accurate color correction, use VEGAS Pro\"s built-in scopes and histograms. These tools help you visually understand the color and brightness levels of your footage for more precise adjustments.
- Final Touches: After adjusting colors, review your footage in different lighting conditions to ensure consistency. Color grading is an iterative process, so be prepared to make multiple adjustments to achieve your desired look.
By following these steps for color correction and grading in VEGAS Pro, you can dramatically improve the visual impact of your video projects. Remember, the goal of color grading is not just to correct issues but to create a visual tone that enhances the storytelling of your video.

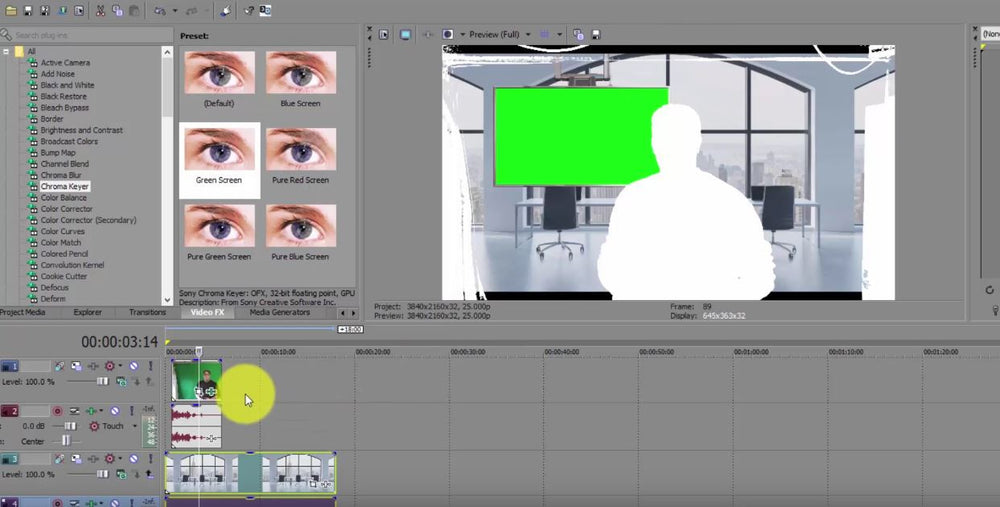
Working with Chroma Key and Green Screen
Chroma keying and working with a green screen in Sony Vegas allows you to create visually stunning effects and composite scenes by replacing the green background with any digital backdrop of your choice. This technique is widely used in film production, news broadcasting, and video content creation to achieve effects that would be otherwise impossible or prohibitively expensive to shoot in the real world. Here\"s how to do it effectively in VEGAS Pro:
- Setting Up Your Green Screen
- Ensure the green screen is evenly lit, without shadows or creases, to make the keying process smoother.
- Position your subject a few feet away from the green screen to avoid spill, where the green color reflects onto the subject.
- Importing Your Footage
- Once you have your footage, import it into VEGAS Pro by dragging the files into the project media window or using the import option in the file menu.
- Applying the Chroma Key Effect
- Find the clip in the timeline you wish to apply the effect to.
- Go to the Video FX tab, and select the \"Chroma Keyer\" effect.
- Drag the effect onto your clip.
- Adjusting the Chroma Key Settings
- Select the eyedropper tool within the Chroma Keyer effect and click on the green color in your video preview. Adjust the low threshold, high threshold, and blur amount to fine-tune the keying effect, removing the green background cleanly.
- Adding Your Background
- With the green screen removed, you can now add your desired background. Import the background image or video into your project and place it on a track below your keyed footage in the timeline.
- Final Adjustments
- Adjust the positioning, scale, and other settings of both your foreground and background clips to match. You may also need to adjust the lighting and color of your foreground clip to match the background for a more seamless composite.
- Preview and Render
- Preview your composite to ensure everything looks right. Make any necessary adjustments, and then render your project by going to File > Render As and choosing your desired output format.
By following these steps, you can harness the power of chroma keying to enhance your video projects, creating scenes that transport viewers to any place or situation you can imagine.
Exporting and Rendering Your Video
Exporting and rendering your video in Sony Vegas is the final step in the video editing process, where your project is encoded into a video file format that can be played back on various devices and platforms. This process can seem complex due to the myriad of settings and options available, but following these steps will help you achieve the best quality output for your project.
- Finalize Your Project
- Before rendering, make sure your video project is complete. Check for any editing errors, ensure all media is correctly placed on the timeline, and confirm that transitions, effects, and audio levels are as intended.
- Choose Your Rendering Options
- Go to File > Render As to open the render options dialog. Here, you\"ll see a list of various output formats and templates.
- Select the Output Format
- Consider the final use of your video (e.g., YouTube, DVD, broadcast) to choose the appropriate format. Common formats include MP4 for web, AVI for high-quality archives, and MPEG-2 for DVD production.
- Customize Your Render Settings
- Click on the \"Customize Template\" button to adjust your render settings. Important settings include:
- Frame rate: Match the project frame rate or choose a standard rate like 24fps for cinema, 30fps for TV, or 60fps for gaming content.
- Resolution: Select the resolution that matches your project settings or your target platform\"s requirements.
- Bitrate: Adjust the bitrate to balance video quality and file size. Higher bitrates offer better quality but result in larger files.
- Name and Save Your File
- Choose a file name and destination on your computer or an external drive. Ensure the location has enough space to accommodate the rendered video file.
- Start Rendering
- Once you\"re satisfied with your settings, click the \"Render\" button to start the process. Rendering time will vary based on the complexity of your project, the length of your video, and your computer\"s processing power.
- Post-Rendering
- After rendering completes, preview your video file to ensure it meets your expectations in terms of quality and playback smoothness. If necessary, you can go back and adjust your settings and render again to achieve the desired outcome.
Exporting and rendering your video is a crucial step in the production process, turning your creative vision into a shareable reality. By carefully selecting your render settings in Sony Vegas, you can ensure your video looks its best, regardless of where it\"s viewed.
_HOOK_
READ MORE:
Useful Tips and Tricks
Maximizing the potential of Sony Vegas requires more than just understanding the basics of video editing. Here are some useful tips and tricks that can help streamline your workflow, enhance your projects, and unlock new creative possibilities within this powerful editing software.
- Keyboard Shortcuts
- Learning and using keyboard shortcuts can significantly speed up your editing process. For example, \"S\" splits the selected clip, while \"Ctrl + Z\" undoes the last action. Customize your shortcuts in the Preferences menu to fit your editing style.
- Save Regularly
- Make it a habit to save your project frequently. You can also enable Auto Save in the Preferences to protect your work against unexpected software crashes.
- Use Proxy Video Editing
- If you\"re working with high-resolution video files, editing can become slow. Use the Create Proxy Video feature to edit with lower-resolution clips, then switch back to the full-resolution files for rendering.
- Color Correction and Grading
- Utilize the Color Correction tools to adjust the look of your video. Start with basic corrections for exposure and white balance, then use Color Grading to give your video a unique look or mood.
- Experiment with Effects
- Don\"t be afraid to experiment with the wide range of video effects available. Layering effects can produce unique results, but be mindful of how it affects playback performance.
- Use Track Motion and Compositing
- Track Motion and Compositing modes allow you to create dynamic visuals within your project. Use these features to animate elements and create complex scene compositions.
- Master Audio Editing
- Good audio is crucial for a successful video. Use the audio editing tools in Sony Vegas to clean up your sound, balance levels, and add effects to enhance the auditory experience.
- Customize Your Workspace
- Adjust the Sony Vegas interface to suit your workflow. You can save different workspace layouts for various types of projects to quickly switch between customized setups.
- Take Advantage of Scripting
- For repetitive tasks, explore scripting in Sony Vegas. Scripts can automate mundane tasks, saving you time and effort.
- Stay Updated
- Keep your Sony Vegas software up to date to benefit from the latest features, bug fixes, and performance improvements. Check for updates regularly through the Help menu.
By incorporating these tips and tricks into your video editing routine, you can enhance your efficiency and creativity in Sony Vegas, leading to higher quality projects and a more enjoyable editing experience.
Embark on your creative journey with Sony Vegas and unlock the full potential of your video projects. With these comprehensive tutorials, tips, and tricks, you\"ll master the art of video editing, bringing your visions to life like never before.