Topic sony vegas green screen: Unlock the power of visual storytelling with Sony Vegas"s green screen feature, transforming your video projects into captivating masterpieces with seamless chroma key integration.
Table of Content
- How to use Sony Vegas for green screen editing?
- Understanding Green Screen Technology in Sony Vegas
- Step-by-Step Guide to Using Green Screen in Sony Vegas
- Choosing the Right Green Screen for Your Project
- Setting Up Your Green Screen for Optimal Results
- Importing and Organizing Your Media in Sony Vegas
- YOUTUBE: How to Use a Green Screen in Vegas Pro
- Applying Chroma Key Effect in Sony Vegas
- Adjusting Chroma Key Settings for Best Results
- Advanced Techniques: Spill Suppression and Edge Softening
- Using Masks and Matte Cleaners for Refined Edges
- Troubleshooting Common Green Screen Issues in Sony Vegas
- Enhancing Your Green Screen Footage with VEGAS Effects and Image
- Exporting Your Final Project from Sony Vegas
How to use Sony Vegas for green screen editing?
Here is a step-by-step guide on how to use Sony Vegas for green screen editing:
- Import your footage with the green screen and place it on Track 1 in your timeline.
- Add the background footage or image that you want to replace the green screen with on a new track, such as Track 2.
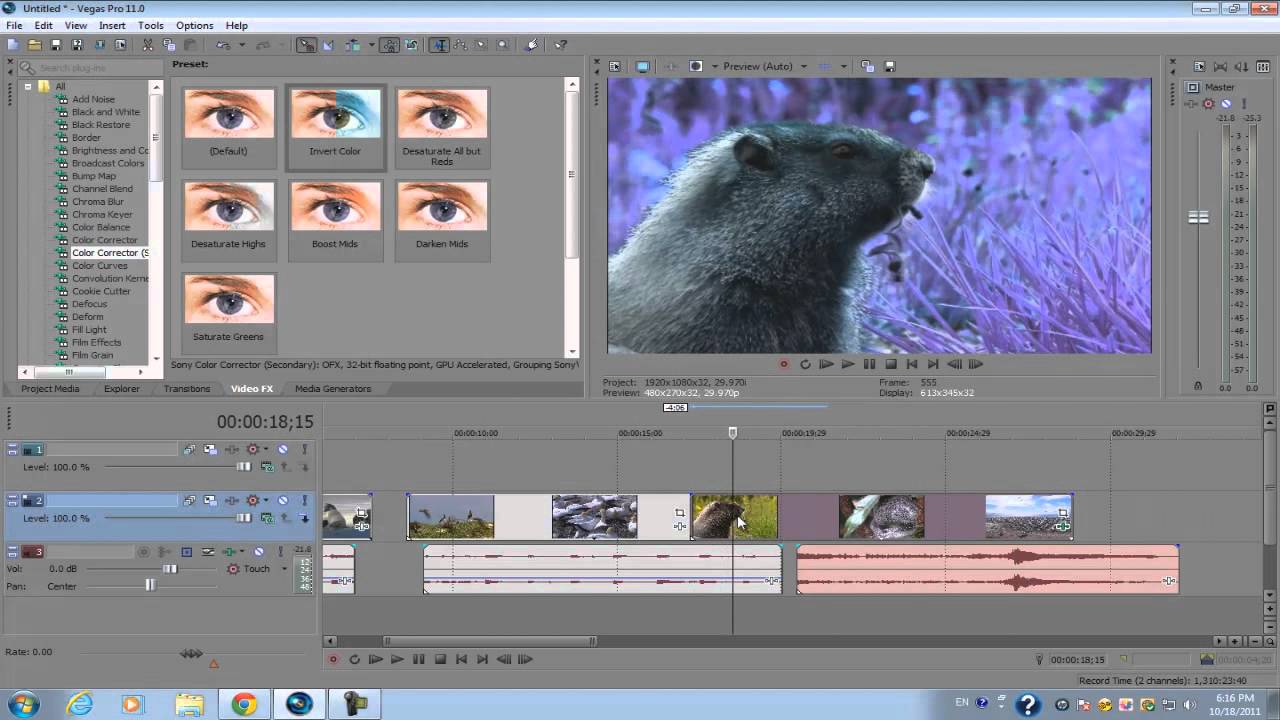
- Select the green screen footage on Track 1 and go to the Video FX tab in the Effects window.
- Search for the Chroma Keyer or Chroma Key effect and drag it onto the green screen footage.
- In the Chroma Keyer settings, use the eyedropper tool to sample the green color in your footage. This will help the software to identify the color to remove.
- Adjust the settings such as sensitivity and smoothing to refine the key effect and make the green screen disappear.
- If needed, use additional features like spill suppression to remove any unwanted green reflections on your subject.
- Preview the result and make further adjustments as necessary.
- Once you are satisfied with the key effect, you can add additional effects, transitions, or text to your video as desired.
- Finally, render or export your edited video with the green screen replaced by the background of your choice.
By following these steps, you can effectively use Sony Vegas for green screen editing and create professional-looking videos with seamless background replacements.
READ MORE:
Understanding Green Screen Technology in Sony Vegas
Green screen technology, or chroma keying, is a powerful video editing technique that allows you to replace the green background with any digital backdrop. Sony Vegas Pro makes it accessible for filmmakers and video enthusiasts to apply this effect, enhancing their creative projects with visual effects that were once the domain of high-budget studios.
This technology works by isolating a specific color—in this case, green— and making it transparent, allowing another image or video to be shown in its place. The choice of green is due to its brightness and difference from human skin tones, making it easier to separate the subject from the background.
- Preparation: Start with a well-lit green screen to avoid shadows and ensure a uniform color for easy keying.
- Importing Footage: Import your footage into Sony Vegas and place the green screen clip on a higher track than the background you intend to use.
- Applying Chroma Key: Use the Chroma Key effect in Sony Vegas to select the green color and adjust the settings to make it transparent.
- Refinement: Fine-tune the edges and remove any spill over to ensure a seamless blend between your subject and the new background.
Understanding the nuances of green screen technology and mastering its application in Sony Vegas can significantly elevate the quality of your video projects, allowing for limitless creativity and professional-grade results.
Step-by-Step Guide to Using Green Screen in Sony Vegas
Integrating green screen effects into your video projects with Sony Vegas enhances creativity and professionalism. Here\"s how to achieve this:
- Set Up Your Green Screen: Ensure your green screen is evenly lit and free of wrinkles or shadows for a clean key.
- Record Your Footage: Film your subject in front of the green screen, keeping a good distance to avoid shadows and green spill.
- Import Your Footage: Open Sony Vegas and import both your green screen footage and the desired background into the project.
- Place Your Clips: Drag your green screen clip onto a video track above the background clip on the timeline.
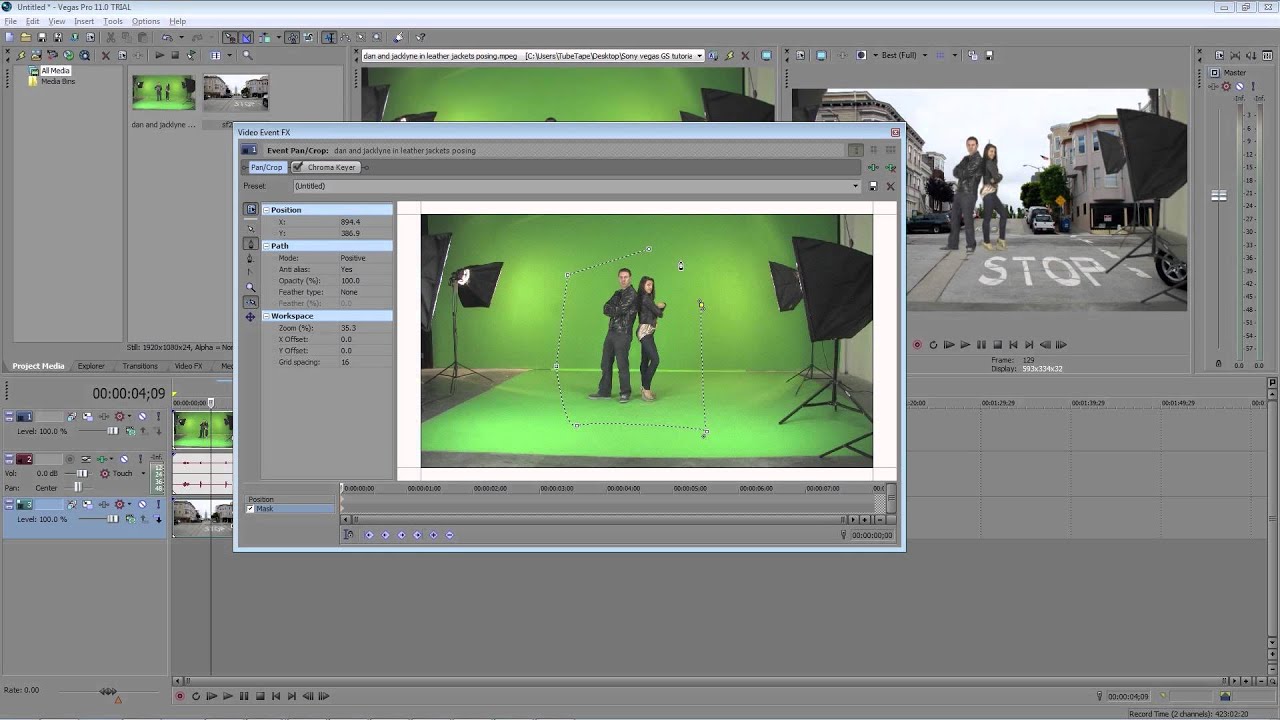
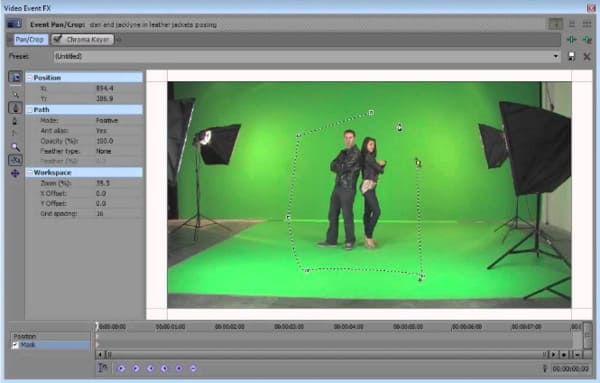
- Apply the Chroma Keyer: Go to the \"Video FX\" tab, find the \"Chroma Keyer\" effect, and drag it onto your green screen clip.
- Select the Green Color: Use the color picker within the Chroma Keyer effect to select the shade of green in your footage.
- Adjust the Settings: Fine-tune the low, high, and blur settings in the Chroma Keyer to remove the green background completely, paying close attention to edges around your subject.
- Preview and Refine: Preview your composite to check for any green spill or edges that need more refinement. Adjust the Chroma Keyer settings as needed for a seamless blend.
- Export Your Project: Once satisfied with the result, render your project to create your final video with the new background.
Following these steps in Sony Vegas will allow you to effectively use green screen technology to create compelling video content that stands out.
Choosing the Right Green Screen for Your Project
Choosing the appropriate green screen is pivotal for achieving professional-grade video effects. Consider these factors to select the best option for your project:
- Material Quality: Opt for a high-quality fabric that doesn’t wrinkle easily, such as muslin or polyester, to ensure a smooth and consistent key.
- Size and Portability: Assess the scale of your project to choose the right size. Portable and collapsible screens are ideal for on-location shoots.
- Color Saturation: A vibrant, evenly-dyed green screen provides a more precise key, making post-production easier and more efficient.
- Lighting Requirements: Consider the lighting setup you have or plan to use. A well-lit screen can drastically reduce post-production work.
- Mounting Options: Ensure your green screen comes with or is compatible with mounting equipment for easy setup and adjustment.
- Budget: While quality is important, there are options available at various price points that can meet both your budget and technical needs.
By carefully selecting a green screen that matches your project\"s requirements, you can greatly enhance the effectiveness of the chroma keying process in Sony Vegas, leading to more professional-looking video content.

Setting Up Your Green Screen for Optimal Results
Proper setup of your green screen is crucial for achieving flawless chroma key effects in Sony Vegas. Follow these steps to ensure the best possible outcome:
- Choose a Suitable Location: Select an area with enough space for your green screen and subject, avoiding natural sunlight which can cause uneven lighting.
- Mount Your Green Screen: Hang or mount your green screen tightly to avoid wrinkles and folds. Use a stand or frame for stability.
- Light Your Screen Evenly: Use soft, diffused lighting to illuminate your green screen evenly, preventing shadows and hotspots. Place lights on both sides of the screen at a 45-degree angle.
- Position Your Subject: Keep your subject a few feet away from the green screen to avoid shadows and green spill, which can complicate keying.
- Adjust Your Camera Settings: Ensure your camera is properly focused and exposed. Use manual settings for consistent results throughout the shoot.
- Test Your Setup: Record a short clip and import it into Sony Vegas to test the chroma key effect. Adjust your setup as needed based on the results.
By meticulously setting up your green screen environment, you can significantly enhance the quality of your keyed footage, making the post-production process in Sony Vegas smoother and more efficient.
_HOOK_
Importing and Organizing Your Media in Sony Vegas
Efficient media management is key to a smooth editing process in Sony Vegas. Follow these steps to import and organize your footage and assets effectively:
- Start a New Project: Open Sony Vegas and start a new project, setting your project properties to match your footage for optimal editing.
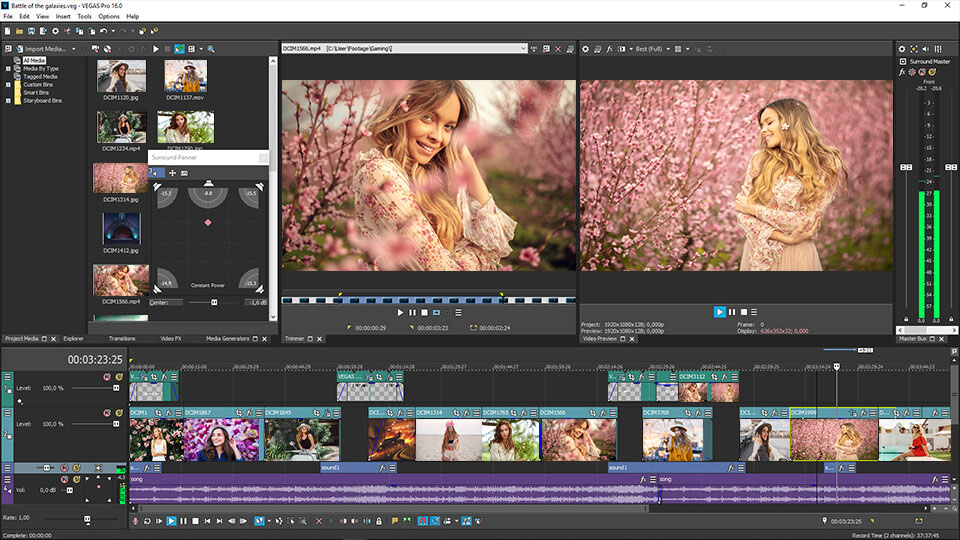
- Import Media: Use the \"Import\" menu or drag and drop files directly into the project media window to add your green screen footage and any background images or videos.
- Organize Your Media: Create bins in the project media window to categorize your footage, backgrounds, and other assets. This makes it easier to find what you need quickly.
- Preview and Select Clips: Use the trimmer window to preview your footage and select the portions you want to use in your project.
- Add Media to the Timeline: Drag your selected clips onto the timeline, arranging them in the order you plan to use them. Place your green screen footage on a track above the background you want to replace it with.
- Save Your Project: Regularly save your project to prevent data loss. Consider setting up auto-save in Sony Vegas\" preferences for added security.
By properly importing and organizing your media, you can streamline your editing workflow in Sony Vegas, making it easier to focus on the creative aspects of your project.

How to Use a Green Screen in Vegas Pro
Want to create magical movie scenes and bring your imagination to life? Check out this video tutorial on how to use a green screen to transport yourself anywhere in the world. Get ready to add a touch of Hollywood to your videos!
Applying Chroma Key Effect in Sony Vegas
Applying the chroma key effect in Sony Vegas allows you to seamlessly integrate your subject with any background. Follow these detailed steps to achieve a professional-looking green screen effect:
- Select Your Footage: On the timeline, click on your green screen clip to select it for editing.
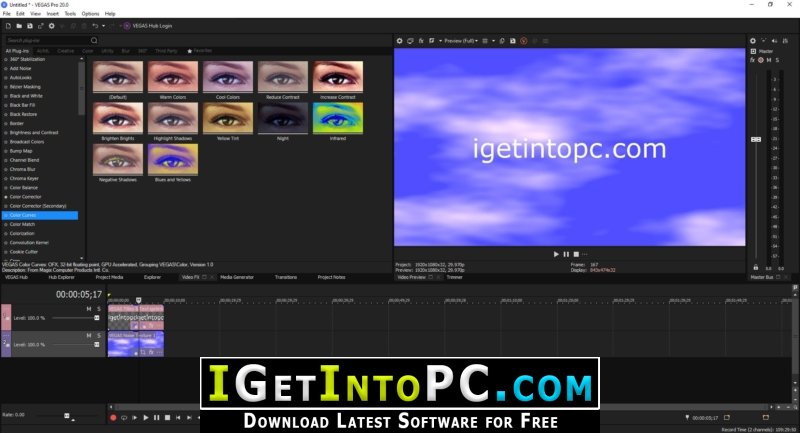
- Access Video FX: Navigate to the Video FX tab in Sony Vegas. Scroll down or search for the \"Chroma Keyer\" effect.
- Apply Chroma Keyer: Drag the Chroma Keyer effect onto your selected green screen clip. A settings window will appear.
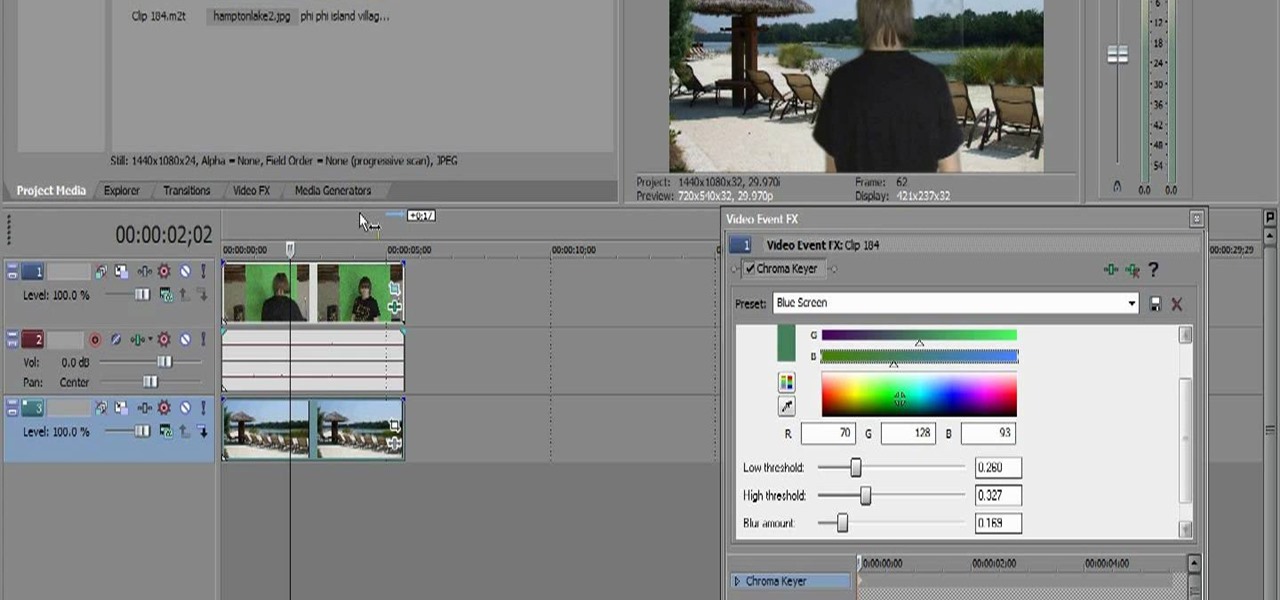
- Pick the Green Color: Use the color picker tool within the Chroma Keyer settings to select the shade of green from your footage. Aim for a color that is most representative of your green screen.
- Adjust the Effect Settings: Fine-tune the low, mid, and high threshold settings to remove the green background effectively. Pay attention to the detail and edges around your subject for a clean key.
- Refine Edges and Spill: If necessary, adjust the spill suppression and edge smoothness to enhance the natural look of the composite.
- Preview Your Work: Regularly preview your work by playing back the edited clip in the preview window to check for any missed spots or edges that need further adjustment.
- Save Your Changes: Once satisfied with the chroma key effect, save your project to preserve your edits.
This step-by-step guide ensures that you can efficiently utilize the chroma key effect in Sony Vegas, creating engaging and visually appealing content by combining your subjects with any background of your choosing.
How to Remove Green Screen in Sony Vegas (Quick & Easy)
Tired of unwanted objects or people ruining your perfect shots? Discover the secret to flawlessly removing any distractions from your photos or videos with this quick and easy tutorial. Say goodbye to pesky imperfections and hello to picture-perfect results!
Adjusting Chroma Key Settings for Best Results
For impeccable green screen effects in Sony Vegas, fine-tuning your chroma key settings is essential. Follow these steps to adjust the chroma key for optimal results:
- Review the Initial Key: After applying the Chroma Keyer effect, review the initial key to identify any issues with the background removal or subject edges.
- Adjust the Color Range: Use the color picker tool to accurately select the green you wish to key out. For unevenly lit screens, you may need to adjust the color range to include variations of green.
- Modify Tolerance Levels: Tweak the low, mid, and high threshold settings to better remove the green background without affecting the subject. Increasing the low threshold can help eliminate lighter greens, while adjusting the high threshold can remove darker shades.
- Enhance Edge Definition: If the edges of your subject appear too sharp or pixelated, soften them slightly with the blur or soften edge options. Be careful not to overdo it, as too much softening can make the edges unrealistic.
- Suppress Green Spill: Green spill is when the green from the screen reflects onto your subject. Use spill suppression settings to neutralize unwanted green tints on the subject.
- Preview and Iterate: Continuously preview your adjustments in the preview window. This iterative process helps you fine-tune the settings for a natural-looking composite.
- Use Masks for Complex Areas: If certain areas are difficult to key out without affecting the subject, consider using masking tools to manually adjust those areas.
- Save Your Project Frequently: Ensure you save your progress regularly to avoid losing any adjustments.
By methodically adjusting the chroma key settings in Sony Vegas, you can achieve professional-quality green screen effects that seamlessly integrate your subjects with any background.

Advanced Techniques: Spill Suppression and Edge Softening
Mastering spill suppression and edge softening can elevate your green screen work in Sony Vegas to a professional level. These advanced techniques ensure your subjects blend seamlessly with their backgrounds:
- Spill Suppression: Green spill occurs when the green from the background reflects onto your subject. To counteract this, use the spill suppression tools in Sony Vegas. Adjust the spill range and intensity to match your subject’s edges without making them look unnatural.
- Edge Softening: Harsh edges can make your subject look out of place against the new background. Soften the edges by slightly blurring them. In Sony Vegas, you can use the blur effect selectively around the edges of your subject to achieve a more integrated look.
- Utilize Secondary Color Corrector: For precise control over spill and edge colors, employ the Secondary Color Corrector. Target specific hues that are problematic and adjust saturation, luminance, and RGB levels to blend them more naturally with the background.
- Apply Light Wraps: Light wraps simulate the natural light that would reflect from the background onto your subject. Create a light wrap effect to help blend the edge of your subject with the background, enhancing the overall believability of the composite.
- Practice Layer Masking: For complex edges or spill issues, layer masking allows for manual adjustment of specific areas. Paint or draw masks to refine the edges or reduce spill in targeted sections of your footage.
- Adjust with Preview: Constantly preview your adjustments to ensure they contribute positively to the overall composite. This iterative process helps fine-tune the balance between your subject and the background.
By implementing these advanced techniques in Sony Vegas, you can significantly improve the quality of your green screen projects, achieving results that are both impressive and visually coherent.
Using Masks and Matte Cleaners for Refined Edges
For achieving polished and professional edges in your green screen work, Sony Vegas offers powerful tools like masks and matte cleaners. Here’s how to use these features effectively:
- Creating Masks: Use the masking tool to draw around your subject, isolating them from the green background. This is particularly useful for intricate edges or when the chroma keyer struggles to differentiate between the subject and background.
- Adjusting the Mask: Once your mask is created, adjust its properties for feathering and opacity to blend the edges more naturally with the new background. Feathering softens the mask\"s edges, reducing harsh lines.
- Utilizing Matte Cleaners: Matte cleaners help in refining the keyed footage by smoothing out the edges and removing any remaining spill. Apply a matte cleaner effect and adjust its settings to polish the edges of your subject.
- Combining with Spill Suppression: For the best results, use masks and matte cleaners in conjunction with spill suppression techniques. This combination ensures that your subject is cleanly cut out from the green screen and blends well with the new background.
- Keyframing for Movement: If your subject moves within the frame, keyframe the mask to follow their movement. This ensures that the mask remains accurate over time, keeping the edges clean and consistent.
- Preview and Adjust: Regularly preview your work to ensure that the masks and matte cleaners are effectively refining the edges. Adjust as necessary to maintain a natural look throughout the scene.
By mastering the use of masks and matte cleaners in Sony Vegas, you can significantly enhance the quality of your green screen effects, ensuring that your subjects are seamlessly integrated into any background.

_HOOK_
Troubleshooting Common Green Screen Issues in Sony Vegas
Even with careful setup, you might encounter some common issues while working with green screens in Sony Vegas. Here\"s how to troubleshoot and resolve them:
- Uneven Background Lighting: If your green screen is not evenly lit, you may find it difficult to key out the background uniformly. Use additional lighting to eliminate shadows and ensure even illumination across the screen.
- Green Spill on the Subject: Green spill occurs when the green from the background reflects onto your subject. Adjust the spill suppression settings in Sony Vegas or use a backlight to separate your subject from the background more distinctly.
- Edges Are Too Sharp or Pixelated: If the edges of your subject appear too sharp or pixelated after applying the chroma key, soften the edges using the blur or feathering tools in the Chroma Keyer effect.
- Background Not Completely Keyed Out: If parts of the green screen remain visible, adjust the chroma key settings such as the color range and tolerance levels. You may also need to manually mask out difficult areas.
- Subject Disappears with the Background: If your subject starts to disappear when adjusting the chroma key settings, it\"s likely because the color of their clothing is too similar to the green screen. Avoid wearing green or reflective clothing that might cause issues.
- Performance Issues: Applying multiple effects and corrections can slow down Sony Vegas. Preview your edits in lower resolution or render small sections to check the results without overloading your system.
By systematically addressing these common green screen issues, you can improve your workflow in Sony Vegas and achieve better results in your video projects.

Enhancing Your Green Screen Footage with VEGAS Effects and Image
After successfully keying out your green screen, enhancing your footage with VEGAS Effects and Image can take your project to the next level. Follow these steps to utilize VEGAS\"s powerful features for a polished finish:
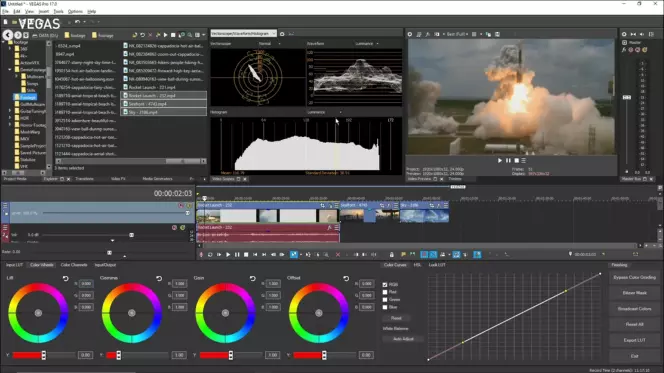
- Apply Color Correction: Start by applying color correction to your footage. Match the colors and lighting of your subject with the new background for a cohesive look.
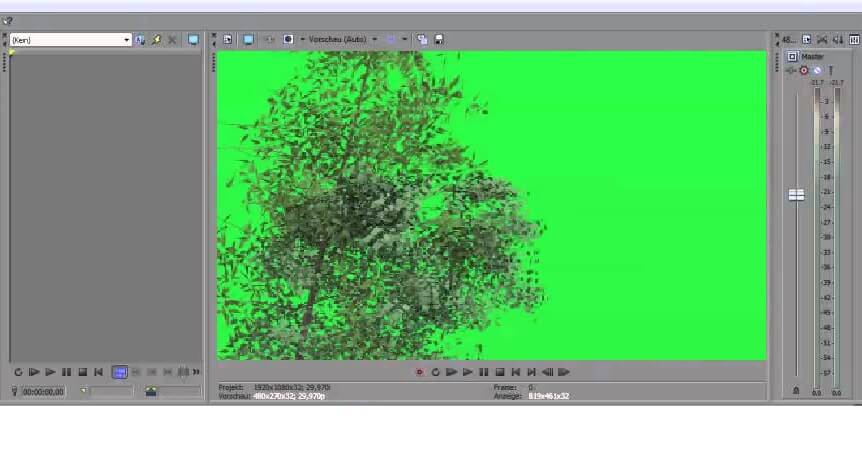
- Integrate VEGAS Effects: Use VEGAS Effects to add dynamic elements or visual effects that complement your scene. From particle effects to simulated lighting, the possibilities are vast.
- Utilize Compositing Tools: Employ VEGAS\"s compositing tools to combine different elements seamlessly. Play with blending modes and opacity to integrate effects naturally.
- Enhance with Image Filters: Apply image filters to both your foreground and background layers to unify the visual tone or style of your project.
- Add Motion Graphics: Incorporate motion graphics for titles, lower thirds, or animated elements to add professionalism and engage your audience.
- Use Track Motion for Dynamic Scenes: Apply track motion to move your composited elements within the scene, adding depth and interest.
- Final Touches with VEGAS Image: Use VEGAS Image to apply final touches such as sharpening, noise reduction, or vignettes to polish your overall project.
- Preview and Adjust: Regularly preview your work to ensure all elements are harmoniously integrated. Adjust as necessary for the best visual outcome.
By leveraging VEGAS Effects and Image, you can enhance your green screen footage, adding depth, interest, and a professional flair to your video projects.
READ MORE:
Exporting Your Final Project from Sony Vegas
Once you\"ve completed your video project in Sony Vegas, exporting it properly is crucial to ensure the highest quality for your audience. Follow these steps to export your final project efficiently:
- Final Review: Before exporting, do a final review of your project. Check for any unsynced audio, visual errors, or unfinished edits.
- Choose Your Export Format: Go to the \"File\" menu and select \"Render As\". Sony Vegas offers a variety of format options. Choose the one that best suits your project\"s needs, considering factors like file size, video quality, and compatibility.
- Customize Render Settings: In the \"Render As\" dialog box, you can customize your render settings. Select a template that matches your desired output resolution and frame rate. For green screen projects, consider using formats that support high bitrate and color depth to preserve the quality of your keyed footage.
- Choose Your Output Destination: Specify the output folder where your rendered file will be saved. Ensure the destination has enough space to accommodate the file size.
- Render Your Video: Click \"Render\" to start the exporting process. The time it takes to render your project will depend on its length, the complexity of the edits, and your computer\"s processing power.
- Review the Exported File: Once rendering is complete, review the exported file in a media player to ensure the quality meets your expectations and that there are no playback issues.
- Distribute or Share Your Video: After confirming the quality of your exported project, you\"re ready to distribute or share it with your audience through your chosen platform.
Exporting your project correctly from Sony Vegas is the final step in the video production process, ensuring your work is presented in the best possible quality to your viewers.
Mastering the green screen in Sony Vegas opens a world of creativity, allowing you to craft visually stunning videos that captivate and engage. Embrace these techniques to elevate your video projects to professional heights.