Topic connect sony headphones to mac: Discover how to effortlessly connect your Sony headphones to your Mac with our step-by-step guide, ensuring a seamless and high-quality audio experience for work, entertainment, and relaxation.
Table of Content
- How do I connect Sony headphones to my Mac?
- Step 1: Ensure Your Sony Headphones are in Pairing Mode
- Step 2: Enable Bluetooth on Your Mac
- Step 3: Pair Your Sony Headphones with Your Mac
- Step 4: Select Sony Headphones as Sound Output
- Step 5: Troubleshooting Common Connection Issues
- Step 6: Updating Firmware for Better Compatibility
- YOUTUBE: Pair Sony WH-1000XM4 headphones with any Mac
- Step 7: Managing Connected Devices
- Step 8: Maximizing Audio Quality
How do I connect Sony headphones to my Mac?
To connect your Sony headphones to your Mac, you can follow the steps below:
- Turn on your Mac and sign in using your credentials.
- Switch on your Sony headphones.
- Click on the \"System Preferences\" icon in the taskbar.
- Select \"Bluetooth\" from the menu.
- In the Bluetooth screen, locate and select your Sony headphones (model name may vary) from the available devices.
- Click on the \"Connect\" or \"Pair\" button next to your Sony headphones to establish the connection.
Once connected, you should be able to enjoy audio from your Mac through your Sony headphones.
READ MORE:
Step 1: Ensure Your Sony Headphones are in Pairing Mode
To connect your Sony headphones to your Mac, the first crucial step is to put them into pairing mode. This process varies slightly depending on the model of your headphones, but generally involves the following steps:
- Turn off your Sony headphones to start fresh.
- Press and hold the power button for about 7 seconds. Look for the LED indicator to flash blue and red alternately, signaling that the headphones are now in pairing mode.
- If you\"re using headphones with a dedicated pairing button, press and hold it until you see the pairing signal.
- For models with touch controls, tap and hold the appropriate area as specified in your headphones\" manual until the pairing mode is activated.
Once in pairing mode, your Sony headphones are ready to be discovered by your Mac. Proceed to the next step to connect them via Bluetooth.

Step 2: Enable Bluetooth on Your Mac
For your Mac to find and connect to your Sony headphones, Bluetooth must be enabled. Follow these simple steps to turn on Bluetooth:
- Click on the Apple menu icon in the top-left corner of your screen.
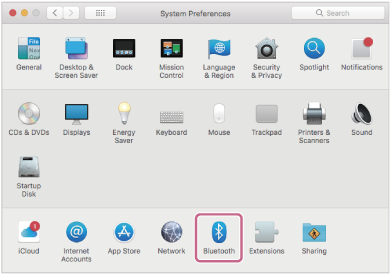
- Select \"System Preferences\" from the dropdown menu.
- Click on the \"Bluetooth\" icon to open the Bluetooth preferences pane.
- If Bluetooth is turned off, click the \"Turn Bluetooth On\" button.
- Once Bluetooth is enabled, your Mac will start searching for available devices to connect with.
Ensure your Sony headphones are in pairing mode and within range. They should appear in the list of devices. If not, ensure they are not connected to another device, as this may prevent them from being discovered by your Mac.
Step 3: Pair Your Sony Headphones with Your Mac
After enabling Bluetooth on your Mac and ensuring your Sony headphones are in pairing mode, follow these steps to pair them:
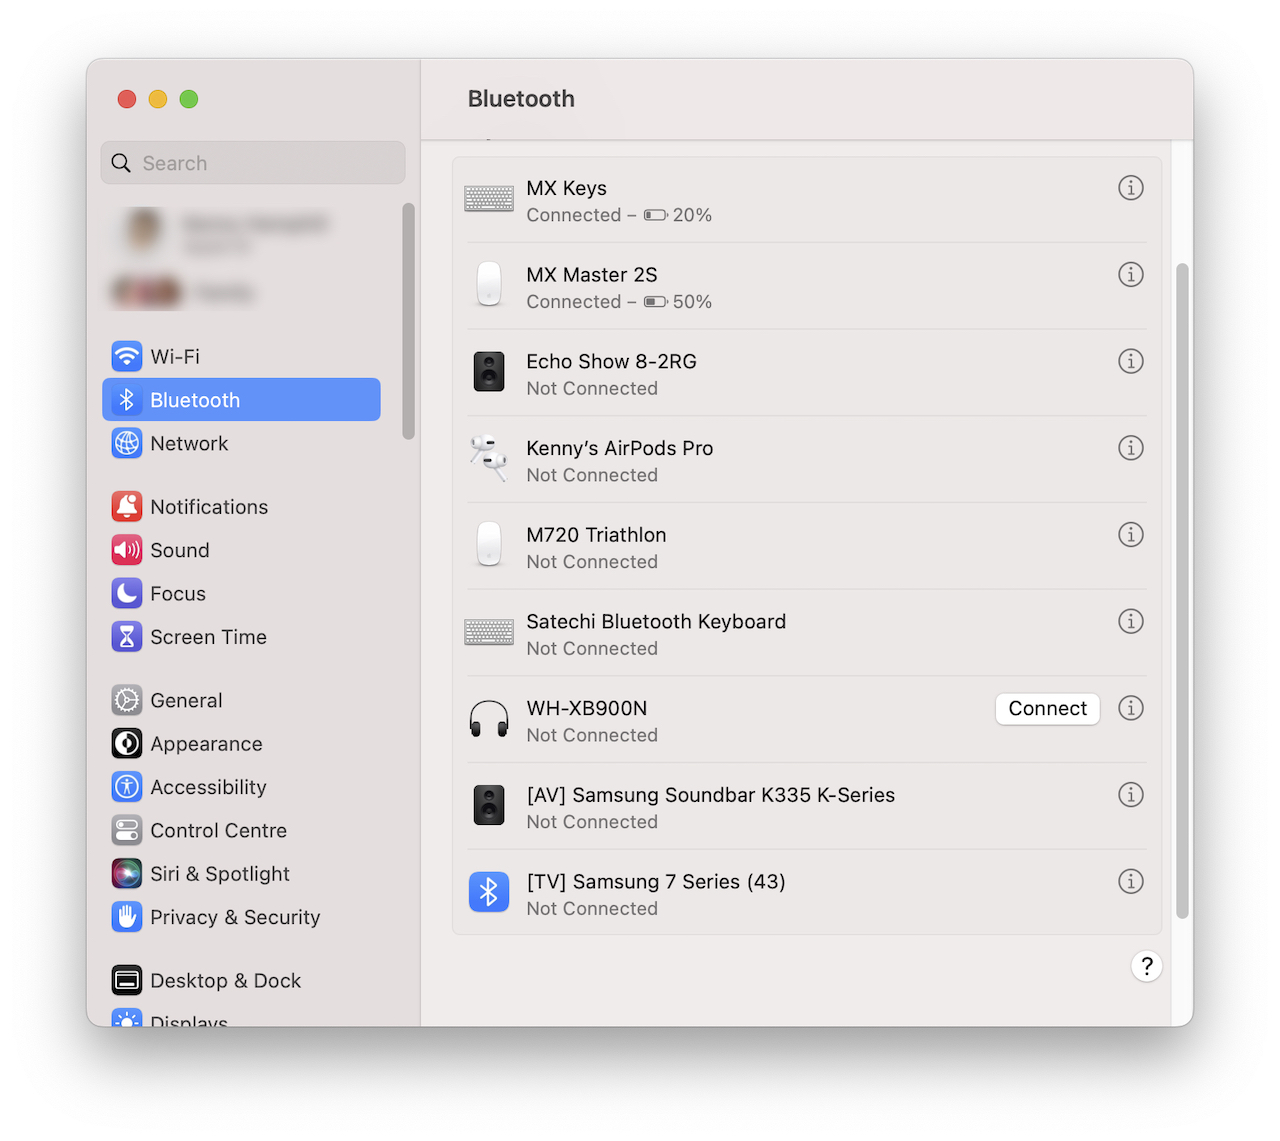
- With Bluetooth enabled, your Mac will display a list of available devices. Locate your Sony headphones in the list. They might appear as a model number or name.
- Click on the name of your Sony headphones. A pairing request may appear, asking if you want to pair with the device.
- Select \"Pair\" or \"Connect\" to establish a connection between your Mac and the Sony headphones. If prompted, you may need to confirm the pairing on your headphones by pressing a button.
- Wait for a few seconds for the connection to be established. Once connected, a confirmation message will appear on your Mac.
- Your Sony headphones should now be listed as a connected device, and you can select them as your audio output source.
If you encounter any issues during the pairing process, ensure your headphones are still in pairing mode and close to your Mac. If the problem persists, consider restarting both your headphones and your Mac before trying again.

Step 4: Select Sony Headphones as Sound Output
Once your Sony headphones are connected to your Mac, the final step is to set them as your primary sound output device. Follow these steps to ensure your audio plays through your headphones:
- Click on the Apple menu icon at the top-left corner of your screen and select \"System Preferences.\"
- Click on the \"Sound\" icon to open the sound preferences pane.
- In the \"Output\" tab, you will see a list of sound devices connected to your Mac. Select your Sony headphones from the list.
- After selecting your headphones, adjust the output volume to your liking using the volume slider.
- Your Mac will now route all audio through your Sony headphones. You can close the System Preferences window.
If you do not see your Sony headphones listed, ensure they are connected properly. You might need to disconnect and reconnect them or restart your Mac and try the steps again.
_HOOK_
Step 5: Troubleshooting Common Connection Issues
If you\"re experiencing issues connecting your Sony headphones to your Mac, here are some common troubleshooting steps to help resolve them:
- Ensure Headphones are in Pairing Mode: Confirm your Sony headphones are in pairing mode. If unsure, refer back to step 1 for instructions on entering pairing mode.
- Check Bluetooth on Mac: Make sure Bluetooth is enabled on your Mac. If it\"s on but not finding your headphones, turn Bluetooth off and on again.
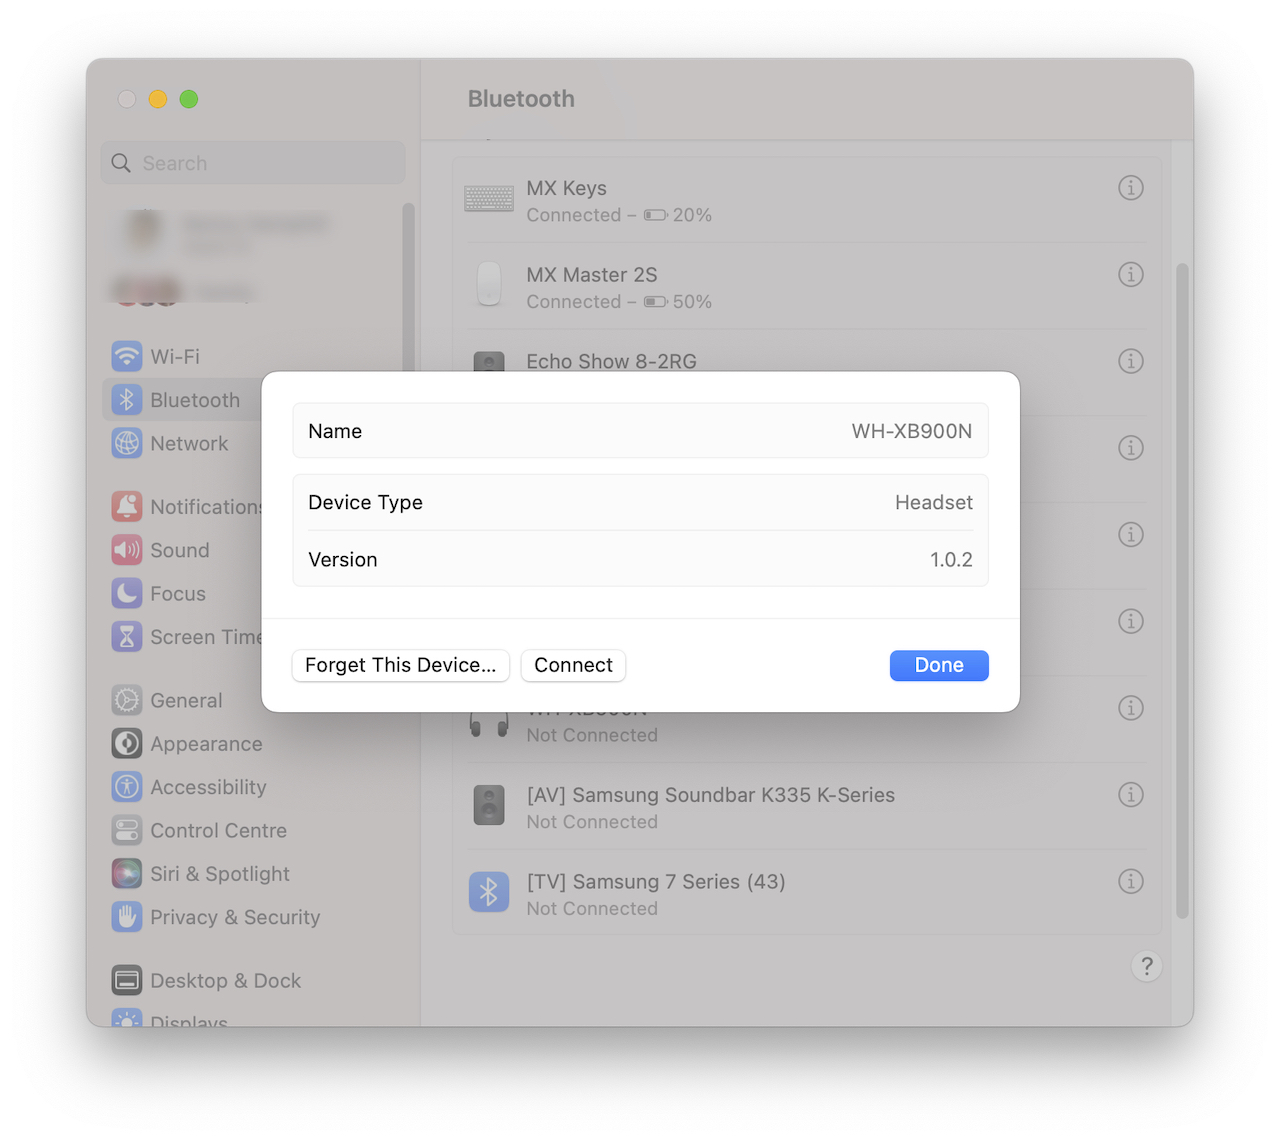
- Forget Device and Re-pair: If your headphones have been connected before but aren\"t working now, go to Bluetooth settings, find your headphones in the list of devices, click the \"X\" next to them to forget the device, and then re-pair them.
- Check for Interference: Keep your headphones away from other Bluetooth devices or Wi-Fi routers to minimize interference.
- Restart Your Devices: Sometimes, simply restarting your Mac and headphones can resolve connection issues.
- Update Your Mac: Ensure your Mac is running the latest version of macOS. Software updates can fix bugs that may be affecting Bluetooth functionality.
- Reset Bluetooth Module: As a last resort, you can try resetting the Bluetooth module on your Mac. Hold down Shift + Option and click on the Bluetooth menu icon in the top bar, then select \"Debug\" > \"Reset the Bluetooth module.\"
Following these steps should help resolve most connection issues. If problems persist, consider consulting Sony\"s support or Apple\"s troubleshooting resources for more specific guidance.

Step 6: Updating Firmware for Better Compatibility
Keeping your Sony headphones\" firmware updated is crucial for ensuring the best compatibility with your Mac. Firmware updates often include important improvements and bug fixes that enhance connectivity and performance. Here\"s how to update your Sony headphones\" firmware:
- Download Sony Headphones Connect App: Install the Sony Headphones Connect app from the App Store if you\"re using an iOS device, or from Google Play if you\"re using an Android device.
- Connect Your Headphones to the App: Open the app and follow the on-screen instructions to connect your headphones. Ensure your headphones are powered on and in range.
- Check for Firmware Updates: Once your headphones are connected to the app, it will automatically check for firmware updates. If an update is available, you\"ll see an update notification.
- Perform the Update: Follow the on-screen instructions to download and install the firmware update. This process may take several minutes, and your headphones may restart during the update.
- Confirm Update Completion: After the update, ensure your headphones are working properly by connecting them to your Mac. You may need to reconnect them as a new device if they were previously paired.
Regularly checking for and installing firmware updates can significantly improve your headphones\" functionality and compatibility with your Mac and other devices.
Pair Sony WH-1000XM4 headphones with any Mac
Immerse yourself in your favorite tunes with Sony headphones. Experience exceptional sound quality and comfortable, stylish design. Watch our video to discover why these headphones are a must-have for music lovers.
Pair Sony WH-1000XM3 and WH-1000XM4 headphones to ANY Mac
Learn how to effortlessly connect your headphones to any device with our informative video tutorial. Whether you\'re using Bluetooth or a wired connection, we\'ll guide you through the simple steps to ensure you never miss a beat. Watch now and never struggle with headphone connectivity again.
Step 7: Managing Connected Devices
Once your Sony headphones are successfully connected to your Mac, managing your connected devices efficiently can enhance your listening experience. Here\"s how to manage your devices for optimal performance:
- Accessing Bluetooth Preferences: To see all connected devices, go to the Bluetooth settings through the System Preferences on your Mac. Here, you can view, disconnect, or remove devices.
- Switching Between Devices: If your Sony headphones support multi-device connection, you can switch between devices using the Sony Headphones Connect app or the device list in the Bluetooth settings of each connected device.
- Disconnecting Unnecessary Devices: To ensure a stable connection, disconnect any devices you\"re not actively using. This can be done directly from the Bluetooth menu on your Mac.
- Prioritizing Devices: Some Sony headphones allow you to set a priority device through their app. This feature ensures your headphones connect to your preferred device first when multiple devices are available.
- Understanding Device Limits: Be aware of the maximum number of devices your headphones can remember. If you reach this limit, you may need to remove old devices before connecting new ones.
By effectively managing your connected devices, you can ensure a smooth and uninterrupted audio experience, whether you\"re working, enjoying music, or watching movies on your Mac.

READ MORE:
Step 8: Maximizing Audio Quality
After connecting your Sony headphones to your Mac, optimizing audio settings can significantly enhance your listening experience. Follow these tips to maximize audio quality:
- Select Appropriate Sound Settings: In your Mac\"s Sound preferences, choose your Sony headphones for output and adjust the balance and volume to your liking.
- Use High-Quality Audio Files: For the best audio experience, play music or audio in high-resolution formats whenever possible. This can make a noticeable difference in sound quality.
- Explore Equalizer Settings: Utilize the equalizer settings in your music player or streaming service app to fine-tune the audio output to your personal preference or to suit the genre of music you\"re listening to.
- Update Sony Headphones Connect App: Ensure the Sony Headphones Connect app is up to date to take advantage of the latest features and audio enhancements available for your headphones.
- Check for Software Updates: Regularly update your Mac\"s software to ensure compatibility and access to the latest audio enhancements and bug fixes.
- Avoid Wireless Interference: Keep your headphones and Mac away from other wireless devices that can cause interference, leading to a reduction in audio quality.
By following these steps, you can enjoy the full potential of your Sony headphones\" audio capabilities, whether you\"re listening to music, watching movies, or attending online meetings.
Successfully connecting your Sony headphones to your Mac enhances your audio experience, blending seamless connectivity with exceptional sound quality. Follow our comprehensive guide for trouble-free listening and optimal audio enjoyment.