Topic sony vegas velocity: Discover the art of dynamic video editing with Sony Vegas Velocity, a tool that transforms your footage into captivating stories through speed adjustments and motion effects.
Table of Content
- What are the native methods to work with speed on Sony Vegas?
- Understanding Sony Vegas Velocity
- How to Use Velocity Envelopes in Sony Vegas
- Speeding Up and Slowing Down Video Footage
- Creating Smooth Slow Motion with Velocity Envelopes
- Advanced Techniques for Velocity Editing
- Syncing Clips to Music with Velocity
- YOUTUBE: VEGAS Pro 18: How To Use The Velocity Tool Tutorial 512
- Improving Workflow with Velocity Shortcuts
- Common Issues and Solutions in Velocity Editing
- Maximizing Performance for High Frame Rate Footage
- Comparing Velocity Features Across Sony Vegas Versions
What are the native methods to work with speed on Sony Vegas?
The native methods to work with speed on Sony Vegas are Velocity and Time Stretch/Compress Tool.
- Velocity: Velocity envelopes can be used to speed up, slow down, and freeze video in Sony Vegas.
- Time Stretch/Compress Tool: This tool allows you to adjust the speed of your video by stretching or compressing it.
To use Velocity, follow these steps:
- Select the clip you want to adjust.
- Right-click on the clip and go to \"Properties\".
- In the \"Velocity\" tab, you can adjust the playback speed by either entering a numerical value or using the slider.
- Click \"OK\" to apply the changes.
To use the Time Stretch/Compress Tool, follow these steps:
- Select the clip you want to adjust.
- Go to \"Tools\" > \"Video\" > \"Time Stretch/Compress\".
- A dialog box will appear where you can enter the desired speed percentage or adjust it using the slider.
- Click \"OK\" to apply the changes.
READ MORE:
Understanding Sony Vegas Velocity
Sony Vegas Velocity is a powerful feature within the Sony Vegas Pro editing software, enabling users to control the speed of their video clips with precision. It\"s an essential tool for creating slow-motion effects, fast-forward sequences, and dynamic video presentations.
- What is Velocity? Velocity refers to the rate at which video playback speed is altered. In Sony Vegas, this is done through velocity envelopes, allowing for frame-by-frame speed adjustments.
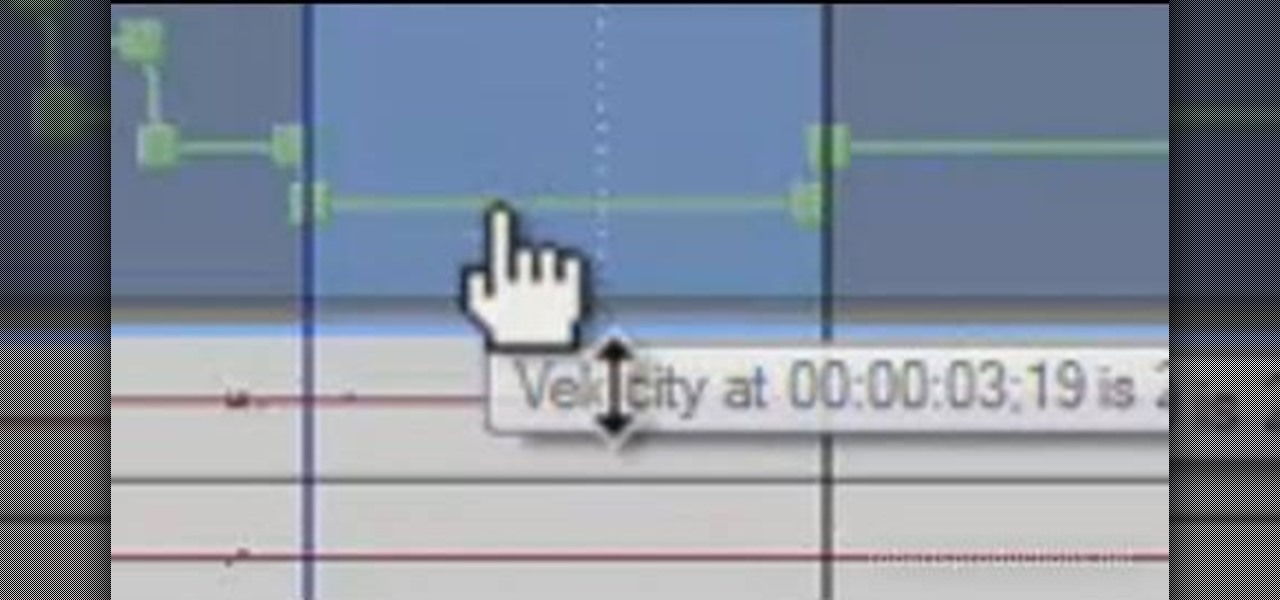
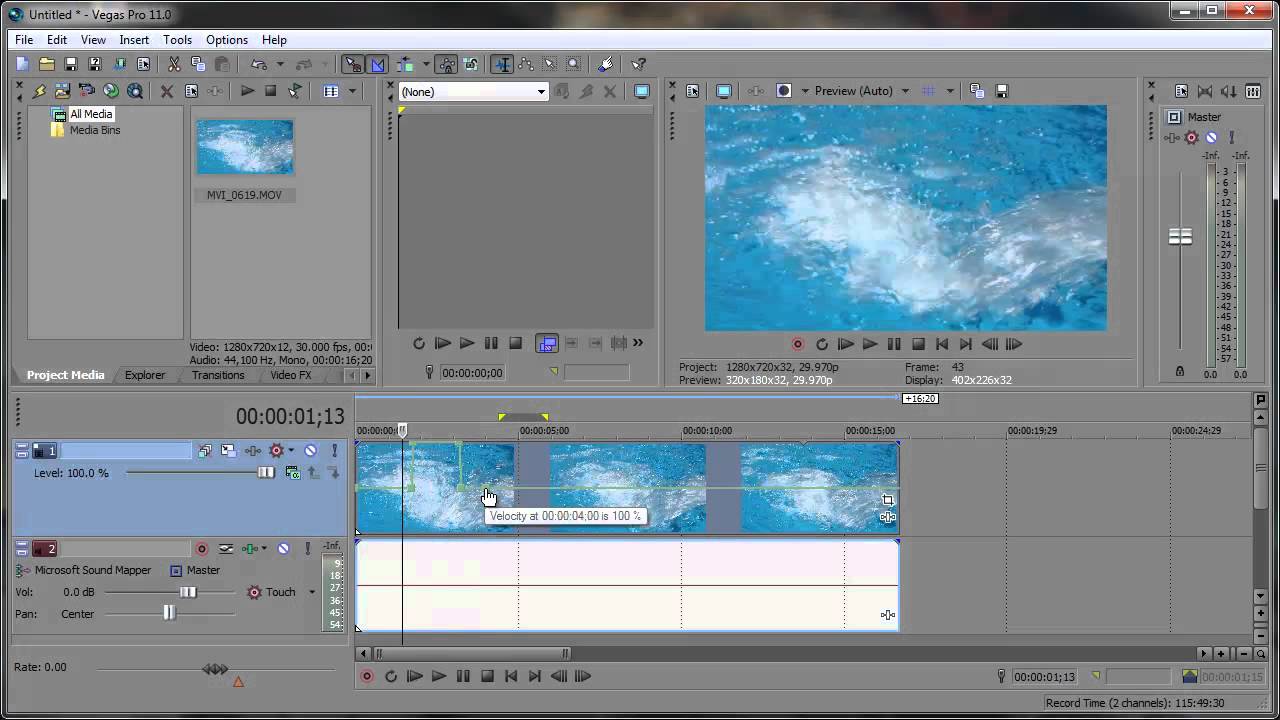
- How to Access Velocity Envelopes: Right-click on a video clip in the timeline, select \"Insert/Remove Envelope,\" and then choose \"Velocity.\" A line appears on the clip, indicating the velocity envelope.
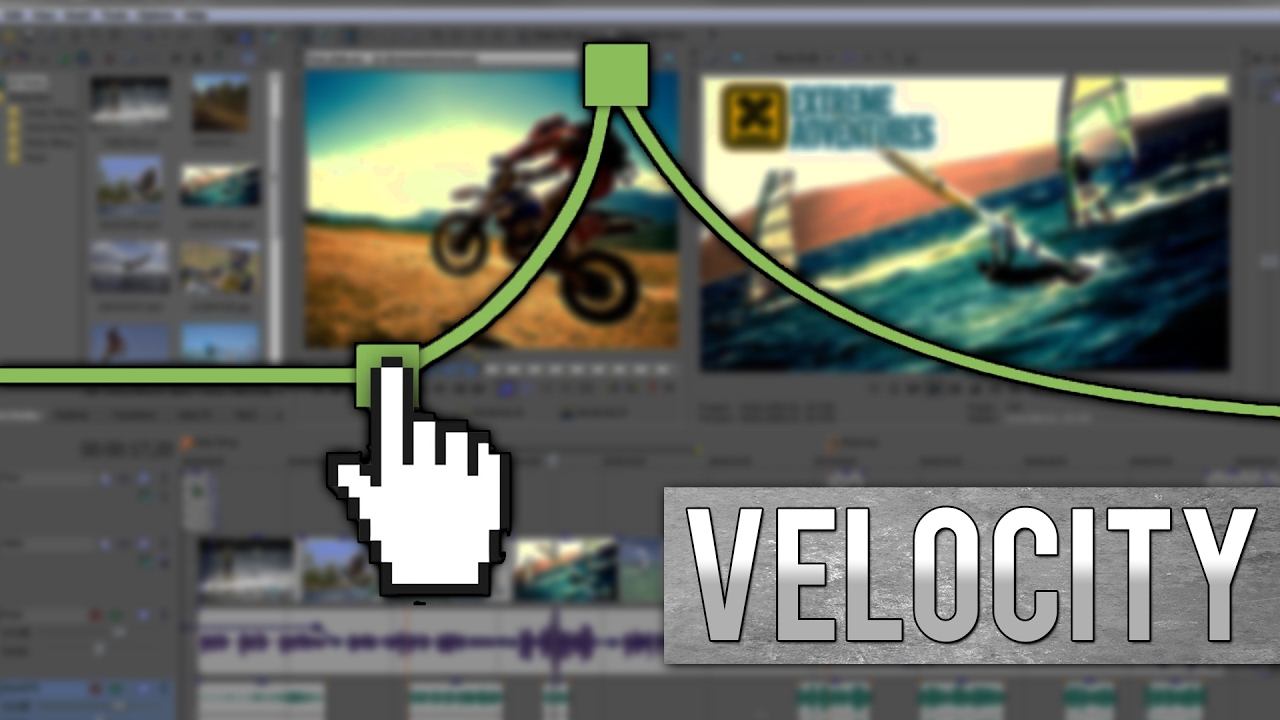
- Adjusting Speed: By adding points along the envelope and dragging them up or down, you can increase or decrease the playback speed of the clip. Dragging a point up accelerates the clip, while dragging it down slows it down.
- Keyframe Interpolation: Smooth transitions between different speeds can be achieved by adjusting the curve between keyframes. This allows for seamless slow-motion or speed ramping effects.
Using Sony Vegas Velocity, editors have unparalleled control over the pacing of their videos, enhancing the emotional impact and visual appeal of their projects.
How to Use Velocity Envelopes in Sony Vegas
Velocity envelopes in Sony Vegas Pro offer a flexible way to manipulate the speed of your video clips directly on the timeline. Follow these steps to effectively use velocity envelopes for dynamic video editing:
- Open Your Project: Launch Sony Vegas and open the project you want to edit.
- Select Your Clip: In the timeline, identify the video clip you wish to apply a velocity envelope to.
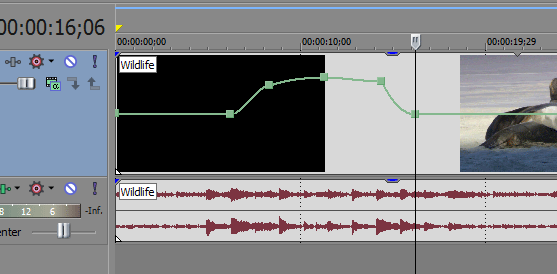
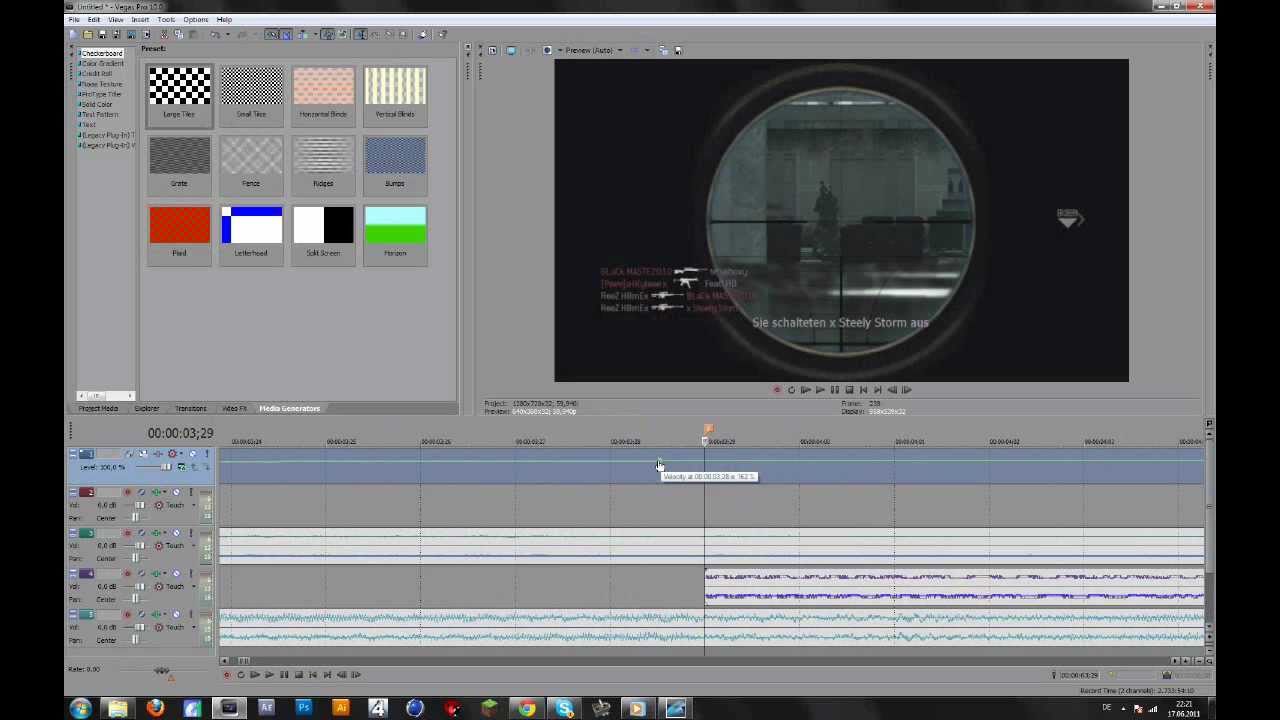
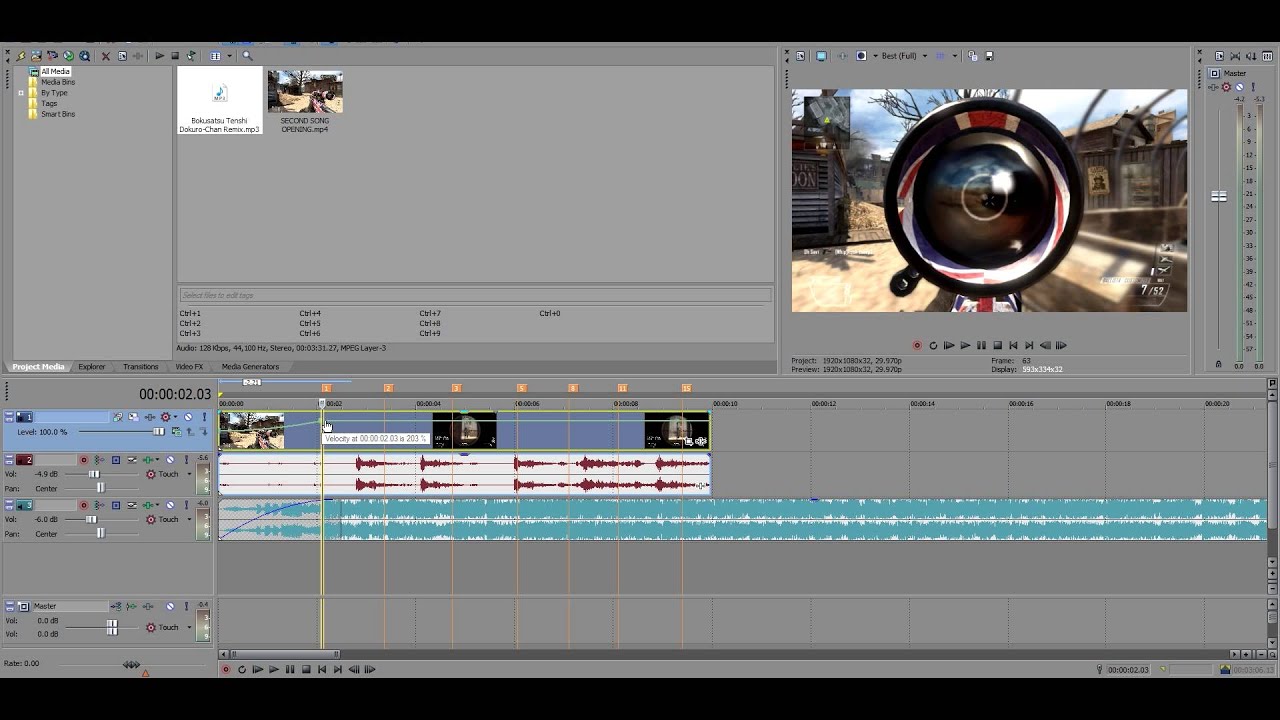
- Insert Velocity Envelope: Right-click on the clip, navigate to \"Insert/Remove Envelope,\" and then select \"Velocity.\" A green line (the velocity envelope) will appear on your clip.
- Add Points to the Envelope: Double-click on the green line to add points. These points are where you will adjust the speed of the clip.
- Adjust Clip Speed: Click and drag these points up to increase speed (up to 300% or more) or down to reduce speed (down to 0%, which pauses the clip). You can add multiple points to create speed ramps or smooth transitions.
- Refine Speed Changes: For more precise control, right-click on a point to access options like \"Set to\" (for specific speed percentages) or \"Smooth Fade\" for gradual speed changes.
- Preview Your Edit: Play back your timeline to see the effect in action. Adjust as necessary until you achieve the desired result.
- Finalize Your Edit: Once satisfied, proceed with your editing workflow, adding any additional effects, transitions, or edits as needed.
With velocity envelopes, you have the creative freedom to highlight dramatic moments, create suspense, or add humor to your videos through speed manipulation.
Speeding Up and Slowing Down Video Footage
Altering the speed of your video footage in Sony Vegas can add dramatic flair, emphasize moments, or fit your video to a specific duration. Here\"s how to effectively speed up or slow down your video footage:
- Choose Your Clip: Identify the clip in your timeline that you wish to modify.
- Insert a Velocity Envelope: Right-click on the clip, select \"Insert/Remove Envelope,\" then choose \"Velocity\" to add the velocity envelope to your clip.
- Speeding Up Footage: To speed up your clip, add points to the velocity envelope and drag them upwards. Increasing the percentage above 100% speeds up the playback. For extreme fast-forward effects, you can go up to 1,000% or more.
- Slowing Down Footage: To slow down your clip, add points and drag them downwards. Decreasing the percentage below 100% slows down the playback. For slow-motion effects, reduce the speed to less than 50%. The lower the percentage, the slower the motion.
- Creating Smooth Transitions: For a smooth transition between different speeds, ensure to add points before and after the desired speed change. Gradually adjust the points to create a ramp effect for smoother acceleration or deceleration.
- Adjusting Frame Rate for Slow Motion: When slowing down footage, consider the frame rate of your original footage. Higher frame rate footage (e.g., 60fps or 120fps) will result in smoother slow-motion effects.
- Preview and Adjust: Regularly preview your adjustments to ensure the desired effect is achieved. You may need to fine-tune the points for optimal results.
By mastering these techniques, you can creatively control the pace of your video, making your content more engaging and visually appealing to your audience.

Creating Smooth Slow Motion with Velocity Envelopes
Creating smooth slow motion in Sony Vegas requires a nuanced approach with velocity envelopes. This technique allows for precise control over playback speed, ensuring your slow-motion effects are both smooth and visually stunning. Follow these steps to achieve optimal results:
- Select High Frame Rate Footage: Begin with footage shot at a high frame rate (60fps or higher) to ensure smoothness in slow motion.
- Apply Velocity Envelope: Right-click on your clip in the timeline, select \"Insert/Remove Envelope,\" then \"Velocity\" to add a velocity envelope.
- Add Keyframes: Double-click on the velocity line to add keyframes at the start and end points of the section you want to slow down.
- Adjust Speed: Click and drag the keyframes down to reduce the speed. For smooth slow motion, aim for a speed between 20% to 50% of the original.
- Create Speed Ramps: To enhance the effect, consider creating speed ramps by gradually adjusting the velocity between normal speed and your desired slow-motion speed. This can be done by adding additional keyframes and gently transitioning between speeds.
- Refine the Effect: Right-click on keyframes to access advanced options like smoothing curves, which help create a more natural transition into and out of the slow-motion effect.
- Preview and Adjust: Frequently preview your adjustments to ensure the smoothness and quality of the slow-motion effect. Fine-tune as necessary.
By carefully adjusting the velocity envelope, you can create captivating slow-motion sequences that highlight key moments, adding dramatic impact to your videos.
_HOOK_
Advanced Techniques for Velocity Editing
For those looking to push the boundaries of video editing with Sony Vegas, advanced velocity editing techniques can unlock new creative possibilities. These methods require a deeper understanding of the software\"s capabilities, enabling editors to produce highly polished, dynamic content.
- Time Remapping: Beyond simple speed changes, time remapping involves varying the playback speed of a clip within a single frame. This technique can be used to create fluid slow motion that speeds up or slows down smoothly over time.
- Combining Velocity and Opacity Envelopes: Pair velocity envelopes with opacity envelopes to blend slow-motion clips with real-time footage, creating ghosting effects or seamless transitions between different speeds.
- Using Markers for Precise Control: Place markers on your timeline as reference points for key moments. This allows for precise alignment of speed changes with musical beats or action cues, enhancing the impact of your edits.
- Reverse Speed Effects: Create a reverse-motion effect by setting the velocity envelope to a negative value. This technique is great for flashback sequences or for adding an artistic touch to your videos.
- Stutter Effects: By rapidly alternating the speed of a clip between extremes (e.g., 100% to 0% and back), you can create a stutter or stop-motion effect. This technique is effective for emphasizing certain beats or moments.
- Smooth Frame Blending: For clips where the frame rate does not support smooth slow motion, use the frame blending option to create intermediate frames, smoothing out the motion and reducing choppiness.
- Custom Curves for Velocity Changes: Instead of linear speed changes, utilize custom curves to create non-linear velocity changes for more natural-looking acceleration and deceleration.
Mastering these advanced techniques requires practice and experimentation but can significantly enhance the visual storytelling of your projects.
Syncing Clips to Music with Velocity
Syncing video clips to music with precision can transform an ordinary video into a compelling story. Sony Vegas\" velocity envelopes enable editors to align the pace of video clips with musical beats, rhythms, or melodies, creating an immersive viewing experience. Here\"s how to achieve perfect harmony between your video and music:
- Analyze the Music Track: Begin by listening to your music track and identifying the beats or sections you want to emphasize with video changes. Place markers on these beats for reference.
- Apply Velocity Envelopes: Add velocity envelopes to your video clips by right-clicking on them and selecting \"Insert/Remove Envelope\" then \"Velocity.\"
- Adjust Clip Speed to Match Beats: Use the markers you placed as guides to adjust the speed of your clips. Speed up or slow down clips by dragging the points on the velocity envelope to align with the music\"s tempo.
- Create Dynamic Speed Transitions: For a more dynamic effect, create speed ramps by gradually changing the velocity of your clips to build up to or wind down from key moments in the music.
- Preview and Refine: Regularly preview your edits in conjunction with the music. This step is crucial for ensuring the visual changes precisely match the music\"s beats and flow.
- Use Keyframes for Precision: For complex music tracks with varying tempos, utilize keyframes to finely adjust the speed of your clips, ensuring seamless synchronization with the music.
- Experiment with Effects: Combine velocity changes with visual effects for even greater impact. For example, slow down a clip at a dramatic point in the music and apply a color grading effect for added emotional weight.
By syncing clips to music with Sony Vegas\" velocity envelopes, you create an engaging rhythm that captivates your audience, enhancing the overall impact of your video.

VEGAS Pro 18: How To Use The Velocity Tool Tutorial 512
\"Discover the endless possibilities of video editing with Sony Vegas! Unleash your creativity and bring your vision to life with its powerful features, stunning effects, and seamless workflow. Watch our video tutorial now and be amazed at what you can achieve!\"
How to have Flow in your Montage Updated Velocity Tutorial 4K
\"Get ready to be blown away by the captivating art of montage! Our video showcases the artistry and skill behind creating breathtaking montages that will leave you inspired. From stunning visuals to perfectly synchronized music, this video is a must-watch for all lovers of creative storytelling!\"
Improving Workflow with Velocity Shortcuts
Efficiency is key in video editing, and Sony Vegas offers several velocity shortcuts that can significantly streamline your editing workflow. These shortcuts enable quick adjustments to clip speed, saving time and enhancing productivity. Here\"s how to incorporate them into your editing process:
- Quick Access to Velocity Envelopes: Instead of navigating through menus, quickly insert a velocity envelope by selecting a clip and pressing Ctrl+Shift+V. This shortcut immediately applies a velocity envelope to your selected clip.
- Instant Speed Changes: For rapid speed adjustments, hold down the Ctrl key and click on the velocity envelope line. Then, drag up or down to instantly increase or decrease the speed of the clip.
- Keyframe Navigation: Use the \"N\" and \"Shift+N\" keys to navigate between keyframes on the velocity envelope. This allows for quick location and adjustment of specific speed changes.
- Setting Specific Speeds: Right-click on a point on the velocity envelope to set a specific speed (e.g., 50% for slow motion or 200% for fast motion). This context menu shortcut ensures precise speed control.
- Copying and Pasting Envelopes: To apply the same speed adjustments to multiple clips, use Ctrl+C to copy and Ctrl+V to paste the velocity envelope from one clip to another. This is especially useful for maintaining consistent speed effects across clips.
By mastering these velocity shortcuts in Sony Vegas, you can enhance your editing efficiency, allowing more time for creative decision-making and less on repetitive tasks.
Common Issues and Solutions in Velocity Editing
Velocity editing in Sony Vegas is a powerful feature, but users may encounter certain issues. Understanding these common problems and their solutions can help maintain a smooth editing process. Here are some typical challenges and how to resolve them:
- Choppy Playback: When editing with velocity envelopes, you might experience choppy playback. Solution: Pre-render your timeline (Shift+B) to create a smoother preview, or adjust preview quality settings for less intensive playback.
- Speed Changes Not Smooth: Abrupt speed changes can disrupt the flow of your video. Solution: Add more keyframes to create gradual speed transitions, or use the \"Smooth\" curve option by right-clicking between keyframes on the velocity envelope.
- Inconsistent Motion Blur: Changing speeds can affect the natural motion blur. Solution: Use the \"Force Resample\" option on your clip properties to better emulate motion blur at various speeds.
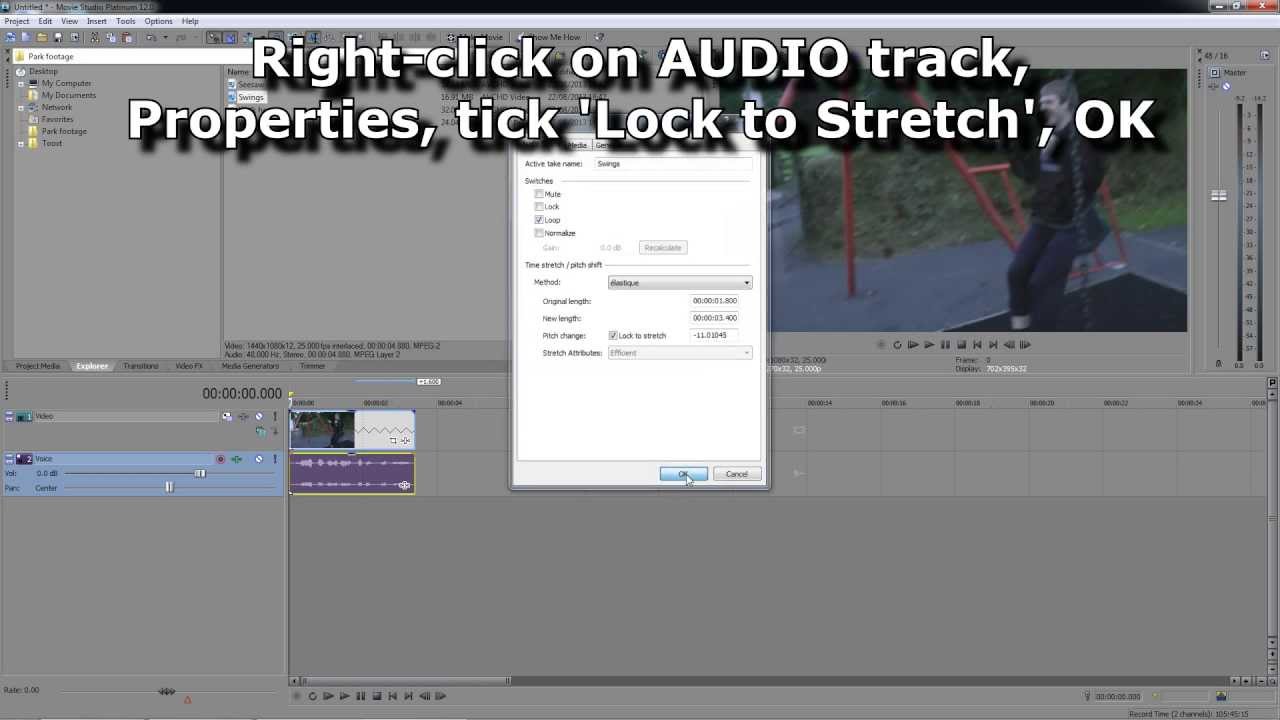
- Audio Desynchronization: Speed adjustments can desynchronize audio. Solution: Separate audio from video before applying velocity changes, or use time-stretching tools on the audio track to match video speed adjustments.
- Difficulty Aligning Speed Changes with Events: Precisely timing speed changes with music beats or action can be challenging. Solution: Use markers for key points in both video and audio tracks to guide your velocity adjustments.
Addressing these common issues effectively enhances the quality of your velocity edits, ensuring a more polished and professional final product.
Maximizing Performance for High Frame Rate Footage
Working with high frame rate (HFR) footage in Sony Vegas can create stunning slow-motion effects but may also present challenges in terms of performance. Here are strategies to maximize your editing performance and quality when dealing with HFR footage:
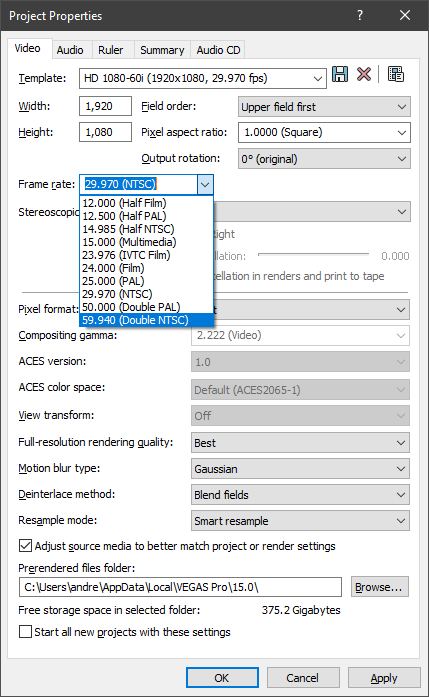
- Optimize Your Project Settings: Match your project settings to your footage\"s frame rate. This ensures that your timeline is optimized for the HFR footage, reducing playback issues.
- Use Proxies for Editing: High frame rate footage can be taxing on your system. Create and edit with proxy files (lower resolution versions of your footage) to improve timeline performance, then switch back to the original high-res files for rendering.
- Pre-Render Clips: Pre-rendering sections of your timeline (Shift+B) that contain HFR footage can smooth out playback, making it easier to edit and preview speed adjustments.
- Adjust Playback Quality: Lower the playback quality in the preview window to improve performance during editing. This does not affect the final render quality.
- Close Other Applications: High frame rate video editing is resource-intensive. Ensure maximum performance by closing unnecessary applications to free up system resources.
- Upgrade Hardware: If you frequently work with HFR footage, consider upgrading your RAM, graphics card, and storage to SSDs. These hardware improvements can significantly enhance performance and reduce rendering times.
By implementing these strategies, you can effectively manage and edit high frame rate footage in Sony Vegas, ensuring both smooth editing workflow and high-quality output.

_HOOK_
READ MORE:
Comparing Velocity Features Across Sony Vegas Versions
The velocity editing feature in Sony Vegas has evolved across different versions of the software, offering an array of functionalities tailored to the diverse needs of video editors. Here\"s a comparison of how velocity features have been enhanced from earlier versions to the latest:
- Sony Vegas Pro 12 and Earlier: Initial introduction of velocity envelopes allowed basic speed adjustments. However, options were somewhat limited, with fewer controls for smooth transitions and precise speed manipulation.
- Sony Vegas Pro 13: This version introduced improved velocity envelope controls, making it easier to create more complex speed ramps and slow-motion effects. The interface became more user-friendly, with better visualization of speed changes.
- Sony Vegas Pro 14 and 15: Continued enhancements included the ability to apply velocity envelopes to multiple clips simultaneously, streamlining the editing process for projects requiring extensive speed adjustments.
- Sony Vegas Pro 16 and 17: These versions introduced high frame rate support and more refined control over velocity curves. Editors could achieve smoother slow-motion effects and more dramatic speed ramps with enhanced frame blending options.
- Sony Vegas Pro 18 and Onwards: The latest versions focus on performance optimization for handling high frame rate footage and complex velocity edits. Advanced features like motion blur control for velocity changes and integration with new hardware acceleration technologies have been added, significantly improving workflow efficiency and rendering times.
As Sony Vegas continues to evolve, the velocity editing feature has become more sophisticated, offering video editors the tools needed to create dynamic and visually captivating content.
Mastering Sony Vegas\" velocity features unlocks endless creative possibilities, transforming your videos into captivating narratives. Dive into the world of dynamic editing and let your imagination lead the way to breathtaking storytelling.