Topic add text sony vegas: Discover the essentials of adding text to your Sony Vegas projects with our comprehensive guide, designed to enhance your videos with captivating titles and engaging subtitles.
Table of Content
- How to add text in Sony Vegas?
- Opening Your Project and Preparing the Timeline
- Accessing the Media Generators Tab
- Selecting Text and Title Presets
- Customizing Text Properties
- Animating Text for Impact
- Adding Credit Rolls and Subtitles
- YOUTUBE: VEGAS Pro: How to Add Text to Your Video Tutorial 554
- Using Advanced Text Features
- Exporting Your Project with Text Overlays
How to add text in Sony Vegas?
To add text in Sony Vegas, you can follow the steps below:
- Launch Sony Vegas Pro on your computer.
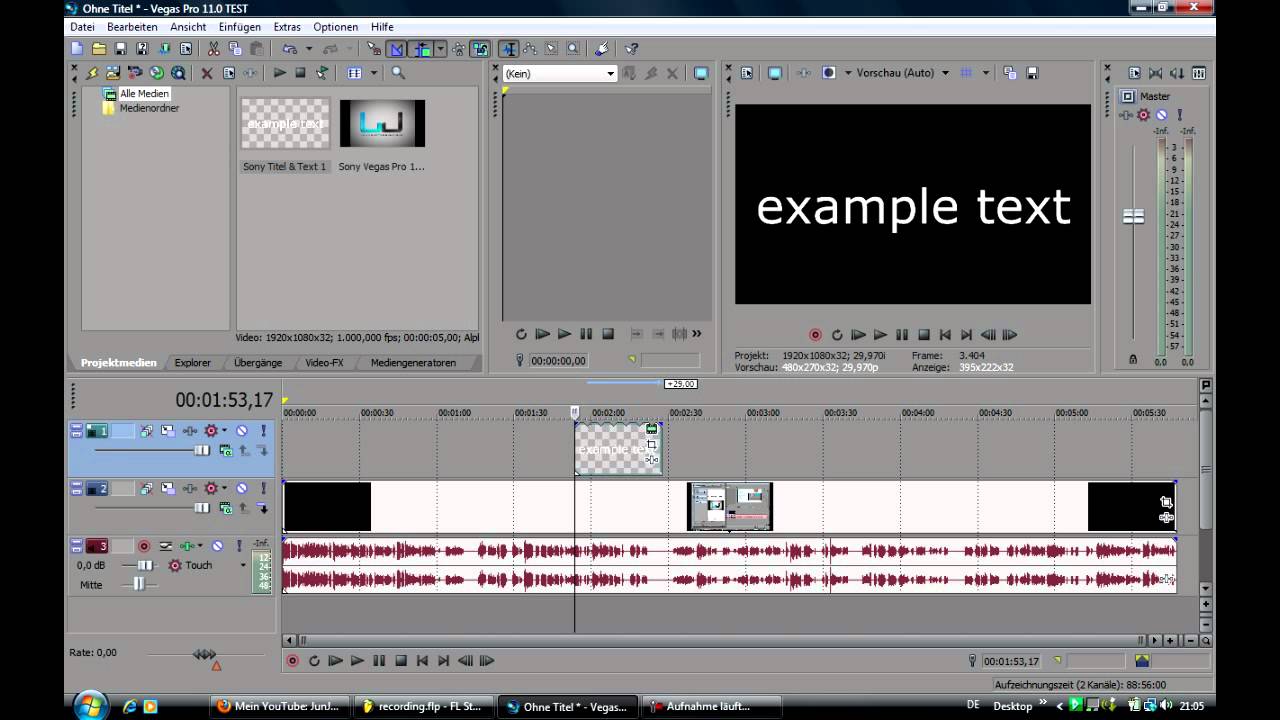
- Go to the \"Media Generators\" tab located at the top of the interface.
- Select \"Text and Title\" from the list of options.
- Choose the type of text effect you want to add, such as \"Action Flip\" or \"Bounce.\"
- A new text media generator will be added to your timeline.
- Double-click on the text media generator on the timeline to open the Text Edit window.
- Enter your desired text in the text field provided.
- Customize the text properties, such as font, size, color, and position, using the options available in the Text Edit window.
- Click \"OK\" to apply the changes and close the Text Edit window.
By following these steps, you should be able to add text to your Sony Vegas project. Remember to save your project regularly to avoid losing any changes.
Opening Your Project and Preparing the Timeline
Starting your video editing journey in Sony Vegas begins with two critical steps: opening your project and setting up the timeline. This foundational stage is key to a smooth editing process, ensuring your text additions perfectly align with your video content.
- Launch Sony Vegas: Open Sony Vegas Pro on your computer. If you\"re starting a new project, select \"File\" > \"New\". For existing projects, choose \"File\" > \"Open\" and navigate to your project file.
- Setting Project Properties: Adjust your project\"s properties (frame rate, resolution, audio settings) to match your video\"s specifications. Access this through \"File\" > \"Properties\".
- Importing Media: Import your video clips, images, and audio files by dragging them into the project media section or by selecting \"File\" > \"Import\" > \"Media\" and choosing your files.
- Timeline Organization: Drag and drop your imported media onto the timeline. Arrange them in the desired order and trim as necessary to fit your project\"s flow.
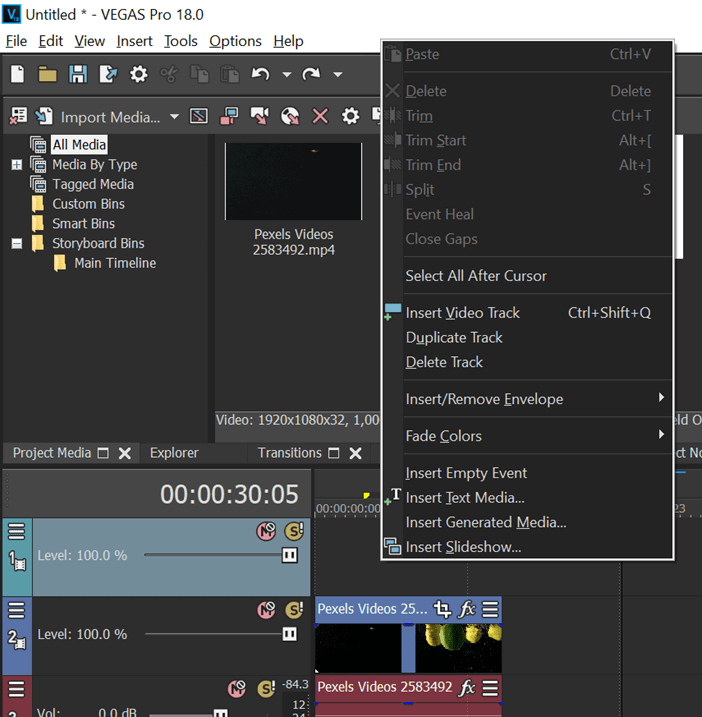
- Creating Video Tracks: Right-click on the timeline area and select \"Insert Video Track\" if you need more layers for your text or additional video elements.
- Saving Your Project: Regularly save your project by clicking \"File\" > \"Save\" or using the shortcut Ctrl+S to avoid losing any progress.
With your project opened and the timeline organized, you\"re now ready to move on to adding text and further enhancing your video content in Sony Vegas.
Accessing the Media Generators Tab
Adding text to your Sony Vegas project involves utilizing the Media Generators tab, a powerful feature packed with customizable text options for your video. Follow these steps to navigate and use the Media Generators for enhancing your project.
- Navigate to the Media Generators Tab: On the Sony Vegas interface, find the tab labeled \"Media Generators\". It\"s usually located on the lower half of the screen, within the same window as the Project Media, Transitions, Video FX, and Explorer tabs.
- Selecting Your Text Tool: Within the Media Generators tab, you\"ll see a list of options. Scroll through or search for \"Text\" to find various text tools, including simple text, titles, and scrolling credits.
- Preview Text Options: Click on any text tool to preview it in the preview window. This helps you see what the text will look like before you add it to your timeline.
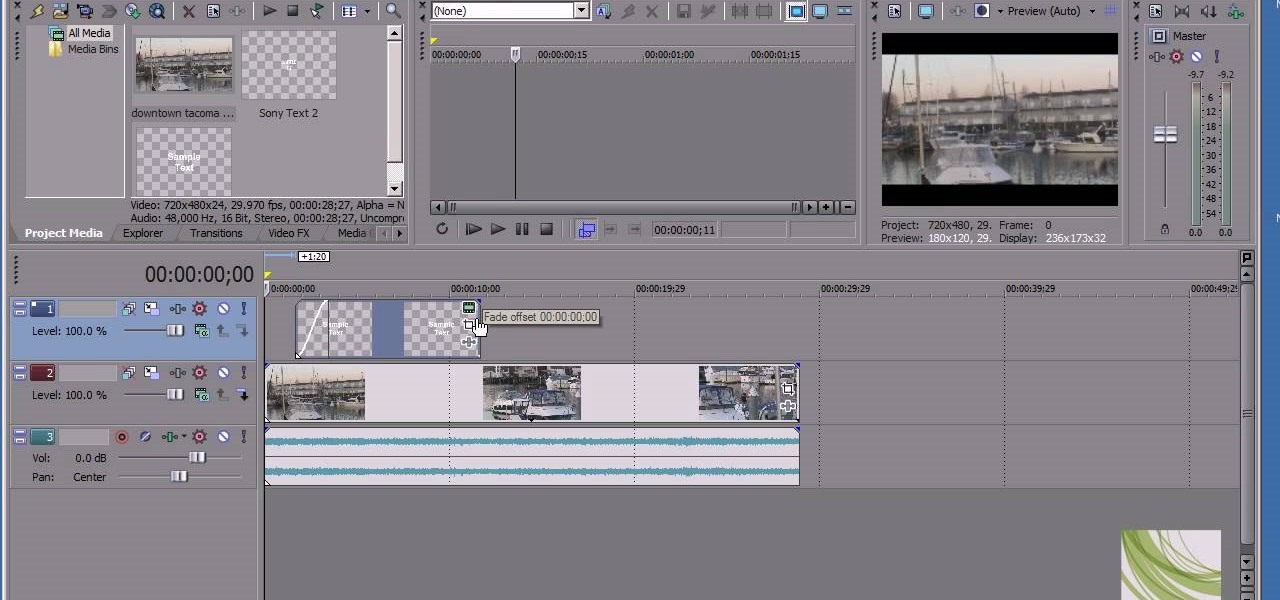
- Adding Text to Your Timeline: Once you\"ve found the text style you like, drag and drop it onto your video track on the timeline where you want the text to appear.
- Customizing Text: After adding the text to your timeline, double-click it to open the text editing window. Here, you can customize the text\"s content, font, size, color, and other properties to fit your project\"s needs.
This section of Sony Vegas is crucial for creators looking to add dynamic and engaging text to their videos. With a wide range of customizable options, the Media Generators tab offers endless possibilities to enhance your video content.

Selecting Text and Title Presets
Choosing the right text and title presets in Sony Vegas can significantly impact the look and feel of your video. This section guides you through the selection process to enhance your project with professional-looking text elements.
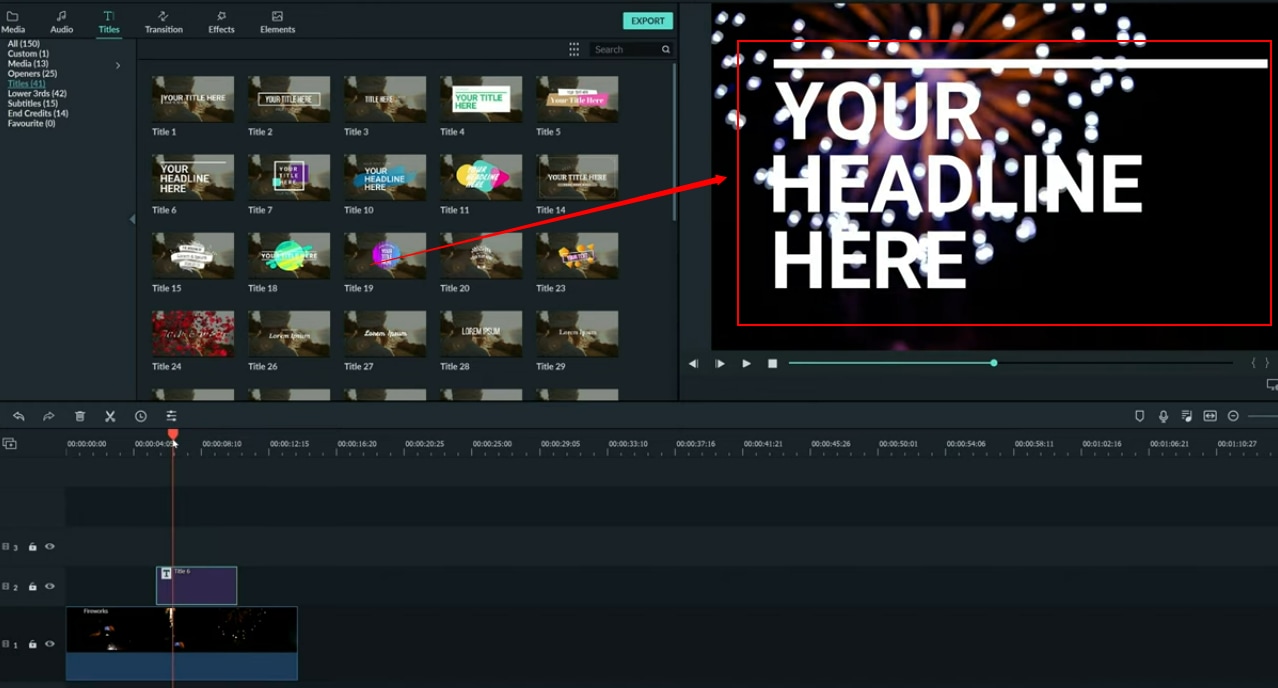
- Explore the Text Presets: Within the Media Generators tab, navigate to the \"Text\" section. Here, you\"ll find a variety of presets, including basic titles, lower thirds, and animated text options.
- Previewing Presets: Hover over a preset to see a preview of how it looks. Sony Vegas provides a quick preview feature that helps you visualize the text effect within your video.
- Choosing a Preset: Consider the theme and tone of your video when selecting a preset. Look for options that complement your content and enhance your message without overpowering it.
- Customizing Your Selection: After selecting a preset, drag it onto your timeline. Double-click it to open the text editor, where you can modify the text\"s wording, font, size, color, and animation to match your project\"s needs.
- Experiment with Animations: Some presets include animations. Experiment with these to add dynamism to your video. Remember, the key is subtlety; the text should enhance, not distract from your content.
- Save Custom Presets: If you\"ve adjusted a preset to your liking, you can save it as a custom preset for future projects. Right-click on the text event in your timeline and select \"Save Preset\" to use it again.
Selecting and customizing text and title presets is a straightforward process in Sony Vegas. With a wide range of options and the ability to create custom presets, you can easily add professional and engaging text to your videos.

Customizing Text Properties
Personalizing text properties in Sony Vegas is essential for creating unique and impactful video content. This section will guide you through the steps to customize text properties, ensuring your text elements perfectly align with your video’s aesthetic and message.
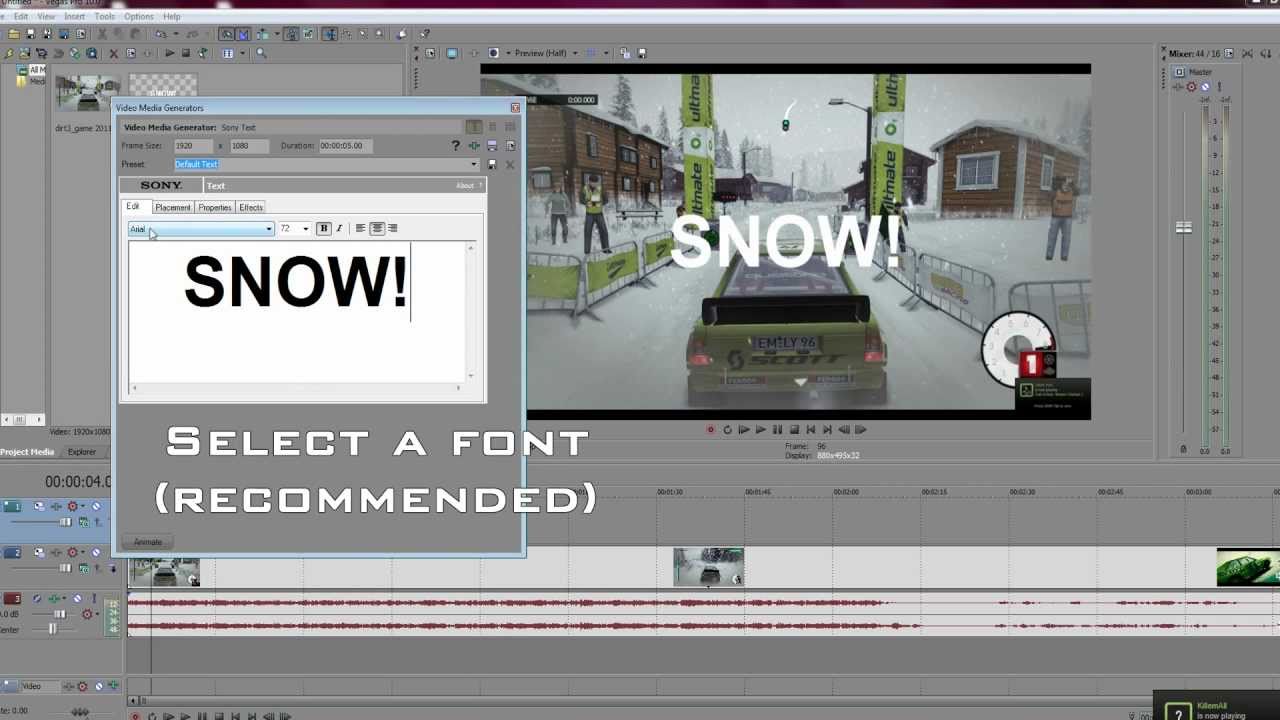
- Accessing Text Properties: After adding a text preset to your timeline, double-click it to open the text editor window. This window is where you\"ll adjust all text properties.
- Modifying Font and Size: Within the text editor, you can change the font, size, and style (bold, italic, underline) of your text. Look for the \"Font\" dropdown menu and size adjustment options.
- Adjusting Color and Background: Use the color picker to change your text color for better visibility and alignment with your video\"s color scheme. You can also add a background color to your text for contrast.
- Applying Animations and Effects: Sony Vegas offers animation options for text, such as fade-in, fade-out, scrolling, and more. Find these under the \"Animations\" section in the text editor.
- Setting Text Position and Alignment: Adjust the position of your text on the screen by dragging it within the preview window or using the alignment tools for precise placement.
- Utilizing Keyframes for Dynamic Text: For more advanced customization, use keyframes to animate text properties over time. Keyframes allow you to change properties like position, opacity, and size at different points in your video.
Customizing text properties in Sony Vegas allows you to enhance your video content with tailored text elements that reflect your creative vision. Experiment with different settings to find the perfect look for your project.
_HOOK_
Animating Text for Impact
Animating text in Sony Vegas can greatly enhance the engagement and dynamism of your videos. This section walks you through the steps to create animated text that captures attention and conveys your message effectively.
- Choosing Your Text: Start with a text layer on your timeline. Ensure the text is finalized in terms of wording, font, and size before animating.
- Accessing Animation Options: Double-click the text event to open the text editor. Look for the \"Animations\" or \"Effects\" tab to explore available animation options.
- Selecting an Animation: Choose from a variety of animations such as fade in, fade out, fly in, bounce, and more. Preview the animations to see which best suits your content.
- Customizing Animation Parameters: Adjust the duration, direction, and speed of the animation to match the pacing of your video. Use the control handles in the timeline or the settings in the text editor.
- Using Keyframes for Advanced Animation: For more control over the animation, use keyframes. Add keyframes at different points in your timeline to change the text’s properties (like position, scale, and opacity) over time.
- Previewing Your Animation: Always preview your animated text within the context of your video. This ensures the animation enhances the content without overwhelming it.
- Rendering and Reviewing: After finalizing your animation, render a small section of your video to review the animation’s impact. Make any necessary adjustments before completing your project.
Effective text animation can make your videos more engaging and professional. With Sony Vegas, you have the tools to create impactful animated text that complements your visual content.

Adding Credit Rolls and Subtitles
Enhancing your Sony Vegas projects with credit rolls and subtitles not only adds professionalism but also improves accessibility. This section guides you through the process of incorporating these elements seamlessly into your videos.
- Using the Media Generators Tab: To add credits or subtitles, navigate to the Media Generators tab and select the \"Titles & Text\" or \"Credit Roll\" option depending on your needs.
- Customizing Your Text: After dragging your selected option onto the timeline, double-click to customize the text. For subtitles, you may need to add multiple text events along the timeline.
- Formatting Credit Rolls: When working with credit rolls, adjust the speed, direction, and text spacing to ensure readability. Use the preview feature to adjust these elements in real time.
- Synchronizing Subtitles: For subtitles, timing is key. Align each text event with the corresponding dialogue or audio cue. This might require zooming into the timeline for precise adjustments.
- Choosing Fonts and Colors: Select fonts and colors that are easy to read against your video background. For subtitles, a contrasting background or outline can enhance visibility.
- Previewing Your Work: Regularly preview your video to ensure the credit roll or subtitles flow smoothly and are synchronized with the audio or scene transitions.
- Exporting Your Video: Once satisfied with the credit roll or subtitles, render your video to finalize these additions. Ensure no text is cut off and the timing remains correct in the final product.
Adding credit rolls and subtitles in Sony Vegas can significantly elevate your video\"s quality and viewer experience. With careful customization and alignment, these text elements will seamlessly integrate into your projects.
VEGAS Pro: How to Add Text to Your Video Tutorial 554
In this comprehensive tutorial, you\'ll learn step-by-step how to master a skill, unlock your creative potential, and become a pro in no time. Get ready to elevate your knowledge and approach with this engaging and empowering video!
Vegas Pro 19: How to Add Text in Vegas Pro
Discover the exciting new features and enhancements of Vegas Pro 19 in this captivating video. Unleash your creativity and take your video editing to new heights with this powerful software. Join us on a visual journey of innovation and excellence!
Using Advanced Text Features
Unlocking the full potential of text in Sony Vegas involves exploring its advanced features. This section delves into the sophisticated options available, enabling you to create dynamic and visually appealing text elements in your videos.
- Exploring Text Effects: Beyond basic animations, Sony Vegas offers a variety of text effects such as shadows, outlines, glows, and textures. Access these by selecting your text event and exploring the \"Video FX\" or \"Event FX\" tab.
- Applying Motion Tracking: For text that needs to follow a moving object in your video, use the motion tracking feature. This requires selecting the video clip, accessing the \"Motion Tracking\" option, and attaching your text to the tracked object.
- Creating 3D Text: Sony Vegas Pro versions include tools for creating 3D text, which can add depth and sophistication to your projects. Find this feature in the text properties or through specific 3D plugins.
- Using Masks with Text: Masks can be used to reveal or hide text creatively. This technique involves creating a mask on a clip or image and then positioning the text to interact with the mask boundaries.
- Incorporating Text into Video FX: Combine text with video effects for unique visual styles. For example, apply a chroma key to your text to overlay it on various backgrounds seamlessly.
- Animating Text with Bezier Curves: For smooth, complex animations, utilize Bezier curves to animate text movement. This is especially useful for creating custom animation paths.
- Experimenting with Composite Modes: Text layers can be blended with video layers using composite modes. This feature allows for creative interactions between your text and video content.
By taking advantage of Sony Vegas\"s advanced text features, you can elevate your video content, making it more engaging and visually striking. Experimentation and creativity are key to mastering these tools and techniques.
READ MORE:
Exporting Your Project with Text Overlays
Finalizing and exporting your Sony Vegas project with text overlays is the last step in the video editing process. This section ensures your text remains crisp, clear, and correctly positioned in the exported video.
- Final Review: Before exporting, conduct a final review of your project. Ensure all text overlays are correctly timed, accurately positioned, and visually coherent with the video content.
- Check Text Visibility: Confirm that your text is easily readable against the background. Adjust text color, size, or add a drop shadow if necessary to improve visibility.
- Selecting Export Format: Go to \"File\" > \"Render As\" and choose the appropriate format for your video. Consider your target platform (YouTube, Vimeo, etc.) to select the best format and settings.
- Customizing Render Settings: In the \"Render As\" window, you can customize settings such as bit rate, frame rate, resolution, and aspect ratio. Higher quality settings will result in larger file sizes.
- Rendering with GPU Acceleration: If your version of Sony Vegas supports it, enable GPU acceleration to speed up the rendering process. Check the \"Render Options\" for a \"Use GPU if available\" checkbox.
- Exporting Your Video: After setting your preferences, click \"Render\" to start the export process. A progress bar will indicate how long it will take to render your project.
- Reviewing the Exported Video: Once rendering is complete, play the exported video to ensure that all text overlays appear as intended and there are no rendering errors.
Exporting your project with text overlays in Sony Vegas requires careful attention to detail to ensure that your final video meets your expectations. Following these steps will help you achieve a professional-looking result.
Mastering text addition in Sony Vegas enhances your videos, making them more engaging and professional. Embrace these tips to elevate your video editing skills and captivate your audience with visually stunning content.