Topic text sony vegas: Unlock the secrets of Sony Vegas with our comprehensive guide to creating stunning text effects that will transform your videos into captivating masterpieces. Start mastering text animations and effects today!
Table of Content
- How can I add text in Sony Vegas Pro?
- Getting Started with Text in Sony Vegas
- Understanding Text Generators: Titles & Text and Credit Roll
- Step-by-Step Guide to Adding Text to Your Videos
- Creative Text Animations and Effects
- Advanced Techniques: Overlaying Text on Videos
- YOUTUBE: The EASIEST Way To Make Smooth Gaming Subtitles For YouTube Videos
- Customizing Text: Fonts, Colors, and Styles
- Animating Text for Impactful Introductions and Outros
- Utilizing Text for Captions, Subtitles, and Lower Thirds
- Best Practices for Readable and Engaging Text
- Exploring Third-Party Text Plugins and Templates
- Common Problems and Solutions in Text Editing
- Maximizing Efficiency: Keyboard Shortcuts for Text Editing
How can I add text in Sony Vegas Pro?
To add text in Sony Vegas Pro, follow these steps:
- Open Sony Vegas Pro on your computer.
- Import the video or image file you want to add text to by clicking on File > Import > Media.
- Drag and drop the imported media file onto the timeline.
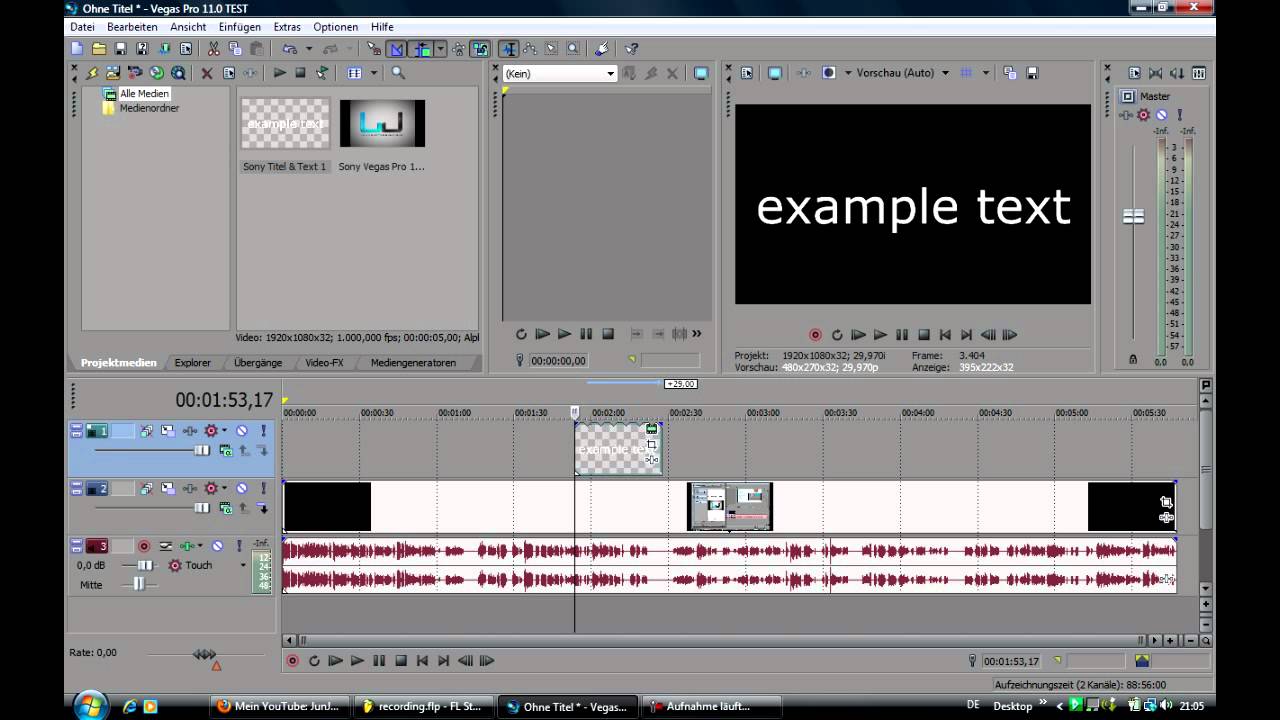
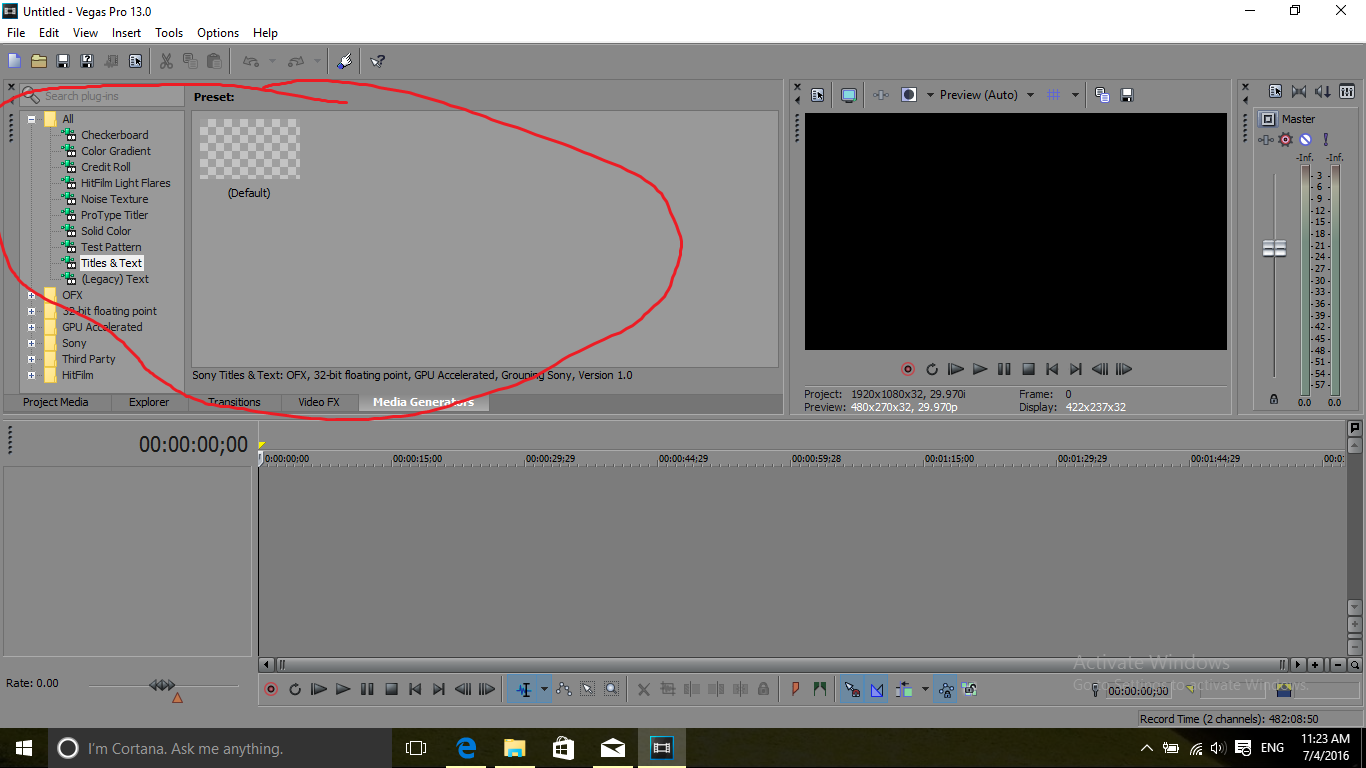
- Click on the Media Generators tab.
- Select the Text and Title option.
- A list of text effects will appear. Choose the desired effect, or select \"Default Text\" for a simple text box.
- Click and drag the effect onto the timeline, where you want the text to appear.
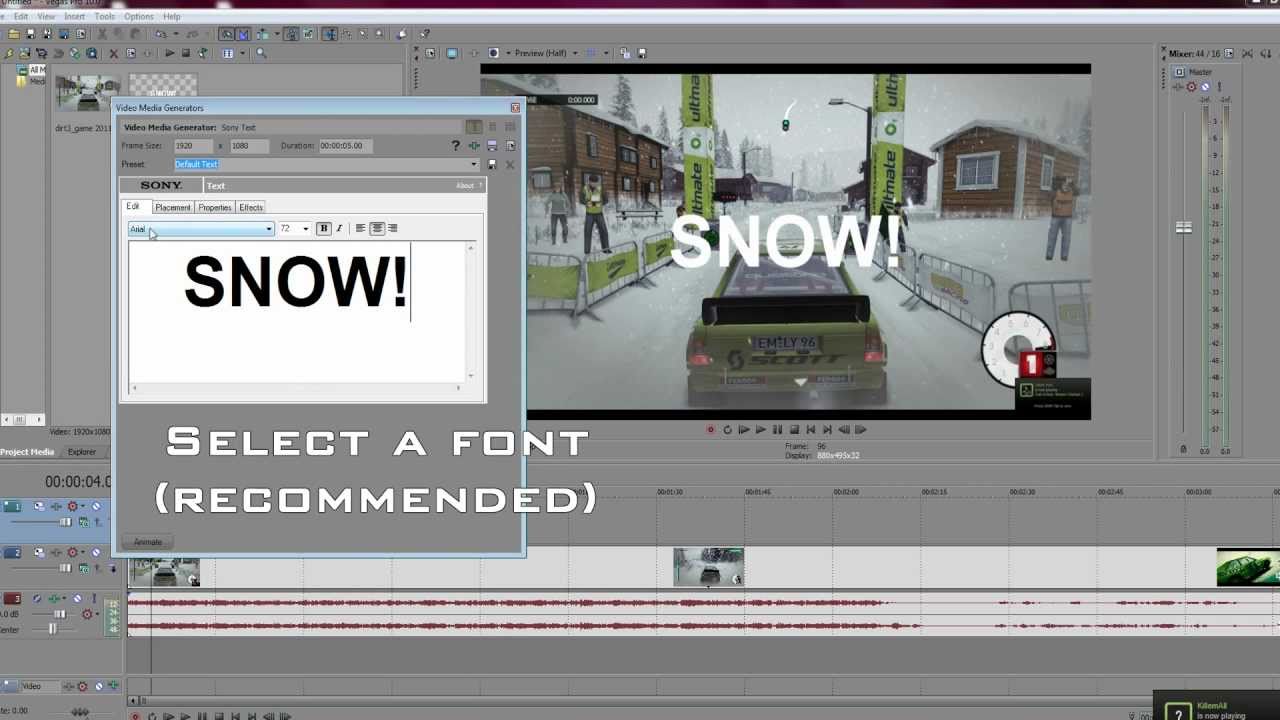
- Select the added text on the timeline and go to the Video Event FX tab.
- Adjust the text properties, such as font, color, size, and alignment, in the Video Event FX window.
- Preview the text by playing the timeline.
- Make any necessary adjustments or edits to the text effect.
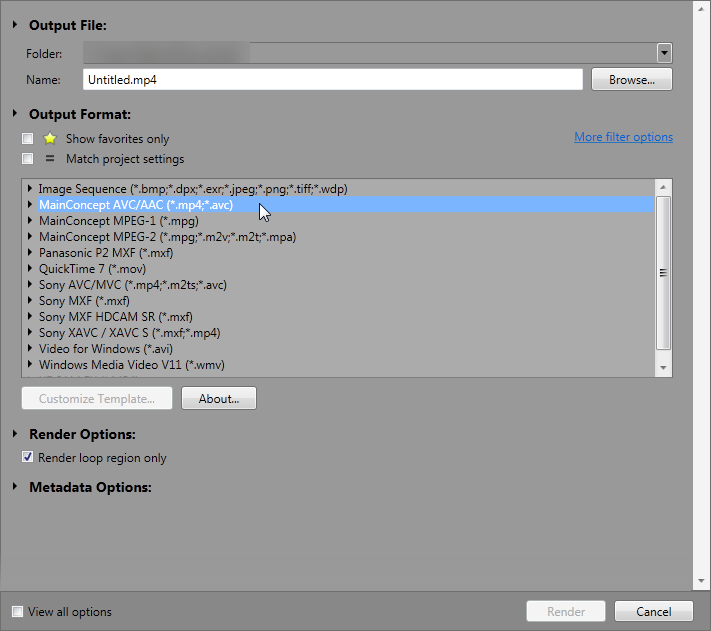
- Once you are satisfied with the text, you can export the video with the added text by clicking on File > Render As.
- Choose the desired output format and settings, then click on the Render button to save the video.
By following these steps, you will be able to add text to your videos using Sony Vegas Pro.
READ MORE:
Getting Started with Text in Sony Vegas
Starting with text in Sony Vegas is a straightforward process that opens up a world of creative possibilities for your video projects. Whether you\"re looking to add simple titles or dynamic text animations, Sony Vegas provides an intuitive interface and powerful tools to get the job done. Here\"s how to begin:
- Open Your Project: Launch Sony Vegas and open the project you wish to add text to by selecting \"File\" > \"Open\" or starting a new project with \"File\" > \"New\".
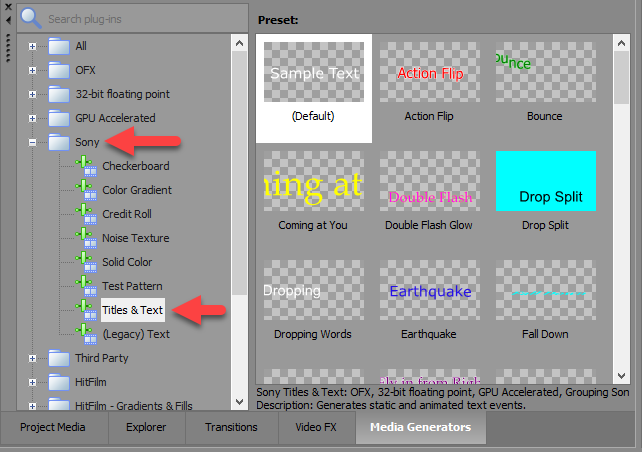
- Access the Media Generators Tab: Navigate to the \"Media Generators\" tab, which is typically found in the lower third of the screen on the right side. Here, you\"ll find a variety of text options including \"Titles & Text\" and \"Credit Roll\".
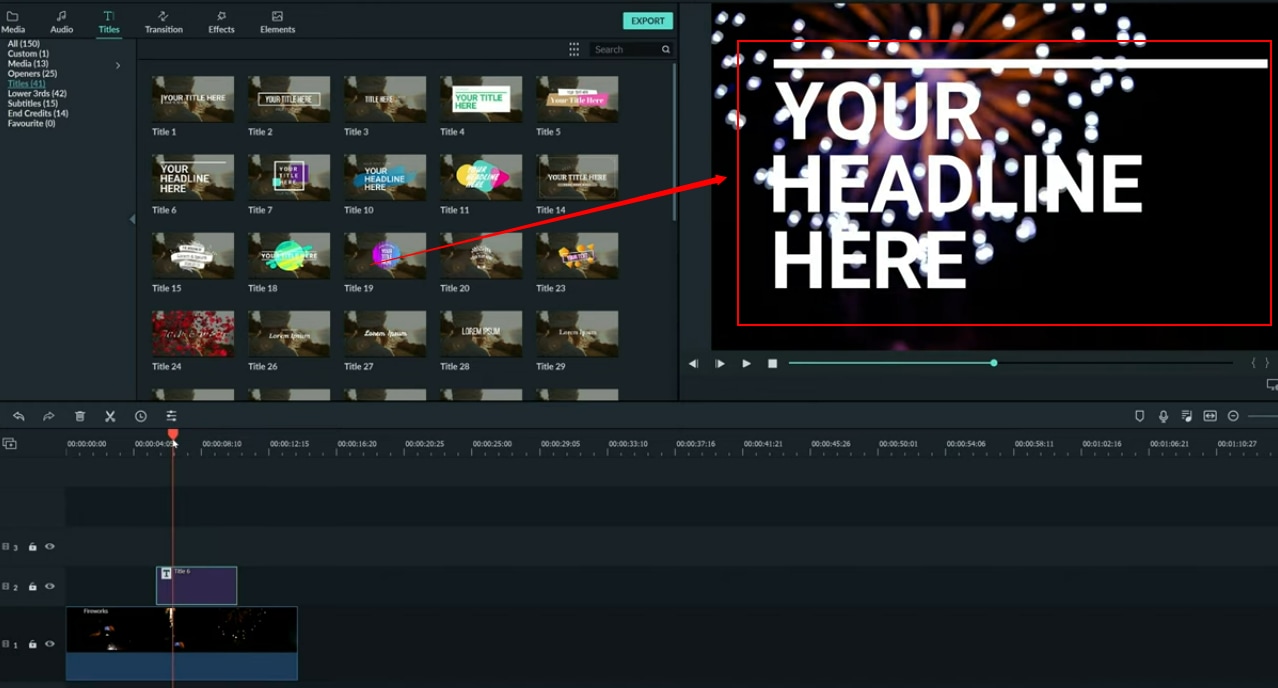
- Choose Your Text Type: Select either \"Titles & Text\" for most standard text needs or \"Credit Roll\" for creating scrolling credits. Drag your choice onto the timeline where you want your text to appear.
- Customize Your Text: After placing the text generator on the timeline, a window will pop up allowing you to enter and format your text. Here, you can choose fonts, sizes, colors, and more to match the style of your video.
- Preview Your Text: Use the preview window to see how your text will appear in the final video. You can make adjustments in real-time to ensure everything looks perfect.
- Animate Your Text: If you wish to add animations or effects, explore the \"Animations\" tab within the text editing window. Sony Vegas offers a range of presets that can make your text fly in, fade out, or animate in other engaging ways.
- Finalize and Render: Once you\"re happy with your text, make sure to save your project. Then, render your video to see the final product complete with your professional-looking text.
With these steps, you\"ll be well on your way to mastering text in Sony Vegas, enhancing your videos with everything from simple titles to complex animated text sequences.
Understanding Text Generators: Titles & Text and Credit Roll
Sony Vegas offers powerful tools for adding and customizing text in your video projects, namely the \"Titles & Text\" and \"Credit Roll\" text generators. These generators are designed to cater to different text-related needs in a project, from simple titles to complex scrolling credits. Here’s a breakdown of each and how to effectively use them:
- Titles & Text: This generator is your go-to for most text needs. It offers a straightforward way to add titles, captions, and other text elements to your videos. You can easily customize the font, size, color, and position of your text, as well as apply animations and effects to make your text stand out.
- Credit Roll: When you need to create scrolling credits for your project, the Credit Roll generator is the tool for the job. It allows you to input a list of names and titles, then automatically animates them into a smooth scrolling format. This is ideal for the end credits of a movie or video.
To use these generators effectively, follow these general steps:
- Navigate to the Media Generators tab in Sony Vegas.
- Select either \"Titles & Text\" or \"Credit Roll\" depending on your needs.
- Drag the chosen generator onto your timeline where you want the text to appear.
- Customize your text using the editor window that pops up, where you can modify text properties such as font, color, and size, as well as apply animations or scrolling effects.
- Preview your text within the video to ensure it looks as expected.
Understanding and mastering these text generators will significantly enhance the professionalism and appeal of your video projects, allowing you to create everything from simple title cards to comprehensive credit sequences with ease.

Step-by-Step Guide to Adding Text to Your Videos
Adding text to your videos in Sony Vegas is an essential skill for creating impactful and professional-looking content. Follow this step-by-step guide to seamlessly integrate text into your projects:
- Launch Sony Vegas: Start by opening your video project in Sony Vegas. If you haven\"t created a project yet, go to \"File\" > \"New\" to start a new one.
- Import Your Video: If your video isn\"t already in the project, import it by going to \"File\" > \"Import\" > \"Media\" and selecting your video file.
- Access the Media Generators Tab: Click on the \"Media Generators\" tab, usually located in the lower part of the interface. This tab contains various tools for adding text and other elements to your video.
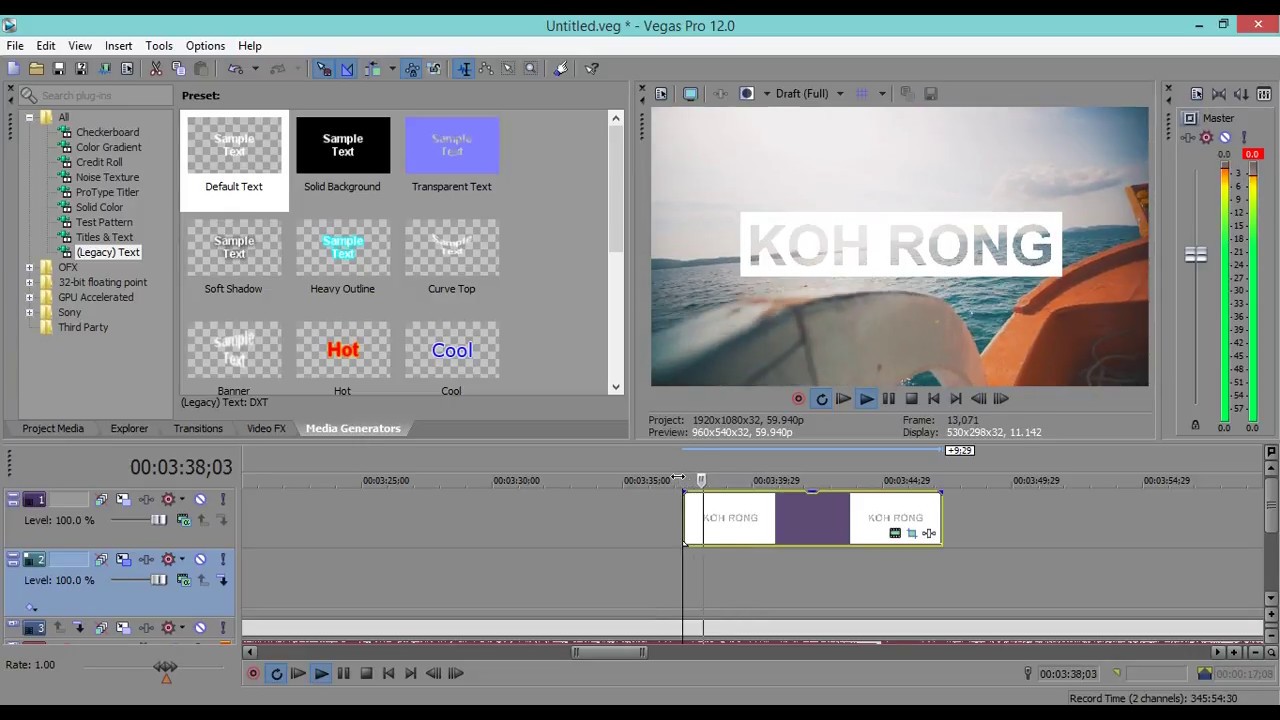
- Select a Text Generator: Within the \"Media Generators\" tab, find the \"Titles & Text\" or \"Credit Roll\" option, depending on what type of text you want to add. \"Titles & Text\" is suitable for most text elements, while \"Credit Roll\" is designed for scrolling credits at the end of your video.
- Drag and Drop: Drag your chosen text generator onto the timeline where you want your text to appear in the video. You can place it above the video track for overlay text.
- Edit Your Text: Once placed on the timeline, a window will pop up allowing you to enter your text and customize its appearance. Here, you can adjust the font, size, color, alignment, and more. You can also add animations or effects to make your text more dynamic.
- Preview Your Work: Use the preview window to review how your text looks in the video. Make any necessary adjustments to ensure the text is clear and well-integrated into the scene.
- Render Your Video: After finalizing your text, save your project and render the video to create the final output. Go to \"File\" > \"Render As\" and choose your desired format and settings.
By following these steps, you can add professional and engaging text to your videos, enhancing their overall impact and viewer engagement.

Creative Text Animations and Effects
Enhancing your videos with creative text animations and effects in Sony Vegas can significantly impact your audience engagement and message delivery. Sony Vegas offers a wide range of tools to create dynamic and eye-catching text features. Here’s how you can leverage these capabilities:
- Open the Titles & Text or Credit Roll: Start by selecting either the \"Titles & Text\" or \"Credit Roll\" from the Media Generators tab, depending on the type of text animation you want to create.
- Explore Presets: Sony Vegas comes with a variety of presets for text animations. These can be found in the properties window of your selected text generator. Presets range from simple animations like fades and fly-ins to more complex movements and effects.
- Customize Animations: For more control over your text animations, you can manually adjust keyframes in the timeline. This allows you to fine-tune the timing, speed, and progression of your text effects.
- Add Effects: Beyond animation, you can also add effects to your text. This includes shadow, outline, glow, and more. These effects can enhance readability and visual appeal.
- Use Motion Tracking: For advanced animations, consider using motion tracking to attach your text to moving objects within your video. This creates a dynamic and interactive element that can make your content stand out.
- Experiment with Composite Modes: Composite modes can be used to blend your text creatively with the video. This is especially useful for creating unique backgrounds or overlay effects.
- Render and Review: After applying your desired animations and effects, render a preview of your video to ensure the text animations align with your overall vision. Adjust as necessary until you achieve the desired outcome.
By following these steps and experimenting with the various tools Sony Vegas offers, you can create captivating text animations and effects that will elevate the quality of your video projects.
_HOOK_
Advanced Techniques: Overlaying Text on Videos
Overlaying text on your videos in Sony Vegas not only enhances your message but also adds a layer of professionalism to your content. This technique is crucial for titles, captions, and any informative text you want to appear over your footage. Here\"s how to master the art of overlaying text:
- Choose Your Text Tool: Start by selecting the \"Titles & Text\" or \"Credit Roll\" option from the Media Generators tab, depending on the nature of your text overlay.
- Drag to Timeline: Once you\"ve chosen your tool, drag it onto the timeline above the video track where you want your text to appear. This creates a new text layer over your video.
- Customize Your Text: Double-click the text event on the timeline to open the text editor. Here, you can type your message and customize the font, size, color, and positioning of your text to fit your video perfectly.
- Adjust Transparency: If you want your video to show through the text, adjust the transparency settings in the text editor. This can create a more integrated look between your text and the footage.
- Animate Your Text: To make your text overlay even more engaging, consider adding animations. Use keyframes within the text event to animate the text\"s entrance, exit, or movement across the screen.
- Apply Effects: Sony Vegas offers a range of effects that can be applied to text, such as shadows, outlines, and glows, to enhance readability and visual appeal.
- Preview and Adjust: Always preview your video with the text overlay to ensure it looks as intended. Adjust timing, positioning, and effects as needed to achieve the perfect overlay effect.
- Render Your Video: Once satisfied with the text overlay, render your video to finalize the effect. Ensure your render settings are appropriate for your project\"s resolution and format requirements.
By following these steps, you can effectively overlay text on your videos, adding depth and clarity to your content. Whether for artistic titles, informative captions, or engaging animations, mastering text overlay in Sony Vegas opens up a world of creative possibilities.
The EASIEST Way To Make Smooth Gaming Subtitles For YouTube Videos
If you are tired of straining your eyes to understand those foreign movies, this video on subtitles is a must-watch! Discover how to effortlessly add subtitles to any video and enhance your movie-watching experience like never before.
VEGAS Pro: How To Add Text To Your Video - Tutorial 554
Become a pro in no time with this informative tutorial video! Learn step-by-step how to master the art of photo editing, and watch your images transform from ordinary to extraordinary. Don\'t miss out on improving your photography skills!
Customizing Text: Fonts, Colors, and Styles
Customizing text in Sony Vegas allows you to match your video\"s aesthetic and enhance your message\"s clarity and impact. Whether you\"re working on titles, captions, or any text overlay, Sony Vegas provides extensive options for font, color, and style customization. Follow these steps to customize your text:
- Select Your Text Tool: Begin by choosing the \"Titles & Text\" or \"Credit Roll\" from the Media Generators tab, based on your project needs.
- Add Text to Timeline: Drag your chosen text tool to the appropriate place on your timeline. This action opens the text customization window.
- Customize Font: Within the text customization window, you\"ll find options to change the font type. Sony Vegas offers a wide range of fonts to choose from, allowing you to find the perfect match for your video\"s tone and style.
- Adjust Font Size and Color: Easily modify the size and color of your text using the provided tools. This flexibility helps ensure your text is both readable and visually complementary to your video.
- Apply Styles and Effects: Beyond basic customization, you can apply styles such as bold or italic and effects like shadows or outlines. These features can help your text stand out or blend seamlessly with your video, depending on your desired outcome.
- Experiment with Animations: For dynamic text, explore the animation presets available in Sony Vegas. Animations can make your text more engaging and are ideal for introductions, transitions, and emphasis.
- Preview and Adjust: Always preview your text within the video to ensure it looks as intended. Make any necessary adjustments to the font, color, size, or style to achieve the optimal look.
By customizing your text using Sony Vegas\" powerful tools, you can significantly enhance your video\"s effectiveness and viewer engagement. Experiment with different fonts, colors, and styles to discover what works best for your content.
Animating Text for Impactful Introductions and Outros
Animating text for your video\"s introductions and outros can significantly enhance the viewer\"s experience, providing a memorable start and finish to your content. Sony Vegas offers a range of tools and techniques to create these animations, ensuring your videos stand out. Here’s how to create impactful animated text:
- Open Your Project: Start by opening your video project in Sony Vegas. Ensure you\"re in a comfortable workspace and have your video timeline ready for text addition.
- Select Text Tool: Navigate to the \"Media Generators\" tab and choose \"Titles & Text\" for most introductions and outros. This option allows for a high degree of customization and animation.
- Insert Text: Drag the \"Titles & Text\" option to the timeline at the point where you want your intro or outro text to appear.
- Customize Your Text: Double-click the text event on the timeline to open the text editor. Here, you can write your message and customize the font, size, and style to match the theme of your video.
- Apply Animations: In the text editor, explore the animation options available. You can choose from presets that make your text fly in, fade in, or animate in other engaging ways. For more control, keyframe animations manually to create custom movements.
- Add Effects: Enhance your text animation with effects such as shadows, glows, or outlines to ensure your text is readable and stands out against the background.
- Preview Your Animation: Regularly preview your animation within the video to ensure it aligns with your vision. Adjust the timing, speed, and effects as necessary to achieve the desired impact.
- Finalize and Render: Once you are satisfied with your animated text, save your project and render the video to see the final outcome. Ensure the animation seamlessly integrates with the rest of your content.
By carefully crafting the animations for your video\"s introductions and outros, you create a strong first and last impression, encouraging viewers to watch through your content and remember it long after it ends.
Utilizing Text for Captions, Subtitles, and Lower Thirds
Adding captions, subtitles, and lower thirds to your videos in Sony Vegas not only enhances accessibility but also adds a professional touch, offering viewers essential information without interrupting the viewing experience. Here’s how to effectively utilize text for these purposes:
- Open Your Project: Start by opening your video project in Sony Vegas. Ensure you have the video track where you want to add text ready on the timeline.
- Choose the Text Tool: Go to the \"Media Generators\" tab and select \"Titles & Text\" for creating captions, subtitles, and lower thirds. This tool provides the flexibility needed for text customization.
- Add Text to the Timeline: Drag the \"Titles & Text\" generator to the timeline, positioning it above the video track where you want the text to appear.
- Customize Your Text: Double-click the text event to open the editing window, where you can type your text and customize its appearance. Use a legible font and size to ensure readability across all devices.
- For Captions and Subtitles: Adjust the timing of each text event to match the spoken dialogue or on-screen action. Captions should include sound cues (e.g., [music] or [laughter]) for the hearing impaired.
- Creating Lower Thirds: Lower thirds are used to introduce speakers or emphasize information. Place them in the lower third of the screen, using minimal text to convey the message without distracting from the video.
- Apply Effects Sparingly: While you can add effects to your text, it\"s important to keep captions and subtitles clear and easy to read. Use effects like shadows or outlines to enhance legibility against varying backgrounds.
- Preview and Adjust: Regularly preview your video to ensure that all text elements are correctly timed, placed, and easy to read. Make adjustments as needed to ensure the best viewer experience.
By following these steps, you can effectively use text to add captions, subtitles, and lower thirds to your videos, making them more accessible and informative for your audience.
Best Practices for Readable and Engaging Text
To ensure your text in Sony Vegas not only captures attention but also conveys your message clearly, it\"s crucial to adhere to best practices for text readability and engagement. Here are essential tips to elevate your text content:
- Choose the Right Font: Select fonts that are easy to read and appropriate for your video\"s tone. Avoid overly decorative fonts for large blocks of text, opting instead for clear, legible typefaces.
- Contrast is Key: Ensure your text stands out against the background. Use contrasting colors for text and background to enhance readability. If necessary, add a background box or shadow to the text for better visibility.
- Size Matters: Text size should be large enough to be easily read on any device, from a smartphone to a television screen. Avoid crowding the screen with text; keep it concise and to the point.
- Keep It Simple: When it comes to text animations and effects, less is often more. Use animations to enhance your message, not distract from it. Simple, clean animations are usually most effective.
- Timing and Duration: Text on screen should be timed to match the pace of the video and remain on screen long enough to be comfortably read. Consider the average reading speed and adjust accordingly.
- Consistency: Maintain consistency in your text presentation throughout the video. Use the same or complementary fonts, colors, and sizes to create a cohesive look and feel.
- Proofread: Typos and grammatical errors can undermine your video\"s professionalism. Always double-check your text for errors before finalizing your project.
By following these best practices, you can create text elements in your Sony Vegas projects that are not only readable and engaging but also enhance the overall impact of your video content.

_HOOK_
Exploring Third-Party Text Plugins and Templates
While Sony Vegas provides a robust set of tools for text creation and animation, exploring third-party plugins and templates can elevate your videos with new styles, effects, and functionalities. Here’s how to get started with third-party text resources:
- Research Available Plugins: Start by researching plugins that are compatible with Sony Vegas. Look for plugins that offer unique text animations, effects, or improved functionality over the built-in tools.
- Consider Your Needs: Identify what you need from a plugin or template. Are you looking for more dynamic animations, 3D text effects, or templates that simplify the creation process? Knowing your needs will help narrow down the options.
- Check Compatibility: Ensure that the plugins or templates you are interested in are compatible with your version of Sony Vegas. Compatibility is key to a smooth integration.
- Read Reviews and Watch Demos: Before downloading or purchasing, read user reviews and watch demo videos to see the plugin or template in action. This can help you gauge the quality and usability of the product.
- Download from Reputable Sources: Only download plugins and templates from reputable sources to avoid issues with software compatibility or security. Official plugin stores or well-known marketplaces are generally the safest options.
- Install and Test: After downloading, follow the installation instructions carefully. Once installed, test the plugin or template to ensure it works as expected and integrates well with your workflow.
- Experiment with New Features: Take the time to experiment with the new features and capabilities of your third-party text plugins and templates. Understanding their full potential can inspire creative uses in your projects.
By incorporating third-party text plugins and templates into your Sony Vegas projects, you can unlock new creative possibilities, streamline your workflow, and achieve professional-looking text effects with ease.
Common Problems and Solutions in Text Editing
Editing text in Sony Vegas can occasionally present challenges, especially for new users. Understanding common problems and their solutions can help streamline your editing process, ensuring smoother project completion. Here are some frequently encountered issues and how to resolve them:
- Text Not Displaying Correctly: If your text appears distorted or not as expected, check the preview quality settings in Sony Vegas. Higher quality settings provide a more accurate representation of how text will appear in the final video.
- Difficulty Aligning Text: For precise text alignment, use the \"Position\" controls within the text editing window. Grids and guides can also assist in aligning text accurately within the video frame.
- Text Animation Issues: If animations are not playing smoothly, ensure your project\"s frame rate matches the intended output format. Adjusting keyframe interpolation can also smooth out animations.
- Problems with Font Rendering: Ensure the fonts used in your project are installed correctly on your system. Some fonts may not be fully compatible with Sony Vegas, so testing different fonts or reinstalling the problematic font may resolve issues.
- Inconsistent Text Appearance: To maintain consistency in text appearance across multiple text events, use the \"Copy\" and \"Paste Event Attributes\" feature to replicate font, color, and size settings.
- Issues with Text Legibility: If text is hard to read against the background, add a contrasting outline or shadow to the text, or consider placing a semi-transparent background behind the text to enhance visibility.
- Exporting Problems: When rendered videos do not display text as seen in the preview, check the render settings to ensure they match your project settings. Exporting in a different format may also resolve rendering discrepancies.
By addressing these common issues with the suggested solutions, you can improve your text editing workflow in Sony Vegas, leading to more polished and professional-looking video projects.
READ MORE:
Maximizing Efficiency: Keyboard Shortcuts for Text Editing
Keyboard shortcuts in Sony Vegas are essential for speeding up the text editing process, allowing for quick adjustments without breaking your creative flow. Here are some key shortcuts to enhance your text editing efficiency:
- Undo/Redo: Ctrl + Z to undo an action, Ctrl + Shift + Z or Ctrl + Y to redo an action. These are invaluable for quickly correcting mistakes.
- Copy/Paste: Ctrl + C to copy selected text, Ctrl + V to paste. Useful for reusing text elements across your project.
- Cut: Ctrl + X to cut selected text. This is handy for moving text without having to delete and retype it.
- Select All: Ctrl + A to select all text within a field. This shortcut saves time when you need to quickly select all text for editing or formatting.
- Grouping/Ungrouping: Ctrl + G to group selected events, Ctrl + Shift + G to ungroup. Grouping text with video or other elements can streamline edits.
- Save Project: Ctrl + S to save your project. Regularly saving your work prevents loss of data.
- Open Project: Ctrl + O to open an existing project. Quick access to your projects enhances workflow efficiency.
- Render As: Ctrl + M opens the Render As dialog, enabling you to export your finished project with the edited text.
Integrating these keyboard shortcuts into your editing routine can significantly speed up your workflow and make text editing in Sony Vegas a more efficient and enjoyable process.
Mastering text in Sony Vegas unlocks a world of creativity for your videos, from captivating animations to professional captions. Embrace these techniques and tools to elevate your content, ensuring your messages resonate with audiences vividly and effectively.