Topic freeze frame sony vegas: Unlock the power of Sony Vegas to create captivating freeze frames that enhance your video projects, turning ordinary moments into unforgettable visuals with ease.
Table of Content
- How to create a freeze frame in Sony Vegas Pro?
- Understanding Freeze Frame in Sony Vegas
- Step-by-Step Guide to Creating a Freeze Frame
- Automatically Create Freeze Frames
- Manual Freeze Frame Techniques
- Adjusting the Duration of a Freeze Frame
- YOUTUBE: How to Freeze Frame Video in Vegas Pro 15 (2018)
- Adding Effects to Freeze Frames
- Common Uses of Freeze Frames in Editing
- Troubleshooting Freeze Frame Issues
- Advanced Freeze Frame Tips and Tricks
- Freeze Frame Inspiration: Creative Ideas from Professionals
How to create a freeze frame in Sony Vegas Pro?
To create a freeze frame in Sony Vegas Pro, you can follow these steps:
- Select the video event on the timeline where you want to create the freeze frame.
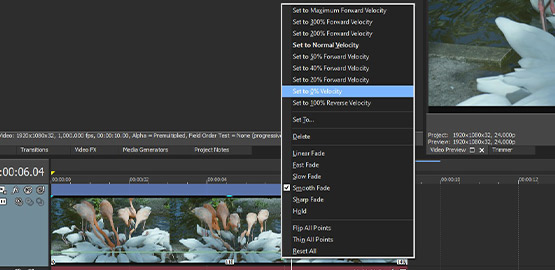
- Right-click on the video event and choose \"Insert/Remove Envelope\" from the dropdown menu.
- A submenu will appear, click on \"Velocity\" to add a velocity envelope to the event.
- Move the cursor to the exact frame where you want the freeze frame to start.
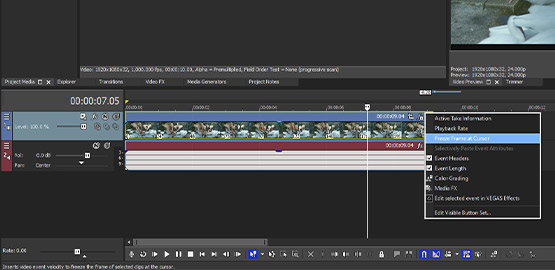
- Right-click on the envelope line at the cursor position and select \"Insert a Velocity Point\" from the menu.
- Now, move the cursor to the frame where you want the freeze frame to end.
- Right-click on the envelope line at the new cursor position and select \"Insert a Velocity Point\" again.
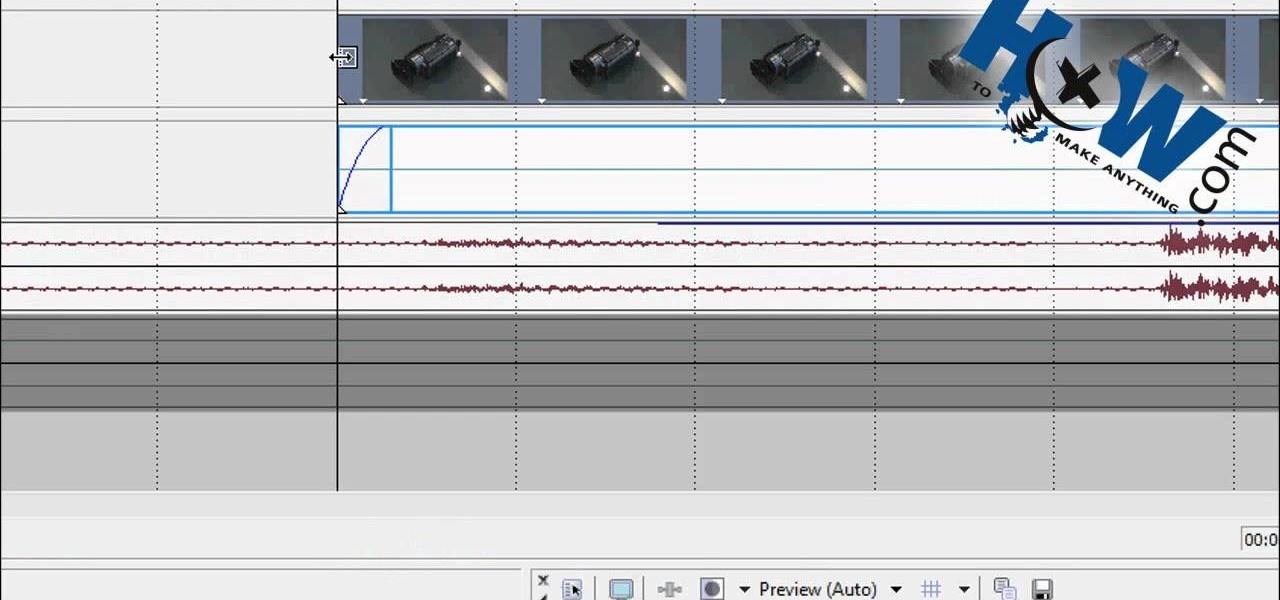
- Your freeze frame is created. You can adjust the duration of the freeze frame by dragging the velocity points on the envelope line.
READ MORE:
Understanding Freeze Frame in Sony Vegas
Freeze framing in Sony Vegas is a powerful technique that allows editors to pause the action at a specific moment, creating a still frame within a video sequence. This feature can highlight key moments, create dramatic effects, or allow for narrative pauses in storytelling.
- What is a Freeze Frame?: A freeze frame is a single frame from a video that is extended to linger on the screen for a desired duration, effectively \"freezing\" the action.
- How Sony Vegas Handles Freeze Frames: Sony Vegas provides tools to easily create freeze frames by selecting a specific frame in your timeline and extending its display time without affecting the rest of the video.
Creating a freeze frame involves choosing the right moment in your footage, making a precise cut, and then using the software\"s tools to extend the duration of the selected frame. With practice, this technique can be mastered to add a professional touch to your projects.
- Identify the frame: Scrub through your timeline to find the perfect moment for a freeze frame.
- Create the freeze frame: Use the split tool to isolate the frame, then extend its duration as needed.
- Adjust and refine: Fine-tune the duration and placement of your freeze frame for the desired effect.
Understanding and mastering the freeze frame function in Sony Vegas opens up creative possibilities, allowing editors to emphasize moments, create suspense, or simply add a unique visual element to their videos.

Step-by-Step Guide to Creating a Freeze Frame
Creating a freeze frame in Sony Vegas is a straightforward process that can greatly enhance your video projects. Follow these detailed steps to successfully implement this effect:
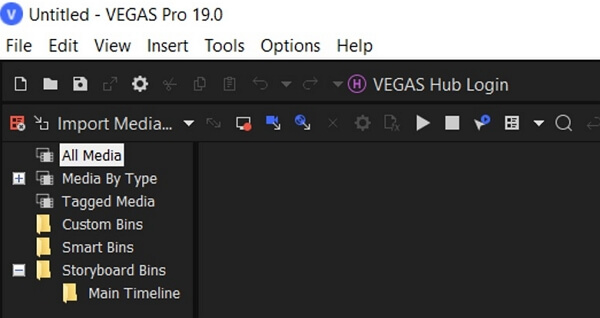
- Open Your Project: Start by opening your video project in Sony Vegas.
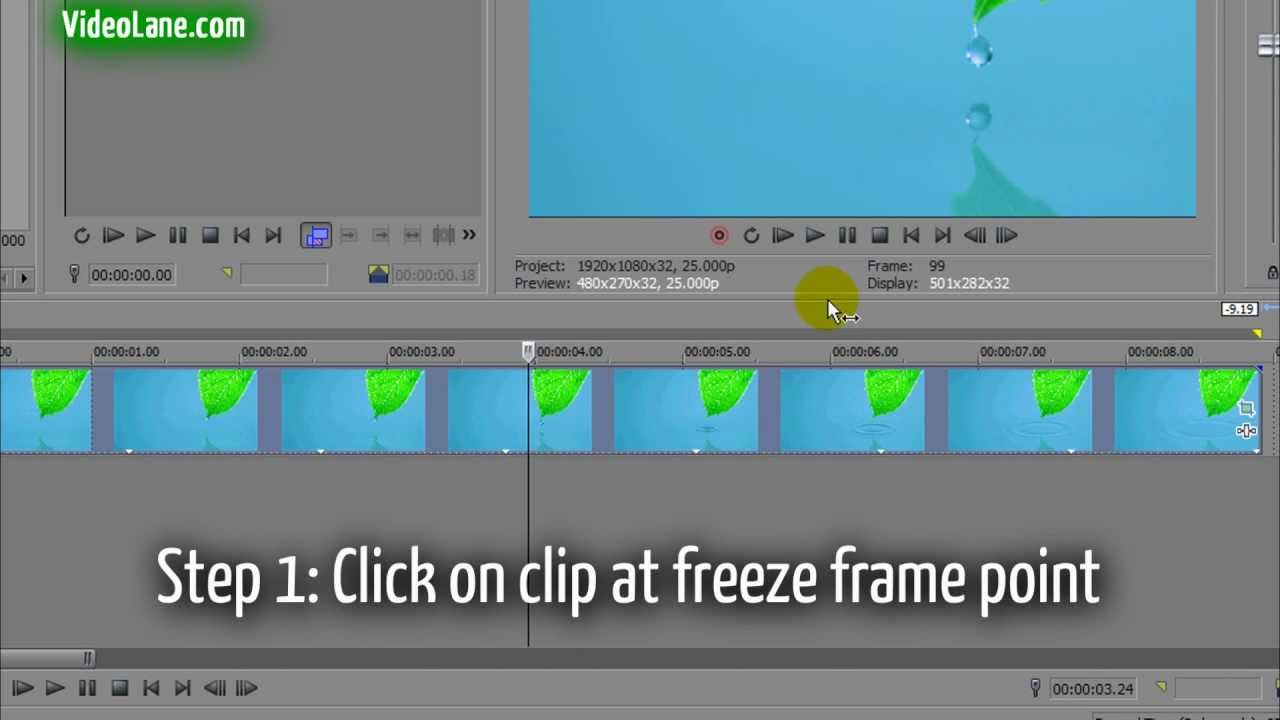
- Find the Desired Frame: Scrub through your video on the timeline to locate the exact frame you want to freeze.
- Split the Clip: Once you\"ve found the frame, split the clip at this point. You can use the \"S\" shortcut on your keyboard for a quick split.
- Insert a Freeze Frame: Right-click on the clip immediately following the split and select \"Insert Freeze Frame\" from the context menu.
- Adjust Duration: Sony Vegas will automatically add a still image of the frame. You can adjust the duration of this still image by dragging its edges on the timeline.
- Apply and Preview: After adjusting the duration, preview your video to ensure the freeze frame integrates seamlessly with your footage.
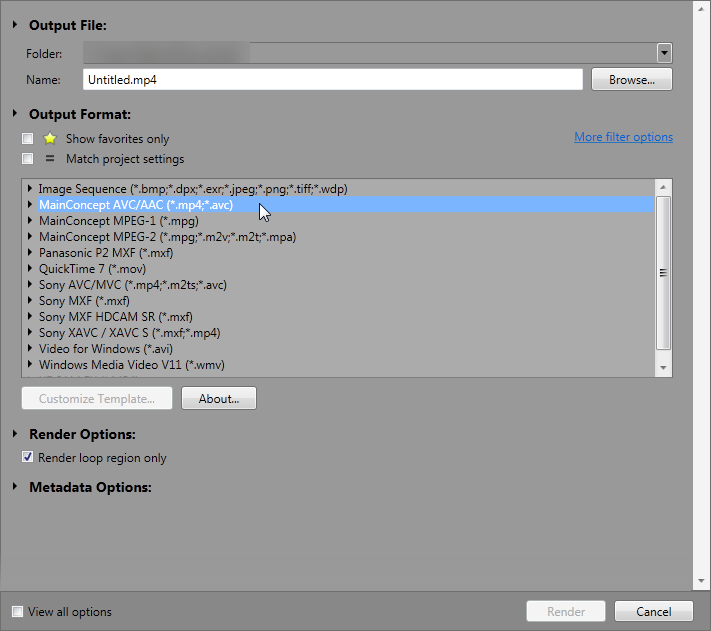
- Finalize Your Edit: Once satisfied, proceed with any additional edits and then render your project to finalize the addition of your freeze frame.
This step-by-step guide should help you effectively incorporate freeze frames into your videos using Sony Vegas, adding depth and interest to your projects.
Automatically Create Freeze Frames
In Sony Vegas, creating freeze frames can also be automated, simplifying the process and saving time for editors. This method uses the built-in features of Sony Vegas to generate a freeze frame without manual editing of the frame duration.
- Select Your Clip: Begin by selecting the clip in your timeline where you want the freeze frame to appear.
- Choose the Frame: Play the clip and pause at the exact moment you wish to freeze. This will be your freeze frame.
- Use the Freeze Frame Option: Right-click on the clip at the chosen frame and find the \"Add Freeze Frame\" or similar option in the context menu. Sony Vegas versions may vary, so the exact wording can differ.
- Automatic Insertion: Upon selection, Sony Vegas automatically inserts a freeze frame at the chosen point. The software duplicates the frame and extends it for a default duration, typically a few seconds, creating a still image within your video.
- Adjust as Needed: You can then adjust the duration of the freeze frame if necessary by dragging its edges in the timeline.
This automated feature is perfect for quickly adding emphasis or pausing on significant moments without the need for extensive manual editing.
Manual Freeze Frame Techniques
For editors seeking more control over their freeze frames in Sony Vegas, manual techniques offer flexibility and precision. These methods allow for custom durations, unique transitions, and personalized effects on your freeze frames.
- Choose Your Frame: Navigate through your video on the timeline to locate the exact frame you wish to freeze.
- Create a Snapshot: Once you\"ve identified the frame, pause the video and use the \"Take Snapshot\" feature. This action captures the frame as a still image, saving it to your project media.
- Import the Snapshot: Drag the snapshot from your project media onto the timeline, placing it at the desired location for your freeze frame.
- Adjust the Duration: Click and drag the edges of the still image on the timeline to extend or shorten its duration, according to your needs.
- Apply Transitions: To smoothly integrate the freeze frame with the video, consider adding transitions before and after the still image. Sony Vegas provides a variety of transition effects for a seamless look.
- Enhance with Effects: For added impact, apply video effects to your freeze frame. You can adjust brightness, contrast, or add artistic filters directly from the Video FX tab.
This manual approach to creating freeze frames in Sony Vegas not only enhances the visual appeal of your projects but also gives you complete creative control over every aspect of the freeze frame effect.

_HOOK_
Adjusting the Duration of a Freeze Frame
Adjusting the duration of a freeze frame in Sony Vegas is an essential step in tailoring the impact of your still moment within a video. This flexibility allows for perfect timing and integration with the narrative flow of your project.
- Select the Freeze Frame: Click on the freeze frame on your timeline. This can be an automatically created freeze frame or a manually inserted still image.
- Open the Event Pan/Crop Window: Right-click on the freeze frame and select \"Event Pan/Crop.\" This window allows for precise control over the frame\"s display duration.
- Adjust Duration: At the bottom of the Event Pan/Crop window, you\"ll find the timeline for the freeze frame. Drag the end of the freeze frame event to extend or shorten its duration. The preview window will show the frame for the entire duration you set.
- Use the Velocity Envelope: For more advanced adjustments, right-click on the clip and select \"Insert/Remove Envelope\" > \"Velocity.\" You can then adjust the playback speed of the clip to effectively alter the duration of the freeze frame.
- Preview Your Adjustments: Always preview your adjustments to ensure the freeze frame fits seamlessly into your video, with the desired impact and timing.
By fine-tuning the duration of your freeze frames, you can create a more engaging and dynamic video project that captures the viewer\"s attention at critical moments.

How to Freeze Frame Video in Vegas Pro 15 (2018)
Freeze Frame: Experience the excitement of Freeze Frame in this incredible video! Explore captivating moments frozen in time, creating stunning visuals that will leave you in awe. Don\'t miss out on this mesmerizing display!
How to Freeze Frame or Pause Video in Vegas Movie Studio Platinum 16
Vegas Movie Studio Platinum: Elevate your video editing skills with Vegas Movie Studio Platinum! Unleash your creativity and produce professional-looking movies with ease. Learn the secrets of Hollywood-style editing and take your projects to the next level. Watch this video now and embark on a journey of cinematic excellence!
Adding Effects to Freeze Frames
Enhancing freeze frames with effects in Sony Vegas can dramatically increase their visual appeal and impact. By applying effects, you can transform a simple still image into a compelling part of your video narrative.
- Select Your Freeze Frame: Click on the freeze frame in your timeline that you wish to enhance.
- Access Video Effects: Navigate to the \"Video FX\" tab in Sony Vegas. Here, you\"ll find a wide range of effects that can be applied to your freeze frame.
- Choose an Effect: Browse through the available effects. Consider using color correction to make your freeze frame stand out, or add a stylized look with filters like \"Black and White\" or \"Film Effects\".
- Drag and Drop the Effect: Once you\"ve selected an effect, drag it onto the freeze frame clip in your timeline. This will open the effect\"s settings window.
- Customize the Effect: Adjust the effect\"s parameters to suit your vision. Each effect has customizable settings that allow for precise control over its appearance on the freeze frame.
- Preview the Result: After applying and adjusting the effect, preview your video to ensure the freeze frame integrates smoothly and enhances the overall project.
Adding effects to freeze frames not only draws attention to these moments but also allows for creative expression in your video editing projects. With Sony Vegas, the possibilities are endless.
Common Uses of Freeze Frames in Editing
Freeze frames are a versatile tool in video editing, used to enhance storytelling, highlight important moments, or add a creative flair to projects. Here are some of the most common uses of freeze frames in editing:
- Emphasizing Key Moments: Freeze frames can draw attention to significant moments, making them stand out in the narrative. This is particularly effective in sports highlights, dramatic scenes, or crucial plot points in storytelling.
- Creative Transitions: Editors often use freeze frames to create stylish transitions between scenes. By freezing the last frame of one scene and the first frame of the next, you can create a seamless yet visually interesting transition.
- Thematic Montages: In montages or sequences that convey the passage of time, freeze frames can punctuate different stages or moments, adding a rhythmic visual element to the sequence.
- Title Screens and Introductions: Freeze frames are perfect for creating title screens or introduction sequences, where text overlays can be added to introduce characters, locations, or chapters in a narrative.
- Comic Effect: For a humorous effect, freeze frames can be used to exaggerate facial expressions, actions, or moments, often accompanied by a caption or sound effect for added comedy.
- Educational and Instructional Videos: In tutorials or instructional videos, freeze frames can highlight important information or steps, allowing the viewer to focus on specific details or instructions.
These applications showcase the flexibility of freeze frames in video editing, offering editors a wide range of creative possibilities to explore in Sony Vegas.

Troubleshooting Freeze Frame Issues
Encountering issues while creating freeze frames in Sony Vegas can be frustrating, but many common problems can be resolved with a few troubleshooting steps. Here\"s how to address some typical challenges:
- Freeze Frame Not Displaying Correctly: Ensure you\"ve correctly selected the frame and applied the freeze frame effect. If the issue persists, check the project settings for any mismatch in frame rate or resolution that might affect playback.
- Unable to Adjust Freeze Frame Duration: If you\"re having trouble adjusting the duration of a freeze frame, make sure you are not in a locked track. Also, verify that you\"re dragging the correct edge of the clip to extend or shorten its duration.
- Quality Loss in Freeze Frame: Quality issues often arise from using a low-resolution video clip. Always use the highest quality source material. Additionally, double-check the snapshot settings to ensure they match your project\"s resolution.
- Freeze Frame Effect Not Applying: This can occur if the video clip is still being processed or if there\"s an error with the software. Try restarting Sony Vegas or re-importing the video clip to resolve this issue.
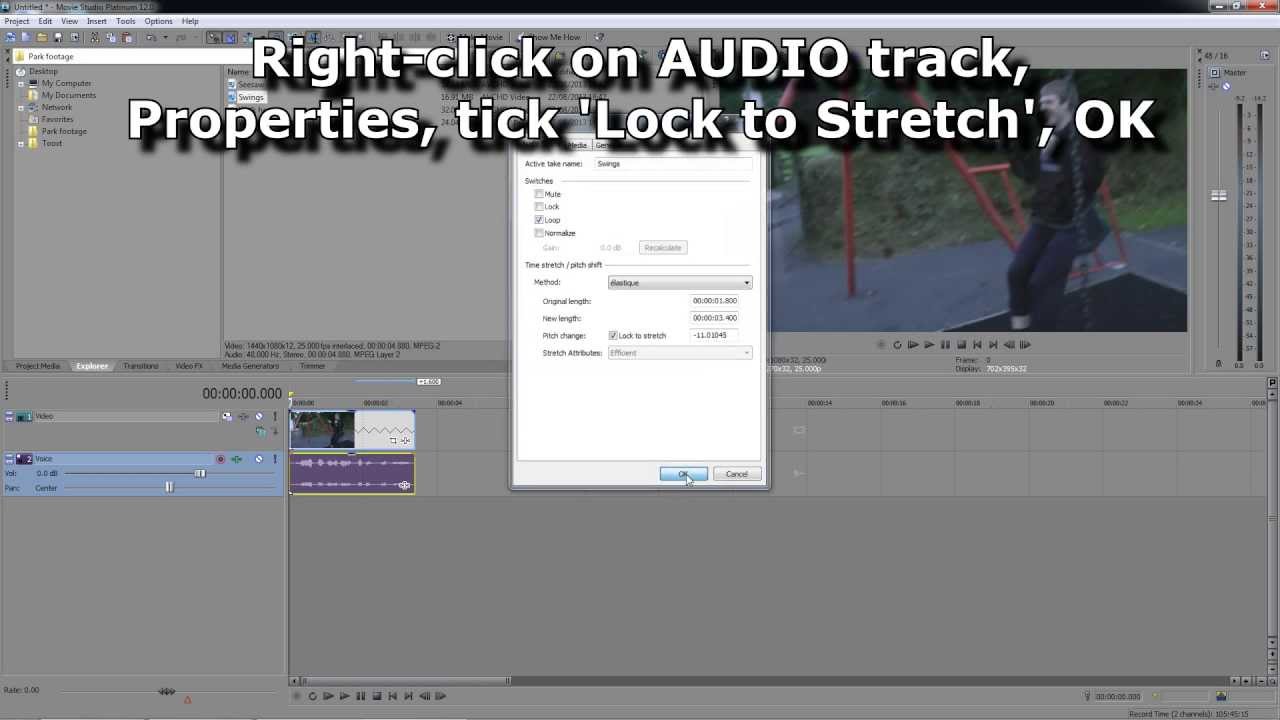
- Audio Desynchronization: When creating a freeze frame, the audio track might become out of sync. To fix this, you can cut the audio track at the same point as the video freeze frame and realign it manually, or use the group feature to keep audio and video synchronized.
Most freeze frame issues in Sony Vegas can be resolved with these troubleshooting tips, ensuring smooth editing workflow and high-quality results.
Advanced Freeze Frame Tips and Tricks
For those looking to elevate their video editing skills in Sony Vegas, employing advanced techniques with freeze frames can add a professional polish to your projects. Here are some expert tips and tricks to enhance your freeze frame effects:
- Layering Effects: Combine multiple video effects on your freeze frame for a unique look. Experiment with color grading, overlays, and textures to create a visually striking image.
- Animating Freeze Frames: Add motion to your freeze frames by using keyframing. You can zoom in or out, pan across the frame, or even rotate it to add dynamism to a static image.
- Seamless Looping: For background videos or interactive displays, create a freeze frame that seamlessly loops. This involves careful editing to ensure the start and end points of the freeze frame are visually indistinguishable.
- Syncing with Music: Enhance the impact of your freeze frames by syncing them with key moments in the background music. This can emphasize beats or dramatic points in the soundtrack.
- Combining with Text Overlays: Use freeze frames as a canvas for text overlays. This is effective for titles, captions, or to convey important information. Ensure the text is readable and complements the visual style of the freeze frame.
- Using Freeze Frames for Transitions: Create dynamic transitions between scenes by incorporating freeze frames. This can be a powerful storytelling tool, allowing you to pause on a significant moment before moving to the next scene.
By mastering these advanced freeze frame techniques in Sony Vegas, you can unlock new creative possibilities and bring a cinematic quality to your video projects.

_HOOK_
Freeze Frame Inspiration: Creative Ideas from Professionals
Gathering inspiration from professional editors can elevate your freeze frame techniques in Sony Vegas, transforming simple edits into impactful visual stories. Here are some creative ideas inspired by professionals to enhance your projects:
- Storytelling Through Sequences: Create a narrative sequence using freeze frames to depict a story or event progression. This technique can effectively convey emotions or tell a story without motion.
- Highlight Reel Freeze Frames: In sports or event highlight reels, use freeze frames to spotlight key moments, achievements, or expressions, adding drama and focus to significant achievements.
- Artistic Portrait Series: Use freeze frames in portrait videos to create a series of artistic stills. Applying different color grades or effects to each frame can produce a stunning visual gallery.
- Cinematic Pause: Implement freeze frames to create a \"cinematic pause\", allowing viewers to absorb a crucial moment or detail, adding depth and weight to the narrative.
- Visual Effects Integration: Combine freeze frames with visual effects to create illusions or fantasy scenes. This could include adding animated elements to a frozen landscape or character.
- Interactive Video Elements: Use freeze frames within interactive videos to pause for viewer choices or to emphasize decision points, enhancing user engagement.
- Educational Highlights: In educational content, freeze frames can be used to highlight important facts, diagrams, or to pause for emphasis during explanations.
These professional insights into freeze frame usage can inspire your editing projects, pushing the boundaries of creativity and storytelling in Sony Vegas.
Mastering freeze frames in Sony Vegas can transform your video projects into captivating stories, filled with dramatic pauses and visual highlights. Embrace these techniques to unlock your creative potential and bring your visions to life.