Topic sony vegas freeze frame: Discover how to enhance your videos with Sony Vegas by mastering freeze frame techniques, a creative tool to highlight moments and add dramatic flair to your projects.
Table of Content
- How to create a freeze frame in Sony Vegas?
- Creating a Freeze Frame in Sony Vegas
- Steps to Locate and Freeze Your Desired Frame
- Adding and Editing Freeze Frames in Your Project
- Advanced Techniques: Velocity Envelopes and Frame Export
- Tips for Perfecting Your Freeze Frame Effect
- Common Issues and Solutions When Freezing Frames
- YOUTUBE: Sony Vegas Pro 13 Freeze Frame Tutorial 7
- Enhancing Your Videos With Creative Freeze Frame Uses
How to create a freeze frame in Sony Vegas?
To create a freeze frame in Sony Vegas, follow these steps:
- Drag the video clip you want to freeze frame onto the timeline.
- Locate the point in the clip where you want the freeze frame to occur.
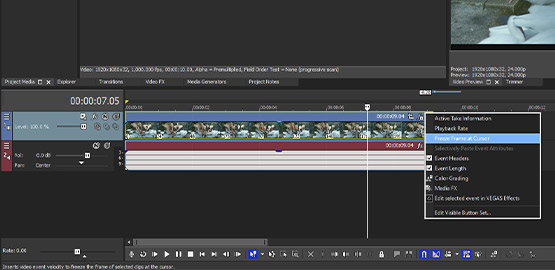
- Right-click on the clip and select \"Switches\" from the context menu.
- Enable the \"Velocity\" option.
- Move the playhead to the desired frame for the freeze frame.
- Right-click on the clip again and choose \"Insert/Remove Envelope\" > \"Velocity\" to bring up the velocity envelope.
- Click on the diamond icon in the velocity envelope to add a point at the current frame.
- Drag the point downwards to set the velocity to 0.
- Preview the freeze frame by playing the timeline.
This will create a freeze frame at the selected frame in your video clip using Sony Vegas.
READ MORE:
Creating a Freeze Frame in Sony Vegas
Creating a freeze frame in Sony Vegas is a simple yet powerful way to emphasize a specific moment in your video. Follow these steps to seamlessly integrate a freeze frame into your project.
- Open your project in Sony Vegas and navigate to the timeline where your video is located.
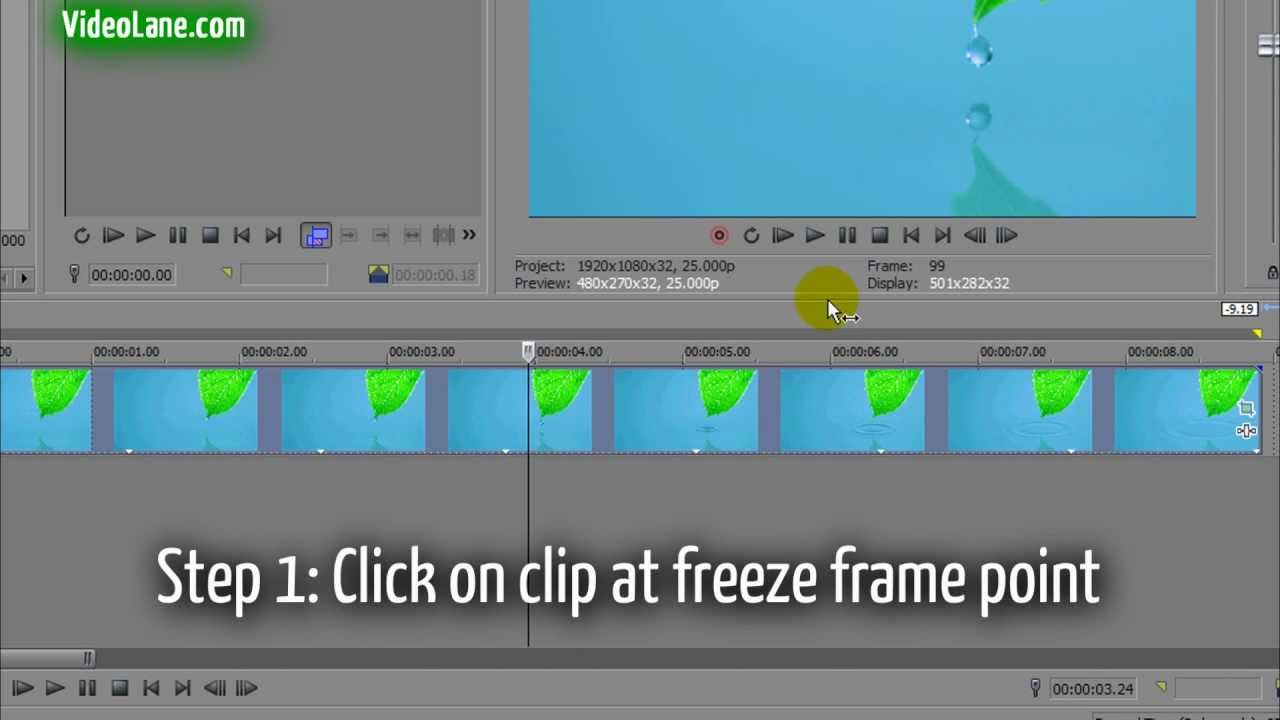
- Play the video in the timeline and pause it at the exact moment you want to create a freeze frame.
- Right-click on the video track at the chosen frame and select \"Insert/Remove Envelope\" > \"Velocity\".
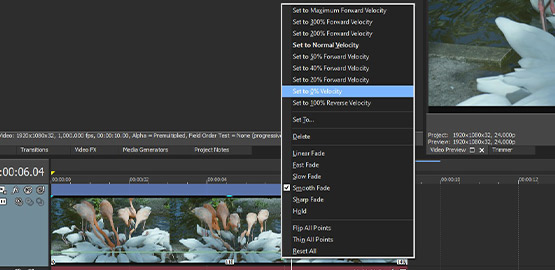
- Double-click on the velocity line at the point where you paused the video, creating a point. Right-click on this point and set the velocity to 0%. This action freezes the frame.
- To extend the duration of the freeze frame, simply click and drag the end of the video clip to your desired length.
- Preview your video to ensure the freeze frame effect matches your expectations and adjust the duration if necessary.
- Finally, render your video to apply and save the changes.
This technique allows you to highlight significant moments, create suspense, or simply add a creative touch to your videos.

Steps to Locate and Freeze Your Desired Frame
Finding and freezing the perfect frame in your video can transform a fleeting moment into a memorable highlight. Follow these detailed steps to pinpoint and freeze your desired frame in Sony Vegas.
- Open your video project in Sony Vegas and ensure the clip you want to edit is on the timeline.
- Scrub through the timeline by dragging the playhead slowly or using the arrow keys for precision, to find the exact frame you wish to freeze.
- Once you\"ve identified the frame, you can make it easier to work with by zooming in on the timeline. This provides a more precise control over selecting the frame.
- After locating the desired frame, split the video clip at this point. You can do this by pressing \"S\" on your keyboard with the playhead over the chosen frame.
- To create the freeze frame, right-click on the second part of the split clip and choose \"Insert Video Envelope\" > \"Velocity\". Reduce the velocity to 0% at the start of this clip to freeze it.
- Adjust the length of the frozen section by dragging the end of the clip. This determines how long the frame will remain frozen on screen.
- Preview your project to ensure the freeze frame occurs exactly as you envisioned. Make any necessary adjustments to the timing or duration.
With these steps, you can effectively freeze any frame in your video, adding emphasis or artistic flair to your content.
Adding and Editing Freeze Frames in Your Project
Integrating freeze frames into your Sony Vegas project not only captures attention but also adds a layer of professionalism to your work. Here\"s how you can add and fine-tune freeze frames for maximum impact.
- Identify the segment of the video where you want to insert a freeze frame. Navigate to this location on the timeline.
- Follow the steps to create a freeze frame by setting the velocity to 0% at the desired point, as previously outlined.
- To add depth to your freeze frame, consider applying video effects. Right-click the frozen clip, select \"Video Event FX,\" and choose from the available effects to enhance your frame.
- If you need to adjust the duration of the freeze frame, click and drag the edges of the clip to increase or decrease the time it appears on screen.
- To ensure continuity and smoothness, you might want to add a crossfade between the freeze frame and the adjacent clips. This can be done by dragging the edge of one clip over another until the crossfade appears.
- For advanced editing, consider keyframing the opacity of the freeze frame to create a fade-in or fade-out effect, adding a dynamic element to your still frame.
- Regularly preview your project to see how the freeze frame integrates with the rest of your content, making adjustments as necessary to ensure it blends seamlessly.
By following these steps, you can effectively add and edit freeze frames, turning simple moments into powerful visuals that enhance your project\"s storytelling.
Advanced Techniques: Velocity Envelopes and Frame Export
Enhance your video editing skills in Sony Vegas by mastering velocity envelopes for dynamic freeze frames and exporting high-quality stills from your projects.
- To create a more dynamic freeze frame effect, utilize velocity envelopes. Right-click on your clip and choose \"Insert/Remove Envelope\" > \"Velocity\". Then, add points before and after your desired freeze frame to adjust the speed gradually or suddenly.
- Experiment with different velocities around the freeze frame to create unique effects, such as a slow-motion lead into a freeze frame or a rapid acceleration out of it.
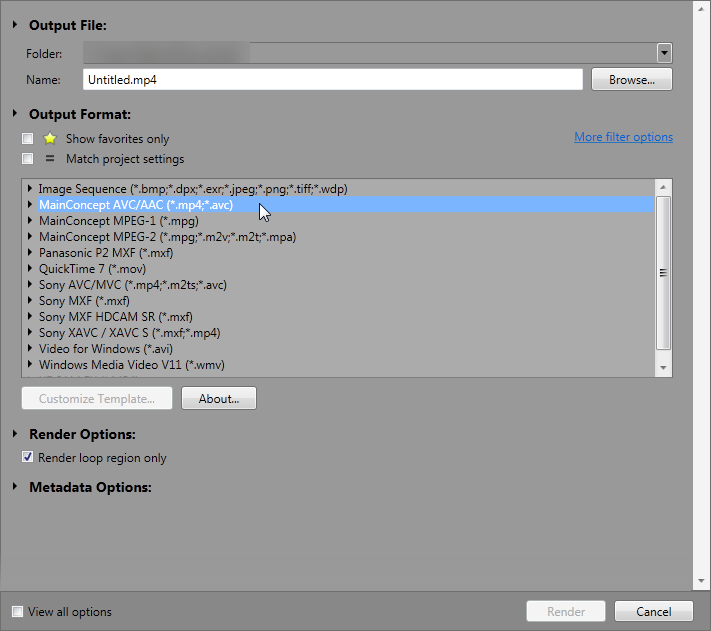
- For exporting a frame, navigate to the frame you wish to export. Go to \"File\" > \"Render As\" and select an image format (e.g., PNG, JPEG). Make sure to adjust the settings for the highest quality.
- When exporting frames, consider the purpose of the still image. For web use, a JPEG might be sufficient, but for print or high-resolution needs, opt for a PNG or TIFF for the best quality.
- Utilize the snapshot tool for a quick export option. This tool captures a still image of the current frame in your preview window and saves it directly to your project folder.
- Advanced users can automate the freeze frame and export process using scripting in Sony Vegas, streamlining their workflow for large projects.
Mastering these advanced techniques in Sony Vegas not only elevates the quality of your videos but also expands your creative possibilities, allowing for more nuanced and engaging storytelling.

_HOOK_
Tips for Perfecting Your Freeze Frame Effect
Freeze frames can dramatically enhance your video\"s visual appeal when done correctly. Here are some tips to perfect your freeze frame effect in Sony Vegas.
- Choose the Right Moment: Select a frame that adds value to your story or highlights a key moment. The impact of a freeze frame is significantly higher when it\"s timed perfectly.
- Use High-Quality Footage: To ensure your freeze frame looks crisp and clear, use high-resolution video footage. This is particularly important if you plan to zoom in on the frozen frame.
- Consider Composition: Before freezing a frame, consider its composition. Ensure the subject is well-placed and the background complements the focal point.
- Add Text or Graphics: Enhance your freeze frame by adding text, graphics, or effects. This can provide context, emphasize a message, or add an artistic touch.
- Adjust Duration Wisely: The length of the freeze should match its purpose. Too short, and it might go unnoticed; too long, and it could disrupt the flow of your video.
- Smooth Transition: Use transitions wisely to integrate the freeze frame smoothly into your video. A sudden freeze can be jarring, so consider using a slow fade or other effects for a more natural feel.
- Experiment with Effects: Don\"t hesitate to experiment with different video effects to make your freeze frame stand out. Adjusting the color, adding a vignette, or applying a filter can make a big difference.
By following these tips, you can create freeze frames that not only capture attention but also enhance the storytelling and emotional impact of your videos.

Common Issues and Solutions When Freezing Frames
While freezing frames in Sony Vegas is a powerful technique, editors may encounter several common issues. Here are solutions to ensure your freeze frames enhance your video without glitches.
- Issue: Blurry Freeze Frames - Ensure you\"re working with high-quality footage and that the frame you choose to freeze is not in motion blur. Increase the video\"s bit rate during rendering for clearer images.
- Issue: Velocity Envelope Not Working - Make sure you\"ve properly added a velocity envelope and that the point you\"re adjusting is correctly set to 0%. Double-check the placement of your points on the timeline.
- Issue: Freeze Frame Duration Too Short or Too Long - Adjust the length of the freeze frame by dragging the edges of the clip in the timeline. If necessary, split the clip to isolate the freeze frame for more precise duration control.
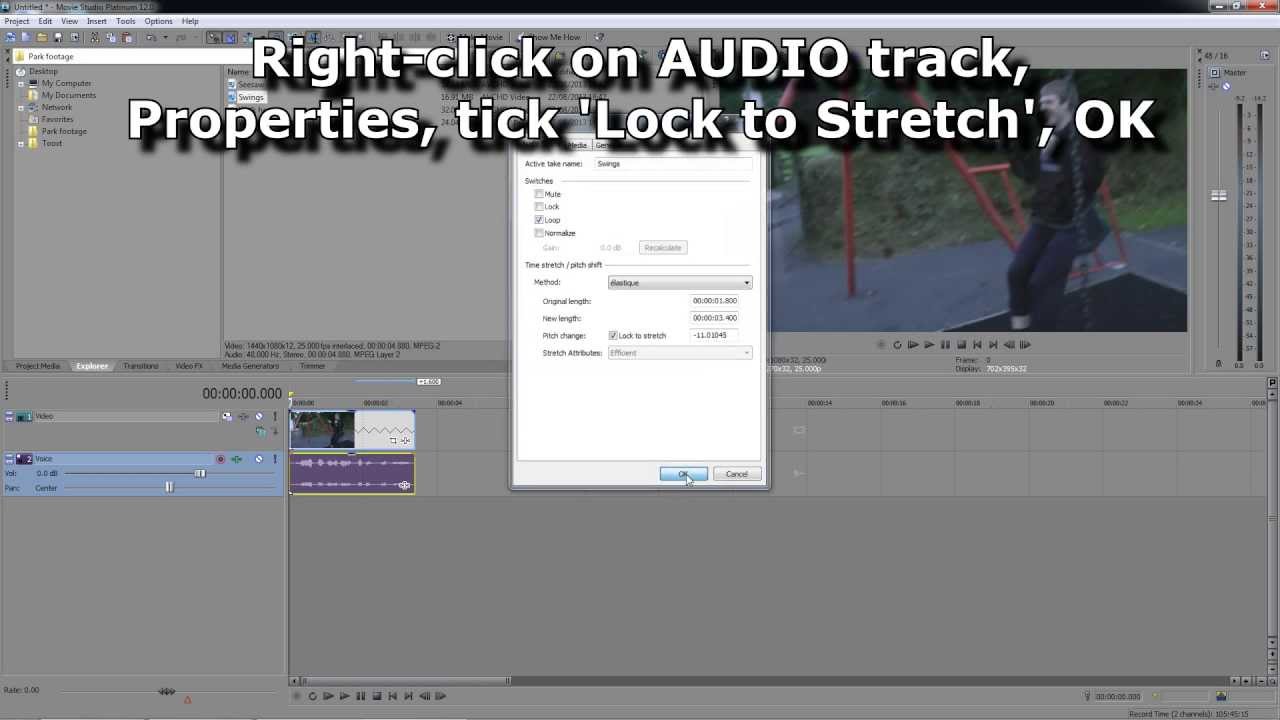
- Issue: Audio Desynchronization - When you freeze a frame, ensure that the audio track is not affected. You may need to separate the audio from the video track and adjust it accordingly to maintain synchronization.
- Issue: Transition Effects Not Smooth - If transitions to and from the freeze frame are not smooth, try adding a crossfade or experimenting with different transition effects for a more seamless flow.
- Issue: Exported Frame Quality Is Low - When exporting a still frame from your video, choose the highest quality settings and select a format like PNG for minimal loss in quality.
By addressing these common issues with the provided solutions, you can create stunning freeze frames that perfectly capture the essence of your video\"s moments.
Sony Vegas Pro 13 Freeze Frame Tutorial 7
Tutorial: In this easy-to-follow tutorial, you will learn step-by-step how to master a new skill. With clear explanations and helpful visuals, you\'ll be amazed at how quickly you\'ll become an expert in no time!
VEGAS Pro Tutorial Instantly Creating Freeze Frame Video.
Video: Get ready to be mesmerized by this incredible video. With stunning visuals, captivating storytelling, and a beautiful soundtrack, this is a must-watch for anyone who appreciates the power of visual storytelling. Don\'t miss out on this unforgettable experience!
READ MORE:
Enhancing Your Videos With Creative Freeze Frame Uses
Freeze frames can serve as more than just a pause in the action; they can add narrative depth, highlight important details, or create a stylistic signature for your videos. Here are some creative ways to utilize freeze frames in Sony Vegas to elevate your video projects.
- Storytelling Pause: Use freeze frames to emphasize crucial moments in your narrative, allowing the audience to absorb the scene fully or to introduce on-screen text explanations or thoughts.
- Comic Book Effect: Create a sequence of freeze frames with added graphic effects or borders to mimic the style of a comic book or graphic novel, enhancing action sequences or transitions.
- Highlight Reels: In sports or event videos, freeze frames can spotlight key moments or achievements, paired with annotations or stats to add context.
- Artistic Transitions: Transition between scenes or segments by creatively using freeze frames as part of a montage, adding visual interest and pacing variation.
- Character Introduction: Introduce characters in your video by freezing their first appearance on screen, adding their name and a brief description in a text overlay.
- Photo Album Effect: Simulate the flipping through a photo album by transitioning between freeze frames of key moments, creating a nostalgic or reflective mood.
- Before and After Scenes: Use freeze frames to show the before and after of a scene or action, especially effective in tutorial or transformation videos.
Implementing these creative freeze frame techniques can dramatically increase the impact of your videos, making them more engaging and memorable for your audience.
Mastering freeze frames in Sony Vegas can transform your videos, adding depth and emotion to your storytelling. Embrace these techniques to captivate your audience and leave a lasting impression with your creative vision.