Topic sony vegas how to freeze frame: Discover the magic of pausing time in your videos with our guide on "Sony Vegas: How to Freeze Frame". This technique is perfect for highlighting moments, creating dramatic effects, and enhancing your storytelling in video editing.
Table of Content
- How to create a freeze frame in Sony Vegas?
- Overview of Freeze Frame Technique
- Steps to Create a Freeze Frame
- Using Velocity Envelopes for Freeze Frame
- Creating a Snapshot for a Permanent Freeze Frame
- Applying Freeze Frame Effect to a Separated Clip
- Adjusting the Duration of the Freeze Frame
- YOUTUBE: How To Freeze Frame Video in Vegas Pro 15 (2018)
- Adding Effects or Annotations to Enhance Freeze Frames
- Exporting Your Video with Freeze Frame Effect
- Alternative Methods and Tools for Freeze Framing
- Advanced Tips for Perfecting Freeze Frame Effects
How to create a freeze frame in Sony Vegas?
To create a freeze frame in Sony Vegas, you can follow these steps:
- Select the video clip or event in the timeline where you want to create the freeze frame.
- Right-click on the selected clip, and from the context menu, choose \"Insert/Remove Envelope\" and then \"Velocity\".
- In the timeline toolbar, click on the \"Show/Hide Velocity Envelopes\" button to enable the velocity envelope view.
- Position the cursor (playhead) at the frame where you want to freeze the video.
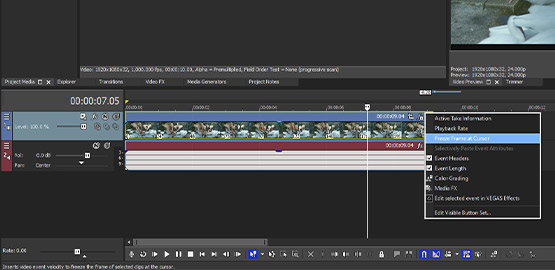
- Right-click on the velocity envelope line at the cursor position and select \"Insert Freeze Frame at Cursor\".
- A freeze frame will be created at that specific frame on the timeline.
By following these steps, you should be able to create freeze frames in Sony Vegas and add a dynamic effect to your videos.
READ MORE:
Overview of Freeze Frame Technique
Freeze frame is a powerful video editing technique used to highlight a particular moment by pausing the action. This method is invaluable for emphasizing key points, creating suspense, or giving viewers more time to appreciate the details of a scene. Sony Vegas offers a straightforward process to apply this effect, making it accessible for editors of all skill levels.
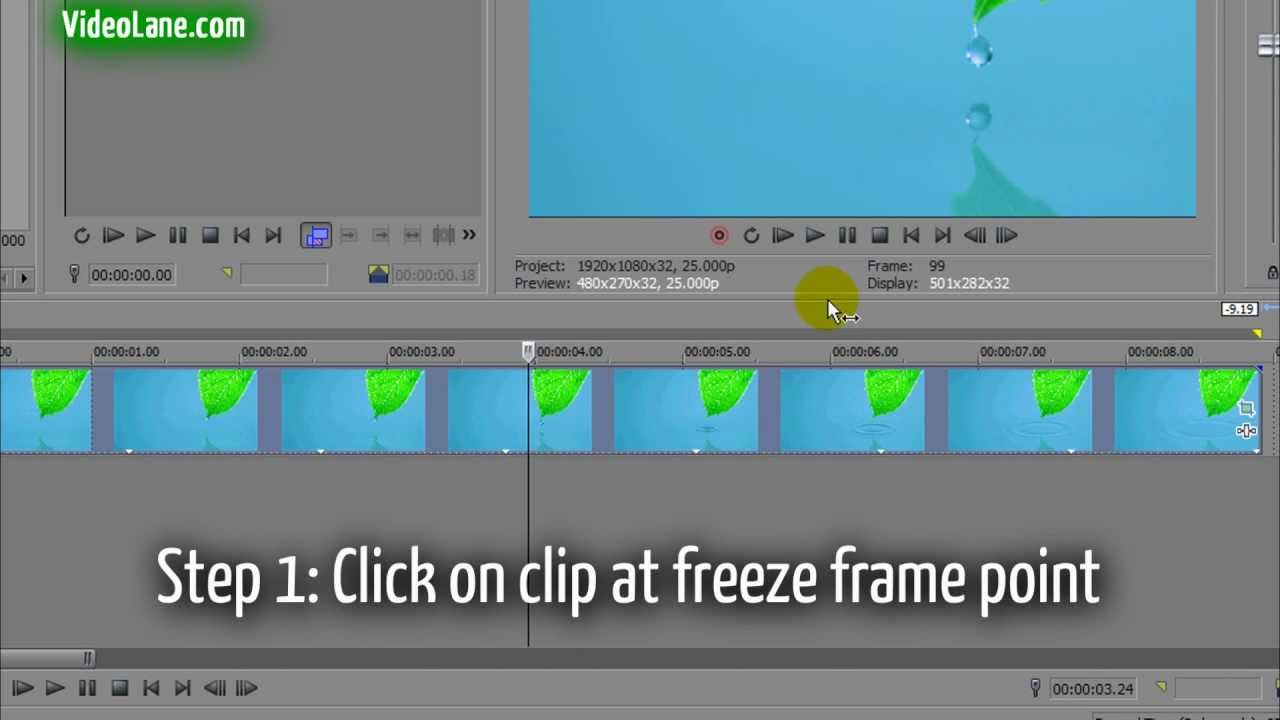
- Identify the Frame: Scrub through your timeline to find the exact frame you wish to freeze.
- Split the Clip: Use the split tool to isolate the frame, creating a distinction between the moving and frozen parts of your video.
- Apply the Freeze Frame: Right-click on the selected clip and navigate to the velocity options or use the snapshot feature to capture and extend the frame.
- Adjust Duration: Extend the duration of the freeze frame to suit the timing of your project, ensuring it holds the viewers\" attention without lingering too long.
- Enhance with Effects: Add text, filters, or other effects to the frozen frame to make it stand out or convey additional information.
By following these steps, you can effectively incorporate freeze frames into your Sony Vegas projects, adding depth and interest to your edits. This technique, while simple, can dramatically transform the narrative and visual impact of your video content.

Steps to Create a Freeze Frame
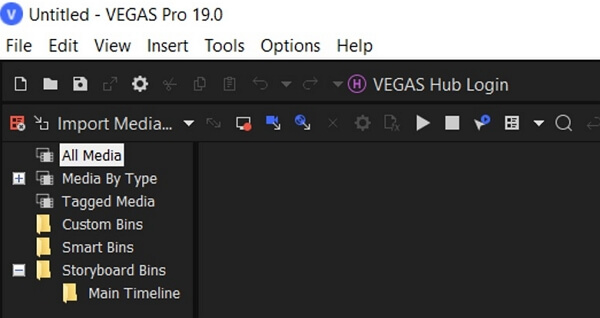
- Open Your Project: Start by opening your video project in Sony Vegas. Ensure you have the clip you want to edit on the timeline.
- Locate the Desired Frame: Play through your video to find the exact moment you want to freeze. Pause the video on this frame.
- Split the Clip: Use the \"S\" key or the split tool to cut the clip at the point where you want the freeze frame to begin.
- Create the Freeze Frame: Right-click the clip and select \"Insert/Remove Envelope\" > \"Velocity\". Then, add a point at the current frame and set its velocity to 0% to freeze the frame.
- Adjust the Duration: Extend the freeze frame by dragging the edge of the clip to your desired duration. This determines how long the frame will stay frozen on the screen.
- Add Effects (Optional): Enhance your freeze frame with effects or text. Right-click the clip to add video effects, or use the text tool to overlay captions or annotations.
- Preview Your Work: Once you\"ve set the freeze frame and added any desired effects, play back your timeline to ensure the freeze frame looks as expected.
- Export the Video: After finalizing your freeze frame and making any other edits, export your project by going to \"File\" > \"Render As\", and select your preferred format and settings.
This step-by-step guide will help you effectively create a freeze frame in Sony Vegas, enhancing the storytelling and visual impact of your video projects.
Using Velocity Envelopes for Freeze Frame
Velocity envelopes in Sony Vegas offer a precise way to create freeze frames in your video projects. This technique allows you to adjust the speed of a video clip, including bringing it to a complete stop. Follow these detailed steps to use velocity envelopes effectively for freeze framing.
- Select Your Clip: On the timeline, click the video clip where you want the freeze frame to occur.
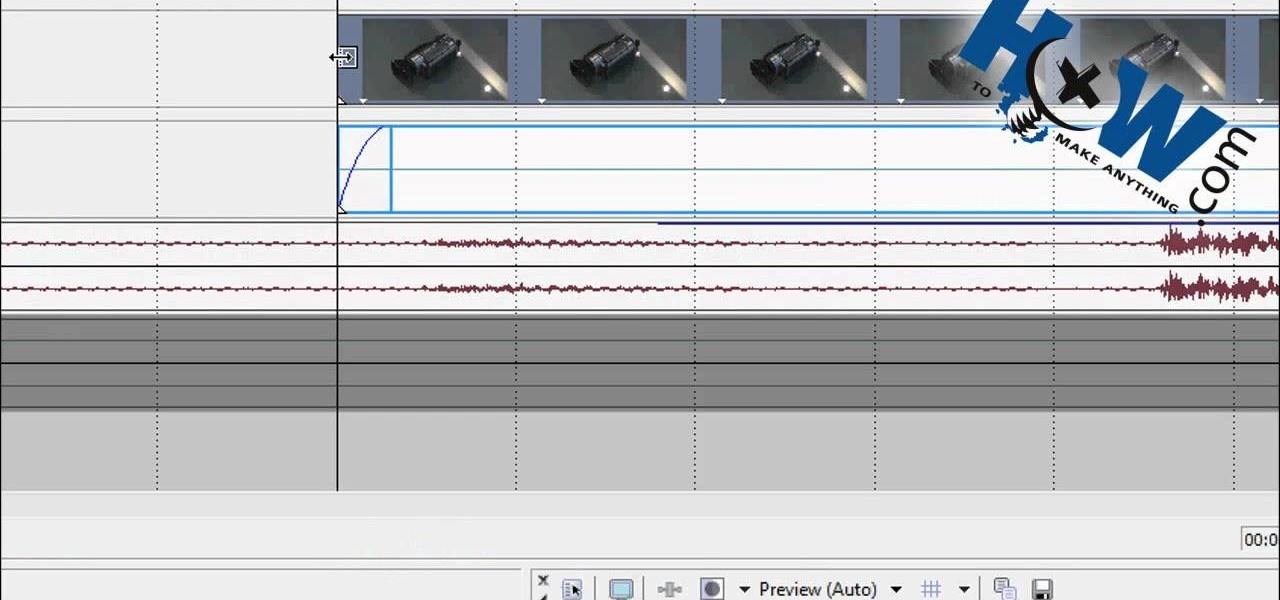
- Insert Velocity Envelope: Right-click the clip and choose \"Insert/Remove Envelope\" > \"Velocity.\" A green line (velocity envelope) will appear across the clip.
- Choose the Freeze Frame Point: Move the playhead to the frame you wish to freeze. This will be the point where you will set the velocity to 0%.
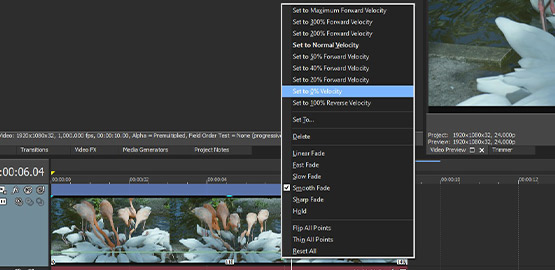
- Add Points on Velocity Envelope: Double-click on the velocity envelope line at the desired freeze frame position to add a point. Add another point slightly to the right of the first point.
- Set Velocity to 0%: Right-click the second point and choose \"Set to\" > \"0%.\" This action freezes the frame between these two points.
- Adjust Duration of Freeze: To extend the duration of the freeze frame, drag the second point to the right. The area between the points at 0% velocity will remain frozen for the duration.
- Preview and Adjust: Preview your clip to ensure the freeze frame effect meets your expectations. Adjust the points as needed for perfect timing.
Using velocity envelopes for freeze frames in Sony Vegas not only enhances your video\"s visual impact but also provides flexibility in editing without cutting the clip. This method is ideal for creating dramatic pauses or highlighting moments.
Creating a Snapshot for a Permanent Freeze Frame
Creating a snapshot for a permanent freeze frame in Sony Vegas is an effective way to highlight a specific moment in your video without altering the playback speed. This method creates a still image that can be inserted into your timeline, providing a seamless freeze-frame effect. Here’s how to do it:
- Identify the Frame: Scrub through your timeline to find the frame you wish to freeze.
- Create a Snapshot: Once you\"ve found the frame, click on the \"Save Snapshot to File\" button. This will capture the frame as a still image.
- Save the Snapshot: Choose a save location for the snapshot file. You can save it in JPEG or PNG format, depending on your preference.
- Import the Snapshot: Import the saved snapshot back into your Sony Vegas project and place it on the timeline where the original frame was.
- Adjust Duration: Extend the duration of the snapshot clip on the timeline to control how long you want the freeze frame to appear in your video.
Using a snapshot for a permanent freeze frame allows for greater flexibility in editing, as it can be treated like any other media clip in your project. This method is particularly useful for creating emphasis or for stylistic effects in your videos.

_HOOK_
Applying Freeze Frame Effect to a Separated Clip
Applying a freeze frame effect to a separated clip allows for dynamic storytelling and emphasis in video editing. This technique involves isolating a segment of your video to apply the freeze frame effect without affecting the entire clip. Follow these steps in Sony Vegas for precise results:
- Identify and Split the Clip: Navigate through your timeline to find the exact moment you wish to freeze. Use the split tool (press \"S\") to separate this frame from the rest of the video.
- Apply the Velocity Envelope: Right-click on the split clip and select \"Insert/Remove Envelope\" > \"Velocity.\" A green line will appear across the clip, indicating the velocity envelope.
- Set the Freeze Frame: Double-click on the velocity line at the point where the clip is split to add a point. Set this point\"s velocity to 0% by right-clicking on it, effectively freezing the frame.
- Adjust the Duration: To extend or shorten the duration of the freeze frame, simply drag the edges of the split clip to your desired length.
- Finalize and Review: Preview your project to ensure the freeze frame effect aligns with your vision. Adjust the duration or velocity as needed for the perfect effect.
Utilizing separated clips for freeze frames in Sony Vegas not only enhances the visual appeal of your projects but also provides a granular level of control over your video editing process.

Adjusting the Duration of the Freeze Frame
Adjusting the duration of a freeze frame is crucial for maintaining the flow of your video while emphasizing key moments. Sony Vegas provides an intuitive way to modify how long a freeze frame lasts in your project. Follow these steps to customize the duration to fit your narrative:
- Identify the Freeze Frame: Locate the clip with the freeze frame effect applied. This could be a clip with velocity set to 0% or a snapshot inserted into the timeline.
- For Velocity Envelopes: If you used a velocity envelope to create your freeze frame, click on the envelope line to select it. Drag the points to extend or reduce the section of the clip that is frozen. This modifies the duration directly on the timeline.
- For Snapshots: If you inserted a snapshot for the freeze frame, click on the edge of the image clip on the timeline. Drag it to extend or shorten the duration of the freeze frame to your liking.
- Preview Your Adjustment: After adjusting the duration, play back the section of your video to ensure the freeze frame lasts for the intended amount of time and maintains the desired impact.
- Finalize Your Edit: Once satisfied with the duration of the freeze frame, proceed with any additional edits or move on to the next section of your video project.
By carefully adjusting the duration of your freeze frame, you can enhance the storytelling aspect of your video, drawing attention to significant moments or details without disrupting the viewer\"s engagement.
How To Freeze Frame Video in Vegas Pro 15 (2018)
Freeze Frame: \"Capture the perfect moment and create a lasting memory with the incredible power of Freeze Frame. Watch this captivating video that unveils the secrets behind freezing time and discover how to effortlessly elevate your photography skills.\"
Vegas Pro 17 Tutorial: How To Freeze Frame Video
Tutorial: \"Unlock your potential and master new skills with this incredible video tutorial. Whether you\'re a beginner or an expert, this in-depth guide will provide you with invaluable knowledge and insights, helping you enhance your expertise and achieve remarkable results.\"
Adding Effects or Annotations to Enhance Freeze Frames
Enhancing freeze frames with effects or annotations in Sony Vegas can significantly impact your video\"s storytelling and visual appeal. Follow these steps to add creative touches that bring your freeze frames to life:
- Select the Freeze Frame: Click on the freeze frame clip in your timeline. This can be a segment where the velocity has been set to 0% or a snapshot that has been inserted.
- Access Video FX: Navigate to the \"Video FX\" tab in Sony Vegas. Here, you’ll find a wide array of effects that can be applied to your freeze frame.
- Apply an Effect: Choose an effect that complements the freeze frame\"s purpose. Drag the chosen effect onto the clip. Common choices include Black and White, Glow, or Sharpen to highlight details.
- Customize the Effect: Once applied, adjust the effect’s settings in the pop-up window to suit the desired impact on the freeze frame. Preview the changes in real-time to ensure they match your vision.
- Add Annotations: To add text or other annotations, go to the \"Media Generators\" tab. Select \"Text\" for simple text overlays or \"Titles & Text\" for more stylized options.
- Customize the Annotation: Drag your chosen annotation onto the freeze frame clip. Customize the font, size, color, and positioning to ensure the text complements the video content effectively.
- Preview and Adjust: Review your freeze frame with the added effects and annotations. Make any necessary adjustments to ensure the enhancements achieve the intended effect.
By adding effects and annotations, you can transform a simple freeze frame into a powerful storytelling tool, adding depth and context to your video projects.

Exporting Your Video with Freeze Frame Effect
Finalizing and exporting your video project with a freeze frame effect in Sony Vegas is a crucial step to sharing your creation. This process involves rendering your video in a format that preserves the quality and effects you\"ve applied. Follow these steps to export your video smoothly:
- Review Your Project: Before exporting, play through your entire project to ensure the freeze frame and any other effects are correctly applied and appear as intended.
- Go to File: With your project open in Sony Vegas, navigate to the \"File\" menu located at the top of the interface.
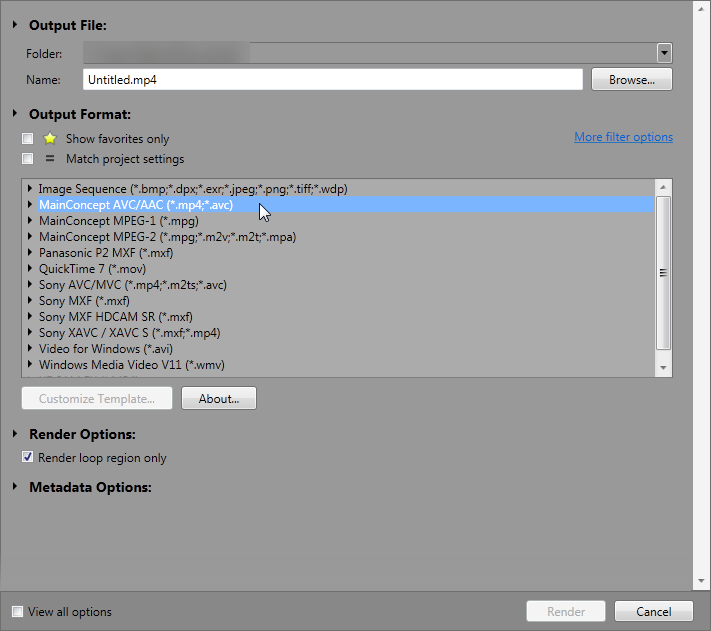
- Select Render As: From the \"File\" menu, choose \"Render As.\" This opens the render options window where you can select the output format and settings for your video.
- Choose Your Format: Select an appropriate format from the list. Common choices include MP4 for a good balance of quality and file size, or AVI for lossless quality.
- Customize Render Settings: Adjust the render settings according to your needs. You can modify the frame rate, resolution, and bit rate. For freeze frames, ensure the quality settings are high enough to maintain the clarity of the still image.
- Name and Save Your File: Choose a file name and destination for your exported video. Make sure it\"s saved in a location where you can easily find it.
- Start Rendering: Click \"Render\" to start the exporting process. The time it takes to render your video will depend on the complexity of the project and your computer\"s processing power.
- Review the Exported Video: Once rendering is complete, locate the exported file and play it to ensure the freeze frame and all other effects are accurately represented.
Exporting your video with a freeze frame effect in Sony Vegas allows you to share your creative work with others, showcasing your editing skills and the powerful moments you\"ve highlighted in your project.
Alternative Methods and Tools for Freeze Framing
While Sony Vegas Pro offers robust features for creating freeze frames, various other methods and tools can achieve similar effects, catering to different workflows and preferences. Exploring these alternatives can provide additional flexibility and creativity in your video editing projects.
- Using Adobe Premiere Pro: Similar to Sony Vegas, Adobe Premiere Pro allows for freeze framing by inserting a frame hold or by exporting a still image and re-importing it into your project.
- After Effects for Advanced Manipulation: Adobe After Effects provides comprehensive tools for freeze framing, including the ability to apply effects directly to a still frame and integrate it seamlessly into video sequences.
- DaVinci Resolve\"s Dynamic Freeze Frame: DaVinci Resolve offers a dynamic freeze frame feature, which automates the process of creating a freeze frame and can add motion effects to the still image for a more dramatic effect.
- Using Online Video Editors: Online tools like Canva and Kapwing provide simple, web-based platforms for creating freeze frames without the need for complex software, suitable for quick edits or social media content.
- Open-Source Alternatives: Open-source video editors like Shotcut and OpenShot offer freeze frame features with the added benefit of no cost, supporting basic freeze frame needs for those on a budget or exploring video editing as a hobby.
Each tool and method offers unique advantages, whether you\"re seeking simplicity, advanced effects, or specific workflow integrations. Experimenting with different software can help you find the best approach for your freeze frame effects and overall video editing needs.

_HOOK_
READ MORE:
Advanced Tips for Perfecting Freeze Frame Effects
Perfecting freeze frame effects in video editing goes beyond just pausing the action. To truly enhance the impact of your freeze frames and integrate them seamlessly into your projects, consider these advanced tips:
- Choose the Right Frame: The effectiveness of a freeze frame can heavily depend on the chosen moment. Look for frames with clear action or emotional expressions for maximum impact.
- High-Quality Snapshots: When creating a freeze frame from a snapshot, ensure your video is at its highest quality setting to avoid pixelation or quality loss in the still image.
- Seamless Transitions: Use transitions creatively to enter and exit freeze frames. Soft fades or dynamic effects can help integrate the freeze frame naturally into the flow of the video.
- Color Correction: Applying color correction or grading to your freeze frame can help it stand out or blend better with the surrounding footage, depending on the desired effect.
- Layer Effects: Experiment with layering text, graphics, or additional video clips over your freeze frame for a more complex and engaging visual effect.
- Sound Design: Don\"t forget about the audio. Adding sound effects or changing the audio track during the freeze frame can enhance the overall impact.
- Timing is Key: The duration of your freeze frame should complement the video\"s pacing. Too long can disrupt the flow, while too short might not fully convey the intended emphasis.
- Practice and Experiment: The more you experiment with freeze frames, the better you\"ll understand how to use them effectively. Try different techniques to see what works best for your storytelling style.
Implementing these advanced tips will help you refine your freeze frame effects, making them a powerful tool in your video editing arsenal.
Mastering the freeze frame effect in Sony Vegas unlocks new creative dimensions in your video projects. By applying the techniques and tips shared, you\"ll captivate audiences, highlighting memorable moments with precision and flair. Elevate your editing skills and bring your storytelling to life.