Topic sony vegas add text: Unlock the full potential of your videos with our easy guide on adding text in Sony Vegas, enhancing your projects" visual appeal and clarity.
Table of Content
- How to add text in Sony Vegas?
- Step-by-Step Guide to Adding Text
- Accessing the Media Generators Tab
- Choosing Text Presets and Titles
- Customizing Text Properties
- Animating Text in Your Video
- Using Default Text Versus Custom Fonts
- YOUTUBE: Vegas Pro 19: How to Add Text
- Adding Multiple Lines of Text
- Creating Captions and Subtitles
- Advanced Text Editing Techniques
- Troubleshooting Common Issues
How to add text in Sony Vegas?
To add text in Sony Vegas, follow these steps:
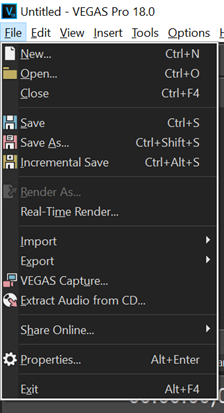
- Open Sony Vegas on your computer.
- Go to the Media Generators Tab.
- Select the Text and Title option.
- A list of various text effects will appear.
- Choose the desired text effect, such as Action Flip or Bounce.
- Click and drag the chosen effect onto the timeline or the preview window.
- A text box will appear on the screen.
- Double-click on the text box to edit the text.
- Enter the desired text in the box.
- Adjust the font, size, color, and other text properties using the available options.
- Preview the text to ensure it is displayed correctly.
- Make any necessary adjustments.
- Once satisfied with the text, you can further customize its position, animation, and duration on the timeline.
- Click on the Play button to play the video with the added text.
- Finally, save your project.
Step-by-Step Guide to Adding Text
- Open your project in Sony Vegas and navigate to the timeline where you want to add text.
- Click on the \"Media Generators\" tab, typically found at the bottom of the screen.
- Scroll through the list and select \"Titles & Text\" or \"Legacy Text\" depending on your version of Vegas.
- Drag your chosen text template to the timeline where you want the text to appear.
- Double-click the text event on the timeline to open the text editing window.
- Type your desired text into the text box. Customize the font, size, color, and alignment as needed.
- For animation, select the \"Animate\" button within the text editing window and choose your animation type.
- Preview your video to ensure the text appears as expected.
- Adjust the duration of the text display by dragging the edges of the text event on the timeline.
- Save your project to retain the changes.
This guide provides a straightforward path to adding text, enhancing your videos with clear, engaging titles, captions, or annotations.
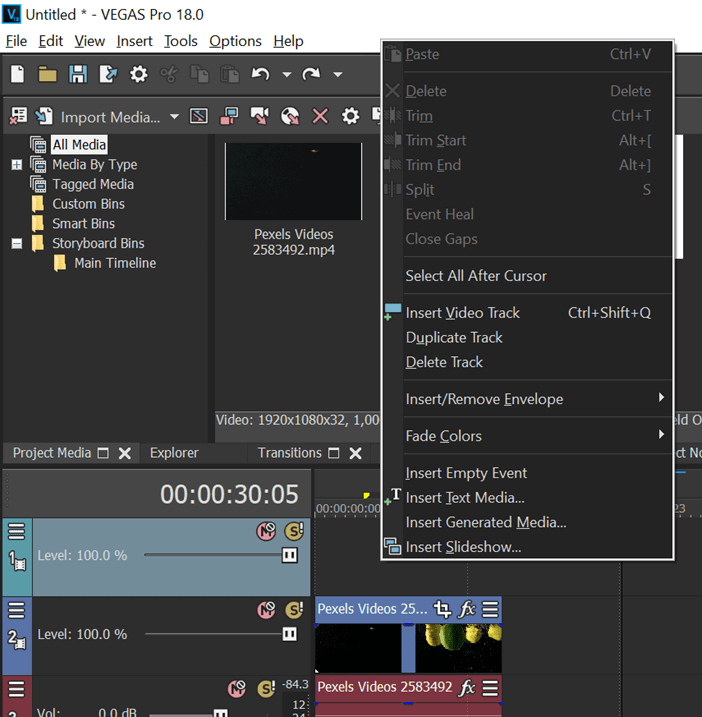
Accessing the Media Generators Tab
To add text to your project in Sony Vegas, the Media Generators tab is your starting point. This section provides a variety of text options, including titles and lower thirds, which can be customized to fit your video\"s theme and tone.
- Launch Sony Vegas and open your project to get started.
- Look towards the window on the lower left side of the screen to find the Media Generators tab. If it\"s not visible, go to the View menu at the top, select Window Layouts, and then Default Layout to reset the interface.
- Click on the Media Generators tab. This will reveal a list of media options, including Titles & Text, Legacy Text, and more.
- Scroll through the list to explore the available text options. You\"ll find a variety of presets suitable for different parts of your video, such as intros, captions, and credits.
- Preview the text effects by hovering over them with your mouse. This helps you see what the text will look like before adding it to your timeline.
This tab is essential for enhancing your videos with text, offering you a comprehensive suite of tools for title creation and customization.

Choosing Text Presets and Titles
With Sony Vegas, you have access to a wide range of text presets and titles designed to make your videos stand out. Selecting the right preset is crucial for conveying your message effectively.
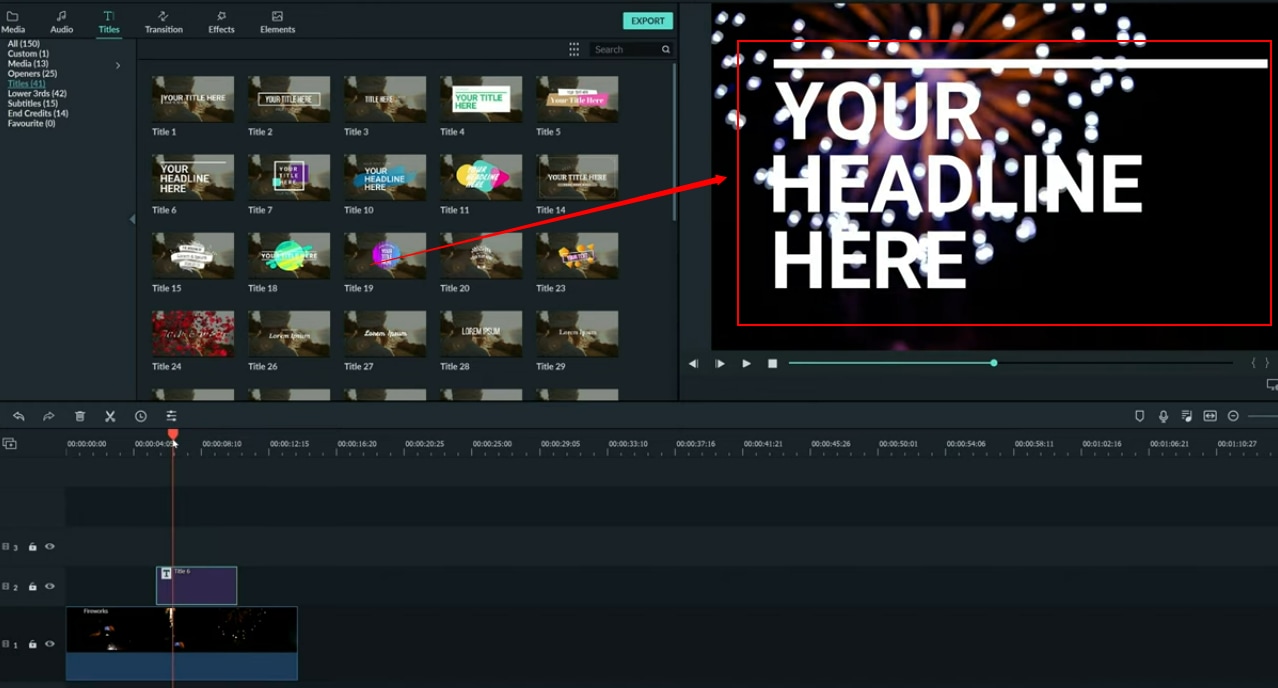
- After accessing the Media Generators tab, you\"ll see categories like \"Titles & Text\" and \"Legacy Text.\" Click on one to see the available presets.
- Explore the presets to find one that matches the style and tone of your video. Sony Vegas offers everything from simple, clean text to animated titles that can add excitement to your projects.
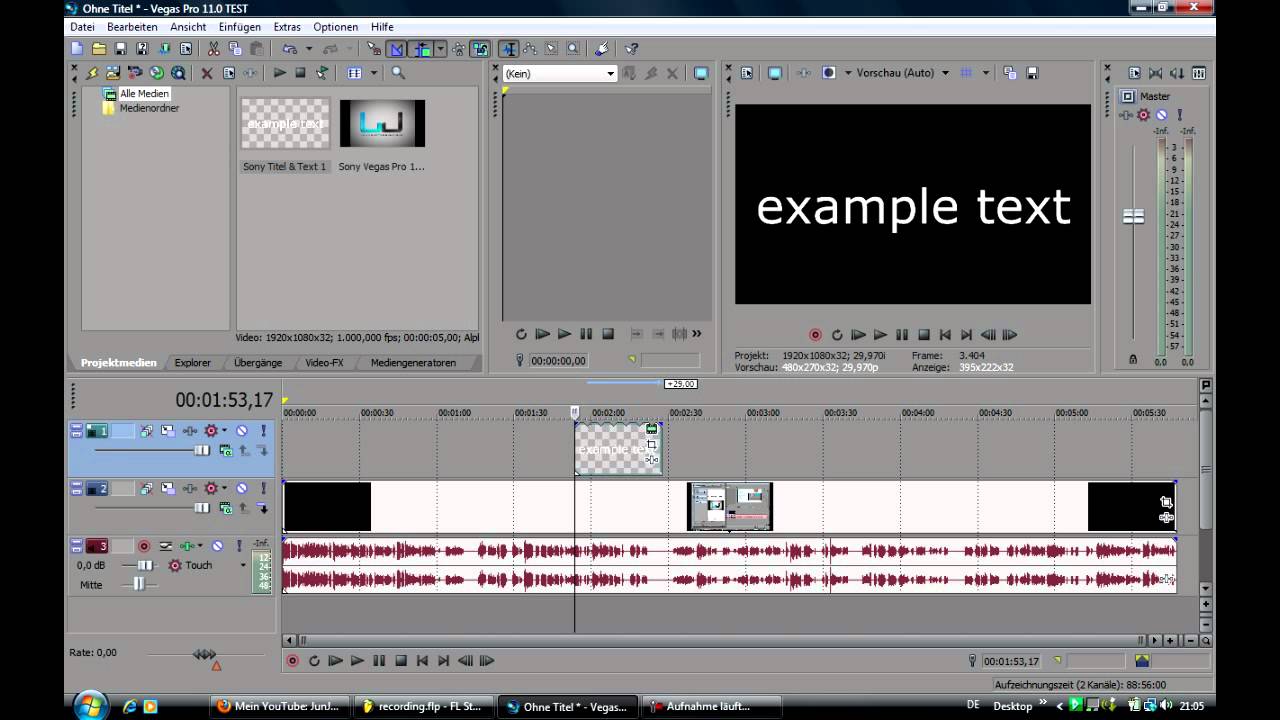
- When you find a preset you like, drag it onto your timeline where you want the text to appear. This creates a new text event in your project.
- Double-click the text event on the timeline to open the text editing interface. Here you can modify the text to say what you need, adjusting the font, size, and color to match your video\"s aesthetic.
- Take advantage of the customization options within each preset. Many presets allow for extensive customization, including animation, shadows, outlines, and background colors, enabling you to create a unique look that complements your video perfectly.
Choosing the right text preset or title can dramatically enhance your video\"s appeal, making it more engaging and professional-looking.

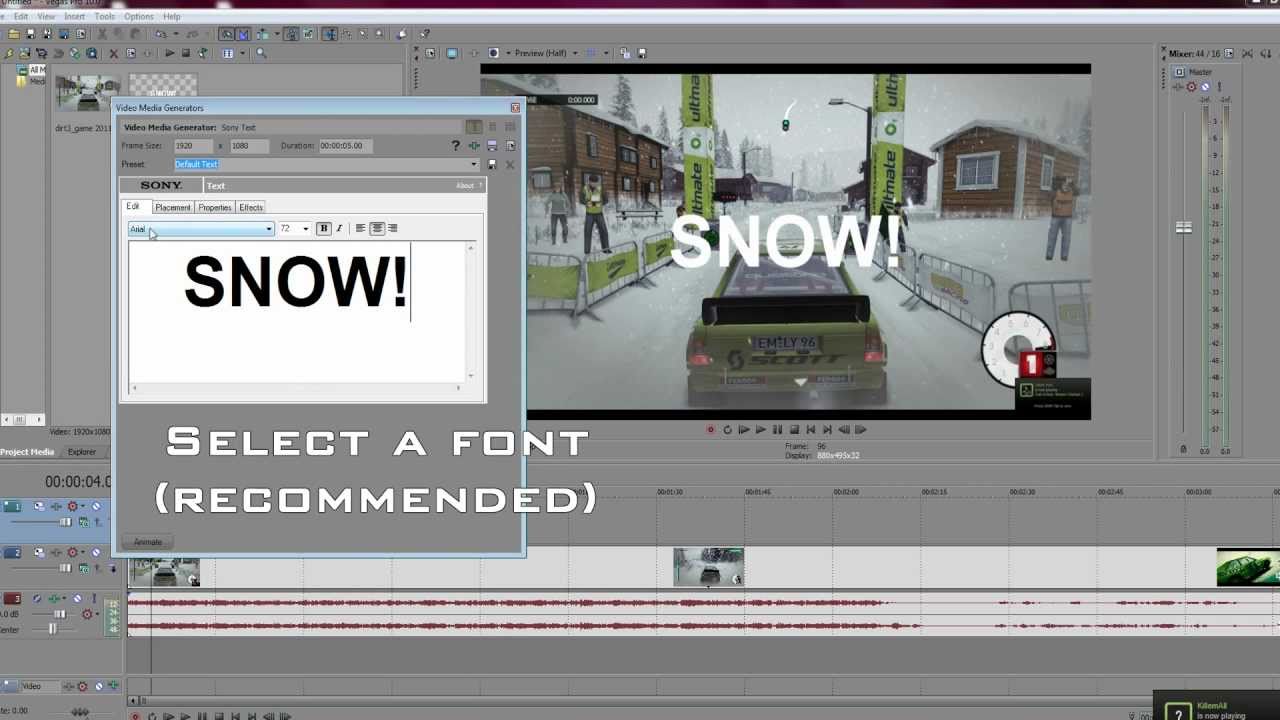
Customizing Text Properties
After selecting a text preset in Sony Vegas, you can further personalize your text to fit your project\"s needs perfectly. Customizing text properties allows for a more engaging and cohesive video presentation.
- Once you\"ve dragged a text preset onto your timeline, double-click it to open the text editor window.
- In the text editor, you\"ll find options to change the font. Click on the font dropdown menu to select a new font that matches your video’s style.
- Adjust the font size using the size dropdown or by entering a value manually. This ensures your text is readable and fits well within the video frame.
- Customize the color of your text to match your video\"s color scheme. Click on the color box to select a new color or enter a specific color code for precision.
- Explore additional text properties such as alignment (left, center, right), bold, italic, underline, and shadow to add depth and emphasis to your text.
- For animated text, navigate to the animation settings within the text editor. Here, you can choose from various animation types to make your text appear more dynamically in the video.
- Use the positioning tools to place your text precisely where you want it on the screen. This is crucial for ensuring your text complements the video content without obstructing important visuals.
- Preview your changes in real-time by playing back the section of the video with the text. Make any necessary adjustments to ensure the text looks exactly as you envisioned.
Customizing text properties is key to creating visually appealing and cohesive videos that capture your audience\"s attention.
_HOOK_
Animating Text in Your Video
Animating text can significantly enhance the visual appeal and engagement of your videos. Sony Vegas provides robust tools to create dynamic text animations with ease.
- After adding text to your timeline, double-click the text event to open the editing window.
- Look for the \"Animation\" section within the text editing window. Here, you can select from various animation options, such as fade in, fade out, fly in, and more.
- Choose an animation style that suits your video. For subtle effects, consider a simple fade in or out. For more dynamic presentations, explore the fly in or zoom options.
- Adjust the animation duration and timing by dragging the edges of the animation timeline within the text editor. This lets you control how quickly or slowly the text animates on screen.
- To further customize your animation, explore the keyframe options. Keyframes allow you to set specific animation points, offering precise control over the animation’s pace and style.
- Preview your animated text by playing back the section of the video. Watch closely to ensure the animation aligns with the overall flow of your video.
- If necessary, return to the editing window to adjust the animation settings until you achieve the desired effect.
Animating text in Sony Vegas not only captures your audience\"s attention but also adds a professional touch to your videos, making them more dynamic and engaging.

Using Default Text Versus Custom Fonts
Choosing between default text and custom fonts in Sony Vegas can significantly impact the look and feel of your video. While default fonts offer convenience, custom fonts provide a unique way to convey your brand or video\"s personality.
- Understanding Default Fonts: Default fonts in Sony Vegas are readily available and easy to use. They are designed to be versatile, ensuring that your text is clear and readable across various video projects.
- Finding and Installing Custom Fonts: For a more personalized touch, you might opt for custom fonts. Custom fonts can be found on various websites, such as Google Fonts or DaFont. Once downloaded, install the font on your computer to make it available in Sony Vegas.
- Using Custom Fonts in Sony Vegas: After installing your custom font, restart Sony Vegas if it was open during installation. Your new font should now appear in the font selection menu within the text editor. Select it as you would any default font.
- Considerations for Custom Fonts: When using custom fonts, consider readability and compatibility. Some fonts may look great up close but become difficult to read when viewed in a video format, especially on smaller screens. Additionally, ensure that you have the right to use the font, especially if your video is for commercial purposes.
- Matching Fonts with Video Content: Whether you choose a default or custom font, consider how the font style complements your video\"s theme and tone. A well-chosen font can enhance your message and engage your audience more effectively.
Deciding between default text and custom fonts comes down to the specific needs and goals of your video project. While default fonts offer ease and accessibility, custom fonts provide an opportunity to create a distinctive visual style that can set your video apart.
Vegas Pro 19: How to Add Text
\"Discover the power and versatility of Vegas Pro, the ultimate video editing software. Unlock your creativity and take your videos to the next level with its intuitive interface and advanced features. Watch our video tutorial to learn how to make professional edits like a pro!\"
How to Insert Text in Vegas Pro Basic Tutorial
\"Learn the art of text insertion and enhance your videos with captivating titles and subtitles. Our video will walk you through the process of adding text to your footage, whether it\'s for informative purposes, storytelling, or simply adding a touch of style. Join us and master the art of text insertion!\"
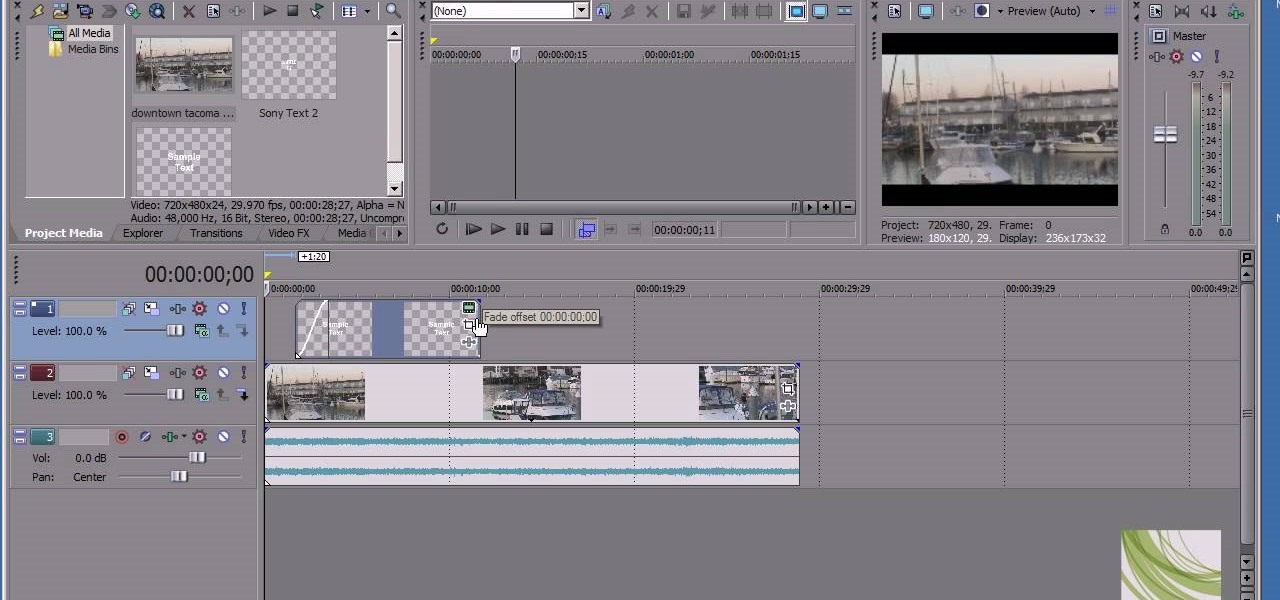
Adding Multiple Lines of Text
Adding multiple lines of text in Sony Vegas allows for more complex and informative titles or captions. This technique is essential for conveying more detailed messages or creating dynamic visual effects with text.
- Open the Titles & Text or Legacy Text editor: After placing a text media on your timeline, double-click it to open the text editing window.
- Entering Text: Click inside the text box where you normally type your message. Press Enter after each line to create a new line. This method is straightforward and effective for adding paragraphs or separate lines of text.
- Formatting Text: Use the text formatting tools to adjust the alignment, font size, and spacing between lines. Proper formatting ensures that your text is both aesthetically pleasing and easy to read.
- Customizing Each Line: For more advanced customization, consider creating separate text events for each line. This allows you to animate each line independently or apply unique effects to each.
- Layering Text: If you\"re using separate events for each line, you can layer them on the timeline for precise timing control. This is particularly useful for creating text animations that reveal each line at different times.
- Previewing Your Text: Always preview your video after adding text to ensure that the lines are properly aligned and appear as intended. Make any necessary adjustments to font size, line spacing, or animation timing.
Whether you\"re adding subtitles, credits, or multi-line captions, understanding how to effectively add and format multiple lines of text in Sony Vegas enhances the professionalism and clarity of your videos.
Creating Captions and Subtitles
Creating captions and subtitles in Sony Vegas is an essential skill for making your videos accessible and engaging for a wider audience. This process enhances viewer understanding, especially in content-heavy or dialogue-driven videos.
- Starting with a Script: Begin by having your dialogue or script ready. This ensures accuracy and efficiency when syncing text with audio.
- Accessing the Media Generators Tab: Navigate to the Media Generators tab and select the \"Titles & Text\" or \"Legacy Text\" option to start creating your captions or subtitles.
- Typing Your Text: For each line of dialogue, create a new text event. Type the corresponding text, and then place it on the timeline at the appropriate time to match the audio.
- Formatting for Readability: Use a clear, legible font and size for your captions or subtitles. Ensure there\"s a contrast between the text color and the background for easy reading.
- Timing Adjustments: Fine-tune the start and end points of each text event to ensure that your captions or subtitles sync perfectly with the spoken words. This might require splitting the video track to align text precisely with dialogue segments.
- Previewing and Adjusting: Regularly preview your video to check the timing and readability of your captions or subtitles. Adjust as necessary to ensure clear communication.
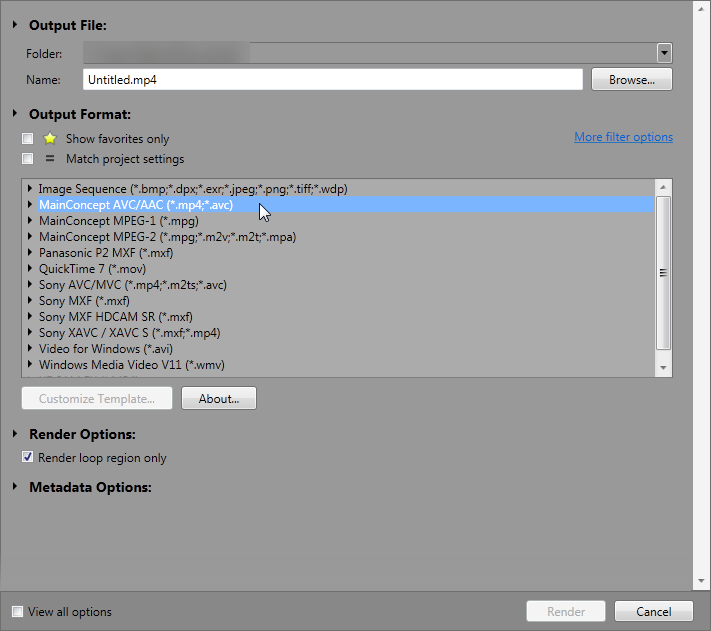
- Exporting Your Video: Once your captions or subtitles are perfectly aligned with the audio, save your project and export the video. Sony Vegas offers various export options to suit your distribution needs.
By following these steps, you can create effective captions and subtitles that enhance the viewing experience, ensuring your content is accessible to all audiences, including those who are deaf or hard of hearing.
Advanced Text Editing Techniques
Mastering advanced text editing techniques in Sony Vegas can elevate your video projects, allowing for more creativity and professionalism. These methods go beyond basic text insertion, offering dynamic and impactful visual effects.
- Using Keyframes for Dynamic Text: Keyframes are essential for creating animated text effects. Open the text event, navigate to the Animation tab, and use keyframes to control the movement, opacity, and scale of text over time.
- Applying Text Effects: Explore the Video FX tab for text effects like glow, shadow, and outline. These effects can add depth and emphasis to your text, making it stand out against complex backgrounds.
- Masking Text for Creative Reveals: Use the masking tool to create custom text reveals. This can involve having text appear behind objects or gradually come into view, adding a layer of sophistication to your video.
- Combining Text with Video Clips: Place a text event over a video clip and experiment with the composite mode. This can result in interesting textures and patterns filling your text, integrating it seamlessly with your video content.
- Custom Animations with Bezier Curves: For smooth, custom animations, use the Pan/Crop tool with bezier curves to animate text movement. This allows for more natural and complex motion paths.
- Using Scripts for Text Automation: Sony Vegas supports scripting to automate repetitive text tasks, such as generating subtitles or captions from a script file. This can save time in large projects.
- Experimenting with 3D Text Options: For projects requiring a three-dimensional effect, explore the 3D text options. This can add a new level of depth to your titles, making them more engaging and visually appealing.
By incorporating these advanced text editing techniques, you can significantly enhance the visual storytelling of your videos, making them more dynamic and captivating for your audience.

_HOOK_
READ MORE:
Troubleshooting Common Issues
While working with text in Sony Vegas, users may encounter various issues. Here\"s how to troubleshoot some of the most common problems, ensuring a smoother editing process.
- Text Not Appearing on Video: Ensure the text layer is placed above the video layer on the timeline. Also, check the text event\"s opacity settings to make sure it\"s not set to 0%.
- Fonts Not Displaying Correctly: Verify that the font you\"re trying to use is properly installed on your computer. If the font was recently installed, restart Sony Vegas to refresh the font list.
- Animating Text Issues: If text animations are not playing back smoothly, check the keyframe intervals and ensure they are evenly spaced. Also, preview the video in lower resolution for smoother playback during editing.
- Text Clipping or Out of Frame: Adjust the text box size and position within the text editing window. Make sure the text scale is set appropriately, and use the preview window to align text within the video frame.
- Problems with Text Legibility: Increase the contrast between the text and the background by adjusting text color, adding a drop shadow, or using a background box behind the text. Choose fonts that are easy to read at small sizes.
- Exported Video Doesn\"t Show Text: Before exporting, preview the project in full to ensure all elements are rendered correctly. Check the export settings to make sure they match your project settings.
- Crashes When Adding Text: This can be due to software bugs or compatibility issues. Make sure you\"re using the latest version of Sony Vegas. If the problem persists, try resetting the software to default settings or reinstalling.
Addressing these common issues can help you maintain a seamless and efficient editing workflow in Sony Vegas, ensuring your text elements enhance your video projects effectively.
Mastering text addition in Sony Vegas enhances your video projects, bringing creativity and professionalism. Dive into these techniques to captivate your audience and elevate your storytelling to new heights.