Topic sony vegas insert text: Discover the simplicity of inserting text into your videos with Sony Vegas, enhancing your projects with dynamic text animations and effects that captivate your audience.
Table of Content
- How to insert text in Sony Vegas?
- Starting a New Project and Preparing the Timeline
- Understanding the Media Generators Tab
- Adding and Customizing Text
- Using Presets for Quick Text Effects
- Animating Text for Dynamic Presentations
- Inserting Subtitles and Closed Captions
- YOUTUBE: Inserting Text in Vegas Pro - Basic Tutorial
- Advanced Text Editing with ProType Titler
- Creating Credit Rolls and Title Screens
- Using Keyframes for Text Animation
- Tips for Efficient Text Editing
How to insert text in Sony Vegas?
To insert text in Sony Vegas, follow these steps:
- Open Sony Vegas Pro on your computer.
- Select the project you want to work on or create a new project.
- Go to the \"Media Generators\" tab located on the left side of the screen.
- Click on the \"Text\" option within the \"Media Generators\" tab.
- Choose the style of text you want to insert from the available options such as \"Action Flip,\" \"Bounce,\" etc.
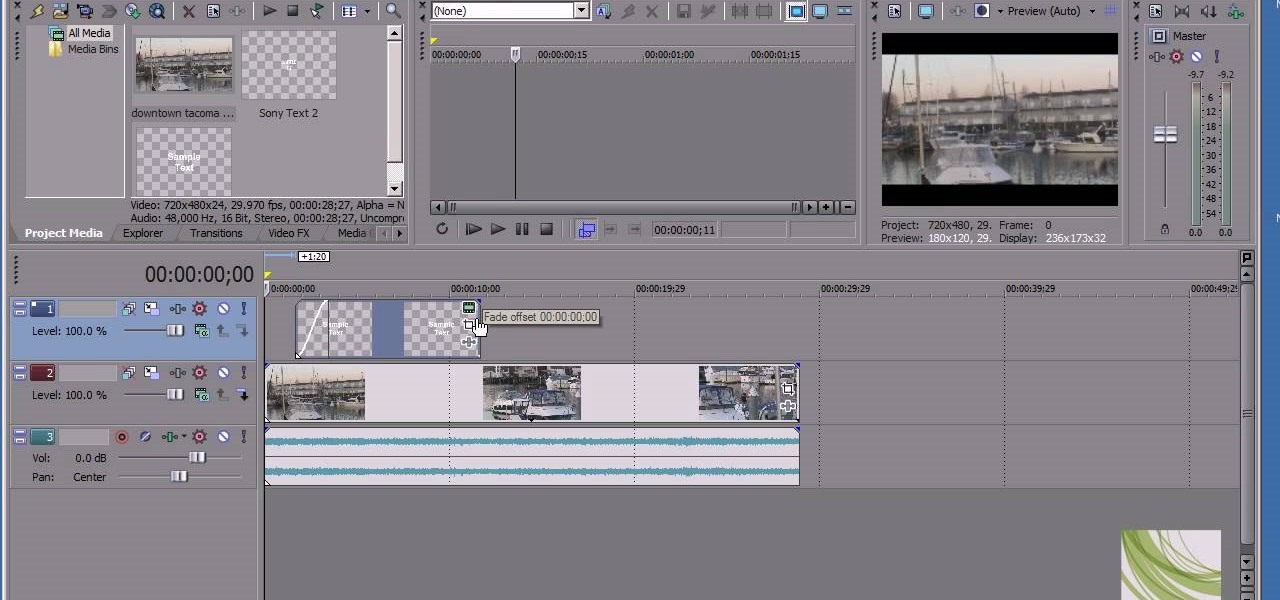
- Click and drag the selected text effect onto your timeline or video track.
- Position the text in the desired location on the timeline by dragging it with your mouse.
- Double-click on the text on the timeline to edit the content.
- Modify the text according to your preferences, including font, size, color, and any other available formatting options.
- Make any additional adjustments to the text\'s timing or animation settings if required.
- Preview your video to ensure the text appears as desired.
- Save your project to preserve the changes you made.
Following these steps will allow you to successfully insert text in Sony Vegas.
READ MORE:
Starting a New Project and Preparing the Timeline
Beginning a new project in Sony Vegas involves a series of straightforward steps to ensure your video editing process starts on the right foot. Here’s how you can set up your project for success:
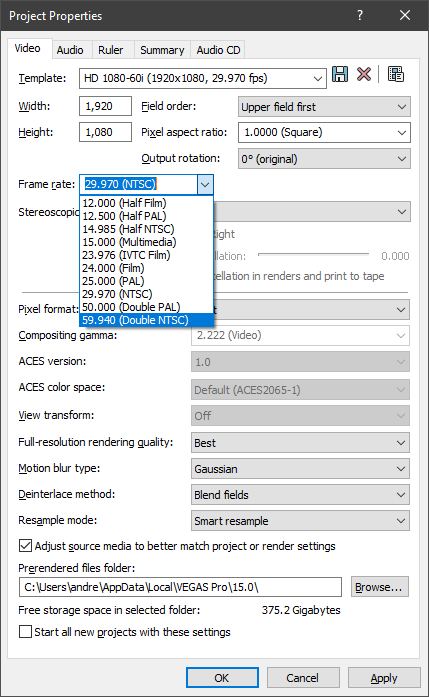
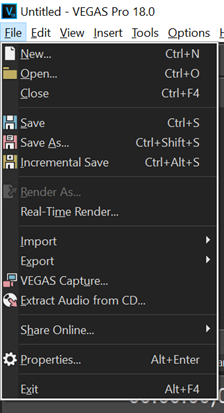
- Open Sony Vegas: Launch the application and start a new project by going to the File menu and selecting \"New\" or pressing Ctrl+N. This action opens a project settings window.
- Configure Project Settings: In the project settings, specify the desired properties such as video format, resolution, frame rate, and audio settings. Ensure these settings match your video\"s intended output format for consistency.
- Import Media: With your project created, the next step is to import the media files you plan to edit. Go to the File menu, choose \"Import\", then \"Media\", and select the files from your storage. Alternatively, you can drag and drop files directly into the project media section.
- Organize Timeline: Once your media is imported, drag the video clips onto the timeline to begin editing. Organize the clips in the desired order, adjusting the track heights for a better view if necessary.
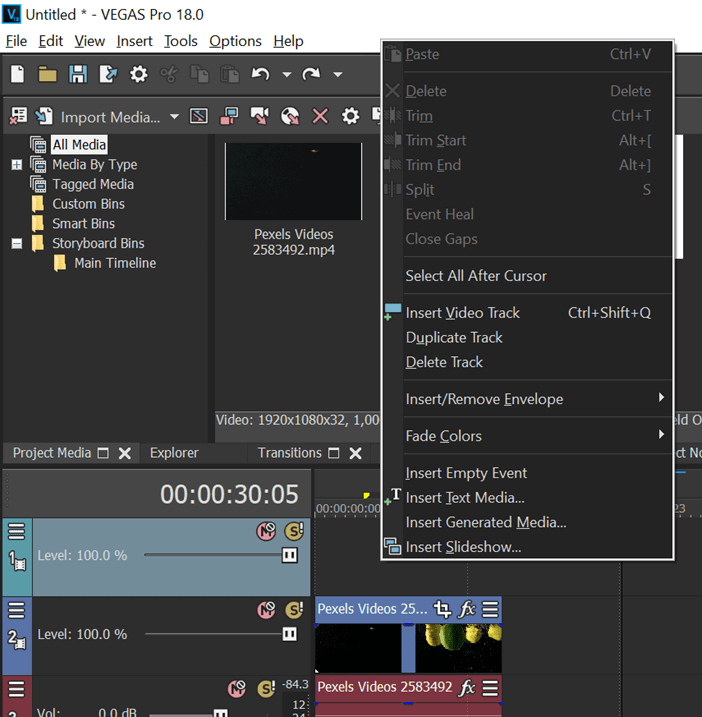
- Add Video Tracks: If you need additional video tracks for text overlays or other elements, right-click on the track header area and select \"Insert Video Track\" or use the shortcut Ctrl+Shift+Q.
- Prepare for Text Insertion: Before adding text, it\"s a good idea to decide where it will go on your video. Use the timeline to scrub through your video and identify the specific times or scenes where text will be added.
Following these steps prepares your project and timeline, making it ready for the creative process of adding text and other elements to your video in Sony Vegas.
Understanding the Media Generators Tab
The Media Generators tab in Sony Vegas is a powerhouse for adding visual elements to your video projects, including text. Here’s how to navigate and use this feature effectively:
- Navigate to the Media Generators Tab: Located in the lower half of the interface, click on the Media Generators tab to view the available options for text, backgrounds, patterns, and more.
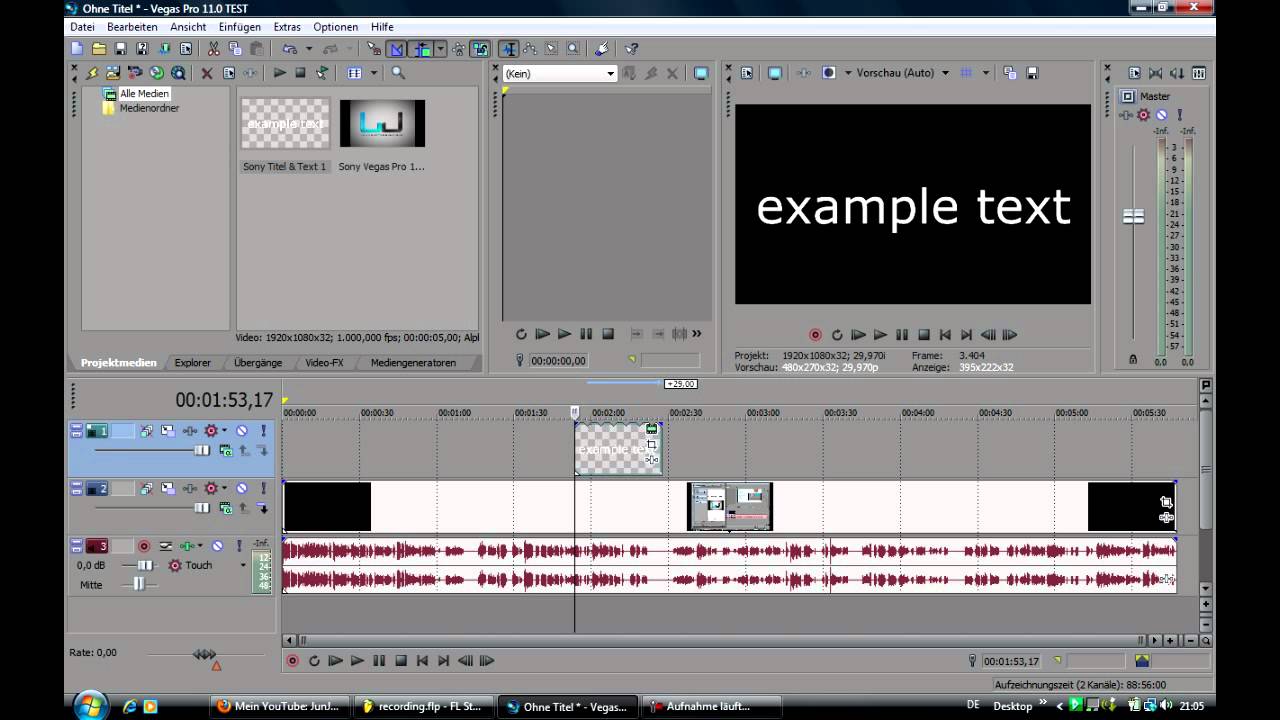
- Selecting the Text Media: Scroll through the list until you find the “Text” section. Clicking on it will display a variety of text templates including simple text, titles, and animated text options.
- Adding Text to Your Project: Drag your chosen template onto the timeline where you want the text to appear. This will automatically open the text editor window.
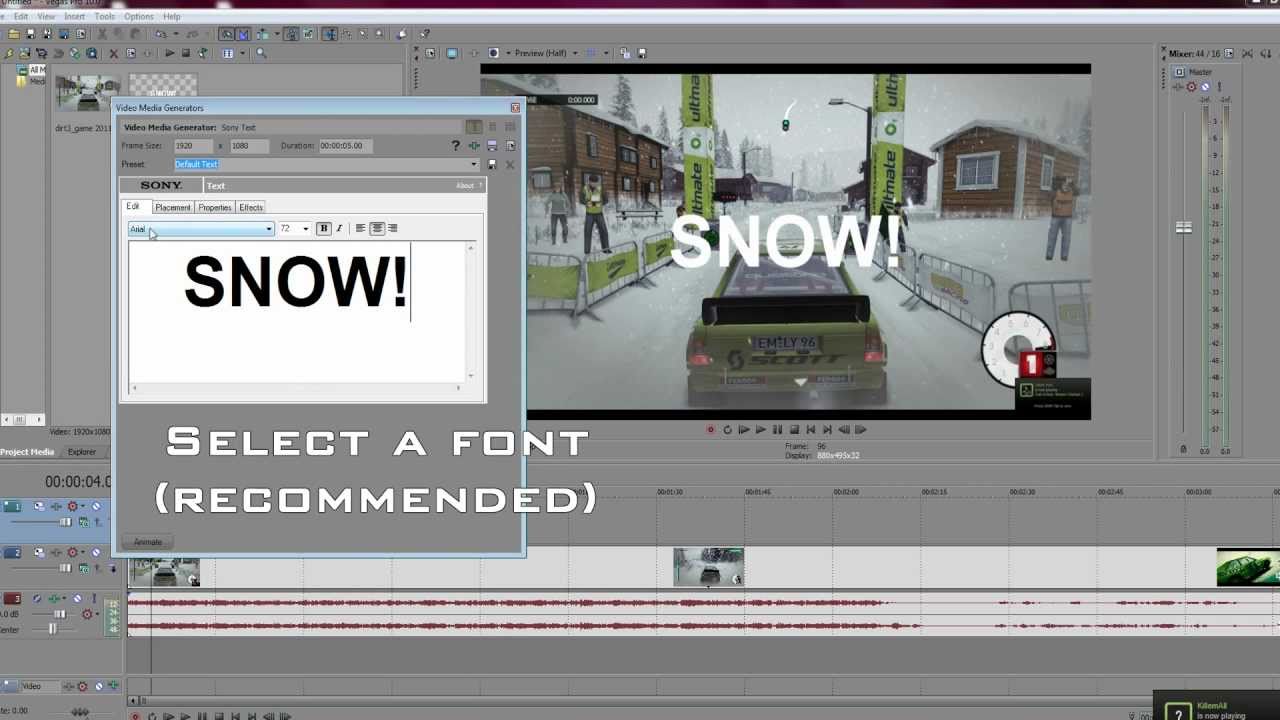
- Customizing Your Text: In the text editor window, you can type your text, adjust the font, size, color, and apply effects. The preview window allows you to see your changes in real-time.
- Exploring Advanced Features: Some text templates come with built-in animations or effects. Experiment with these to add dynamic elements to your text without needing to animate them manually.
- Saving Custom Text Settings: If you’ve created a text style that you’d like to use again, you can save it as a preset for easy access in future projects.
Understanding how to use the Media Generators tab for inserting text enhances your editing workflow and brings a professional touch to your videos with Sony Vegas.

Adding and Customizing Text
Adding text to your video in Sony Vegas is a simple process that can greatly enhance your project\"s visual appeal and informational value. Follow these steps to insert and customize text effectively:
- Access the Media Generators Tab: Click on the Media Generators tab, usually found on the lower section of the interface, to access the text media options.
- Choose Your Text Template: Within the Media Generators tab, look for the Text section. You will find various templates, including simple text, animated titles, and more. Select one that fits your project needs.
- Drag and Drop: Drag your selected text template to the timeline where you want the text to appear. This action will open the text editing window.
- Edit Your Text: In the text editing window, you can type your desired text and customize its appearance. You have options to change the font, size, color, and alignment. Additionally, explore the settings to add shadows, outlines, or other effects for more dynamic text.
- Preview and Adjust: Use the preview window to see how your text looks within the video. Adjust the placement and duration of the text on the timeline as needed to ensure it fits perfectly with your video content.
- Save Custom Presets: If you\"ve created a text style that you\"d like to reuse, you can save it as a custom preset for future projects, streamlining your workflow.
By following these steps, you can add professional-looking text to your videos, enhancing their overall quality and viewer engagement.

Using Presets for Quick Text Effects
Enhance your videos with eye-catching text effects by utilizing the preset options in Sony Vegas. This streamlined approach allows you to add professional flair to your text without extensive manual tweaking. Follow these steps to use presets effectively:
- Accessing Presets: In the Media Generators tab, navigate to the Text section to explore a variety of preset text styles and animations.
- Previewing Presets: Hover over each preset to see a preview of the text effect in the preview window. This feature helps you choose the most suitable effect for your video.
- Applying a Preset: Once you’ve found your preferred preset, drag it onto the timeline where you want the text to appear. The text editor will open, allowing you to customize the text itself.
- Customizing Text: Even with presets, you can still customize the text. Change the wording, font, color, and size to match your project’s needs. Some presets also allow adjustments to animation speed and other effect parameters.
- Adjusting Duration and Position: In the timeline, adjust the duration and position of your text clip to sync perfectly with your video content. This ensures that your text appears at just the right moment.
- Exploring Advanced Presets: Some presets include complex animations and effects. Take time to explore these options to create more dynamic and engaging videos.
Using presets for quick text effects in Sony Vegas can significantly enhance your video projects, making them more engaging and professional-looking with minimal effort.
_HOOK_
Animating Text for Dynamic Presentations
Animating text in Sony Vegas adds a dynamic layer to your videos, making them more engaging and professional. Here’s a step-by-step guide to bring your text to life:
- Insert Text: Begin by adding text to your project using the Media Generators tab. Select a text template and drag it onto your timeline where you want the animation to appear.
- Open Event Pan/Crop: Right-click on the text event on the timeline and select \"Pan/Crop\" to open the Event Pan/Crop window. This tool allows you to animate your text.
- Create Keyframes: In the Event Pan/Crop window, navigate to the timeline at the bottom. Click to create keyframes, which are points where you will specify how the text moves or changes over time.
- Set Position and Scale: For each keyframe, adjust the position and size of the text within the video frame. You can move the text to different positions, scale it up or down, or even rotate it to create dynamic effects.
- Apply Motion Blur: To make your text animation smoother, consider enabling motion blur in the Event Pan/Crop window. This adds a realistic blur effect to fast-moving text.
- Preview Your Animation: Use the preview window to play back your animation. Adjust the timing and effects as needed by moving or editing the keyframes.
This process can be used to create a variety of text animations, from simple sliding effects to complex motion graphics. Experiment with different keyframe positions and effects to achieve the desired outcome.
Inserting Subtitles and Closed Captions
Adding subtitles and closed captions to your videos in Sony Vegas enhances accessibility and viewer engagement. Here\"s how to incorporate them seamlessly into your projects:
- Prepare Your Subtitle File: Begin with a prepared subtitle file in a format such as SRT or ASS. Ensure the subtitles are correctly timed to match the video.
- Import Your Video and Subtitle File: Open Sony Vegas and import your video file into the project. Then, import your subtitle file using the same \"Import Media\" option.
- Add Video to Timeline: Drag your video onto the timeline. Ensure it is placed on a video track.
- Insert Text Media: Navigate to the Media Generators tab, find the \"Text\" option, and select a simple text template. Drag this onto the timeline, ideally on a new track above your video.
- Edit Text to Match Subtitles: Double-click the text event to open the editing window. Here, you can manually input your subtitles or copy and paste them from your subtitle file.
- Sync Subtitles with Video: Adjust the duration and position of each text event to match the corresponding dialogue or narration in the video. This might require splitting the text event for different subtitles timings.
- Customize Subtitles Appearance: In the text editing window, you can customize the font, size, color, and position of your subtitles to ensure they are readable and match the style of your video.
- Preview and Adjust: Regularly preview your video to ensure subtitles are correctly synchronized and easy to read. Make any necessary adjustments.
This process allows you to add subtitles or closed captions directly within Sony Vegas, improving the accessibility and professionalism of your videos.
Inserting Text in Vegas Pro - Basic Tutorial
Looking to learn something new? Our tutorial video is here to guide you step-by-step, making it easy for anyone to master a new skill or concept. Don\'t miss out, start watching now and unlock your full potential!
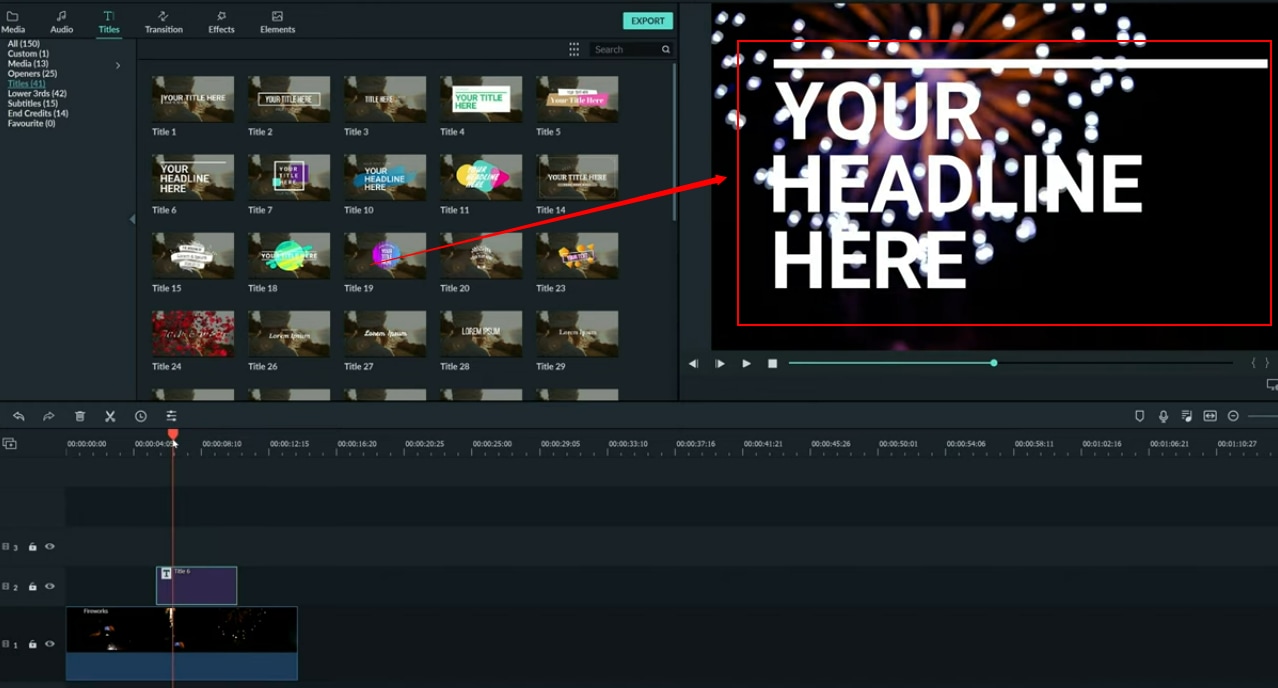
VEGAS Pro - Titles and Text
Want to grab your audience\'s attention? Our video will teach you everything you need to know about creating captivating titles. Learn the secrets behind crafting eye-catching headlines that will draw viewers in and make your content stand out from the crowd. Don\'t wait, dive in and discover the art of powerful titles!
Advanced Text Editing with ProType Titler
The ProType Titler in Sony Vegas offers advanced text editing capabilities for creating sophisticated and animated titles. Follow these steps to utilize its features:
- Access ProType Titler: Navigate to the Media Generators tab and select \"ProType Titler\" from the list to add it to your timeline.
- Explore Templates: ProType Titler comes with a variety of templates. Preview them to find one that suits your project’s theme.
- Customize Your Text: Double-click the text layer in the timeline to open the ProType Titler editor. Here, you can type your text and apply advanced formatting options such as font style, size, color, and alignment.
- Use Advanced Features: Take advantage of ProType Titler’s advanced features like text paths, 3D manipulations, and texture overlays to create dynamic titles.
- Animate Your Text: Apply keyframe animations to your text for movement, fade-ins/outs, and other effects. Adjust the keyframes in the timeline to control the animation’s timing and duration.
- Add Multiple Text Layers: For complex titles, you can add multiple text layers within the ProType Titler. Each layer can be individually animated and styled.
- Preview and Adjust: Regularly preview your title within the video to ensure it aligns with your vision. Adjust the animations and styles as needed for the perfect presentation.
With the ProType Titler, your titles and text can achieve a level of sophistication and dynamism that enhances the overall impact of your video projects.

Creating Credit Rolls and Title Screens
Creating engaging credit rolls and title screens in Sony Vegas can elevate your video projects, providing a professional touch. Follow these detailed steps to craft compelling openings and closings:
- Start with a New Project: Open Sony Vegas and create a new project that matches the specifications of your video.
- Access the Media Generators: Navigate to the Media Generators tab, which offers a range of options for creating text-based elements like title screens and credit rolls.
- Choose Your Template: Within the Media Generators tab, select the \"Titles & Text\" or \"Credit Roll\" template depending on your need. Drag the chosen template onto your timeline.
- Customize Text Content: Double-click the text event on the timeline to open the editing window. Here, you can input your title or credits information, adjusting the font, size, color, and positioning to fit your project\"s style.
- Animating the Credit Roll: For credit rolls, adjust the animation settings to control the speed and direction of the scrolling text. This ensures your credits move smoothly and at an appropriate pace for viewers to read.
- Add Background Elements: Enhance your title screens and credit rolls by adding background images, videos, or solid colors. These can be added to tracks beneath the text layer and customized to complement the text.
- Preview and Refine: Regularly preview your title screen or credit roll within the context of your video to ensure it integrates seamlessly. Make any necessary adjustments to timing, animation, or aesthetics.
By following these steps, you can create dynamic and visually appealing title screens and credit rolls that add a professional finish to your video projects in Sony Vegas.
Using Keyframes for Text Animation
Keyframes are essential for creating smooth and dynamic text animations in Sony Vegas. They allow you to define specific points in your timeline where changes occur, making it possible to animate text from one state to another seamlessly. Here\"s how to use keyframes for text animation:
- Open Your Project: Start by opening your project in Sony Vegas and navigate to the point in the timeline where you want to add animated text.
- Add Text: Use the Media Generators tab to add a text element to your timeline. Customize the text to your liking.
- Access the Event Pan/Crop Tool: Right-click on the text event and select \"Event Pan/Crop.\" This will open a new window where you can create animations.
- Create Keyframes: In the Event Pan/Crop window, you\"ll see a timeline at the bottom. Click on this timeline to add keyframes, which are markers for where your text’s properties will change.
- Animate Text Properties: For each keyframe, adjust properties such as position, scale, or rotation to change how the text appears at that moment in the video. By adding multiple keyframes, you can create animations where the text moves, grows, shrinks, or rotates.
- Adjust Keyframe Interpolation: Right-click on a keyframe to change its interpolation method, such as smooth, sharp, or slow. This affects how the animation transitions between keyframes.
- Preview Your Animation: Use the preview window to play back your animation, ensuring it flows as expected. Make adjustments as needed by adding, removing, or modifying keyframes.
By mastering keyframes in Sony Vegas, you can create professional-looking text animations that add depth and interest to your video projects.

_HOOK_
READ MORE:
Tips for Efficient Text Editing
Efficient text editing in Sony Vegas can streamline your video editing workflow and enhance your final product. Here are some expert tips to help you edit text more effectively:
- Use Keyboard Shortcuts: Learn and utilize keyboard shortcuts for common text editing tasks, such as opening the text editor (Ctrl+T) and copying/pasting text properties, to save time.
- Customize Default Text Settings: Save your frequently used text styles as presets. This allows you to apply your favorite text formats quickly without manually adjusting settings each time.
- Batch Edit Text: When working with multiple text elements, use the project media window to select and adjust properties for multiple texts at once, ensuring consistency across your project.
- Use Snapping for Alignment: Enable snapping in the timeline to align text elements with video clips or transitions accurately, creating a polished look.
- Preview As You Go: Regularly preview your edits in the video preview window. This helps ensure that text animations and timings align perfectly with the video content.
- Explore Text Effects: Don\"t shy away from experimenting with text effects and animations available in the Media Generators tab. These can add a professional touch to your videos.
- Keep It Legible: Always ensure your text is legible against the background. Use drop shadows, outlines, or background boxes if necessary to make text stand out.
- Maintain Consistency: For projects with multiple text elements, maintain consistency in font, color, and size to keep your video cohesive and professional-looking.
By following these tips, you can enhance your efficiency and creativity when editing text in Sony Vegas, leading to more engaging and polished videos.
Mastering text insertion and customization in Sony Vegas unlocks endless creative possibilities, elevating your videos to professional standards. Embrace these techniques to captivate your audience and bring your storytelling to life.