Topic connect sony bravia to wifi: Discover the simple steps to connect your Sony Bravia to WiFi and unlock a world of seamless streaming and entertainment. Follow our comprehensive guide for an easy setup.
Table of Content
- How to connect a Sony Bravia to WiFi?
- Understanding Your Sony Bravia WiFi Capabilities
- Pre-Connection Checklist
- Step-by-Step Guide to Connect to WiFi
- Using WPS for Easier Connection
- Manual Setup for Advanced Users
- Troubleshooting Connection Issues
- YOUTUBE: Sony Bravia TV: Connect to Wifi Network
- Updating Your Sony Bravia Firmware
- Maximizing WiFi Connection Performance
- Connecting to WiFi Without a Remote
- Advanced WiFi Features and Settings
- Securing Your WiFi Connection
How to connect a Sony Bravia to WiFi?
To connect a Sony Bravia TV to WiFi, follow these steps:
- On your TV remote control, press the HOME button.
- Select \"Settings\" from the menu.
- Look for the option called \"Wireless network setup\" and select it.
- Make sure your WiFi network is turned on and within range of your TV.
- Select your WiFi network from the list of available networks.
- If prompted, enter your WiFi network password using the remote control.
- Wait for the TV to connect to the WiFi network.
- Once connected, a confirmation message or symbol will appear on the screen.
After following these steps, your Sony Bravia TV should be successfully connected to the WiFi network.
READ MORE:
Understanding Your Sony Bravia WiFi Capabilities
Your Sony Bravia TV is equipped with advanced WiFi capabilities that enable you to connect to the internet wirelessly, providing access to a vast world of streaming content, apps, and services. Understanding these capabilities will help you make the most of your smart TV experience.
- Integrated WiFi: Most Sony Bravia models come with built-in WiFi, allowing for easy connection to your home network without the need for additional cables or hardware.
- Streaming Services: Once connected, you can stream your favorite movies, TV shows, and music from popular services like Netflix, Hulu, Amazon Prime Video, and Spotify.
- Screen Mirroring: With WiFi, you can also mirror your smartphone or tablet screen to your Bravia TV, making it easier to share photos, videos, and other content with friends and family.
- Software Updates: Keeping your TV\"s firmware up to date is crucial for performance and security. WiFi connectivity enables automatic software updates, ensuring your TV always runs smoothly with the latest features.
- Smart Home Integration: Connect your Sony Bravia to your home network and integrate it with smart home devices for enhanced control and automation. This includes voice control through devices like Amazon Alexa or Google Assistant.
By leveraging these WiFi capabilities, you can enhance your viewing experience, access a broader range of content, and enjoy the convenience of a connected smart home ecosystem. Ensure your WiFi network is stable and secure for the best performance.
Pre-Connection Checklist
Before connecting your Sony Bravia TV to WiFi, it\"s important to go through a pre-connection checklist to ensure a smooth and successful setup. Follow these steps to prepare:
- Check Your WiFi Network: Ensure your home WiFi network is active and functioning correctly. Verify that other devices can connect to it without issues.
- Know Your WiFi Password: Have your WiFi network name (SSID) and password ready. You\"ll need these details to connect your TV to your network.
- Position Your TV Correctly: WiFi signal strength can be affected by distance and obstacles. Place your Sony Bravia TV in a location where it can receive a strong WiFi signal.
- Update Your TV\"s Software: If your TV is already connected to the internet via an Ethernet cable, ensure it\"s running the latest firmware version for a smoother connection process via WiFi.
- Reboot Your Router: If you haven\"t restarted your router in a while, doing so can resolve many connection issues. Turn off your router, wait a minute, and then turn it back on.
- Prepare for a Manual Connection: In some cases, you might need to manually enter network settings. Familiarize yourself with accessing your router\"s settings in case you need to find out your IP address, subnet mask, and DNS servers.
Completing this checklist will help ensure that your Sony Bravia TV connects to your WiFi network smoothly and efficiently, allowing you to enjoy your favorite streaming content without delay.
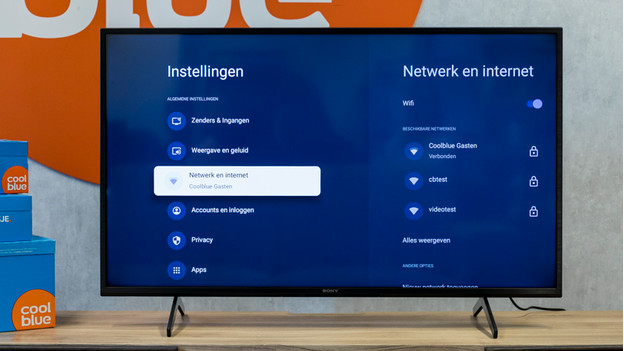
Step-by-Step Guide to Connect to WiFi
Connecting your Sony Bravia TV to your home WiFi network is straightforward. Follow these step-by-step instructions to get connected:
- Turn on Your Sony Bravia TV: Ensure your TV is powered on and ready to go.
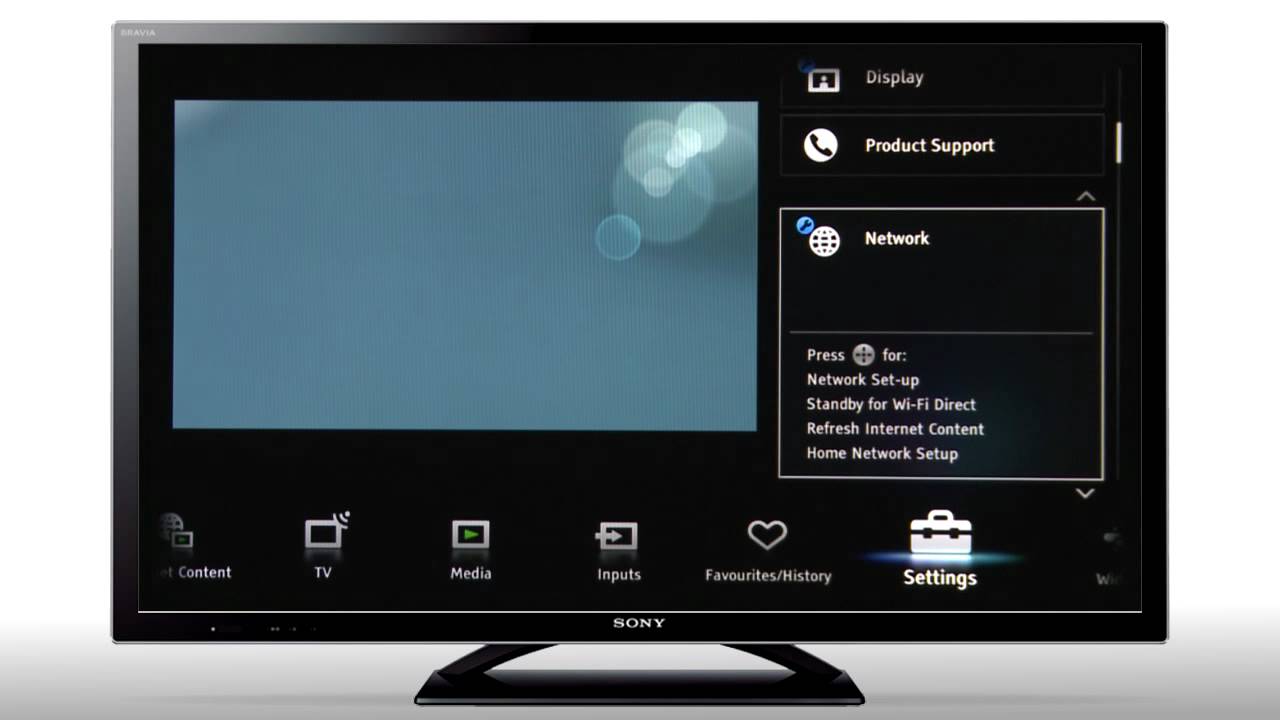
- Access the TV Menu: Using your Sony remote, press the HOME or MENU button to access the main menu.
- Select \"Settings\": In the menu, navigate to and select the \"Settings\" option. Depending on your model, this may be represented by a gear icon.
- Go to Network Settings: Within the Settings menu, find and select \"Network,\" then choose \"Network Setup\" or \"Setup Network Connection.\"
- Select \"Wireless Setup\": Choose the option for a wireless connection, which may be labeled \"Wireless Setup,\" \"WiFi Setup,\" or something similar.
- Choose Your WiFi Network: Your TV will search for available networks. Select your home WiFi network from the list.
- Enter WiFi Password: When prompted, use the on-screen keyboard to enter your WiFi network password. Ensure accuracy as passwords are case-sensitive.
- Confirm and Connect: After entering your password, select \"OK\" or \"Connect\" to initiate the connection process. Your TV will connect to the WiFi network.
- Connection Confirmation: Once connected, you\"ll receive a confirmation message. You may now access the internet and streaming services directly from your TV.
If you encounter any issues during the setup process, refer to the troubleshooting section for help resolving common WiFi connection problems.

Using WPS for Easier Connection
Connecting your Sony Bravia TV to WiFi can be simplified using the WPS (Wi-Fi Protected Setup) feature, which allows for a quick and secure connection without the need to enter a password. Follow these steps to connect using WPS:
- Check WPS Compatibility: Ensure that both your Sony Bravia TV and your WiFi router support WPS. Look for the WPS logo or check the device manuals for confirmation.
- Access the TV\"s Network Settings: Press the HOME or MENU button on your Sony remote, navigate to \"Settings,\" then to \"Network,\" and select \"Network Setup\" or \"Setup Network Connection.\"
- Select \"WPS (Push Button)\": In the network setup options, choose \"WPS (Push Button)\" or a similarly named option to initiate the WPS connection process.
- Activate WPS on Your Router: Within two minutes of selecting WPS on your TV, press the WPS button on your router. This is usually labeled \"WPS\" and may require a long press to activate.
- Wait for Connection: After pressing the WPS button on your router, wait momentarily. Your TV will automatically connect to the WiFi network without needing to enter a password.
- Confirmation: Once connected, a confirmation message will appear on your Sony Bravia TV screen. You are now connected to the WiFi network and ready to enjoy streaming services.
Using WPS is a convenient and secure method to connect your Sony Bravia TV to your home network, eliminating the need to manually enter complex passwords.

_HOOK_
Manual Setup for Advanced Users
For those who prefer a more hands-on approach or need to configure specific network settings, a manual setup of your Sony Bravia TV\"s WiFi connection might be the right choice. Here\"s how to manually configure your network settings:
- Access Network Settings: Press the HOME or MENU button on your remote, navigate to \"Settings,\" then select \"Network\" and go to \"Network Setup\" or \"Setup Network Connection.\"
- Choose Manual Setup: In the network setup options, select \"Expert,\" \"Custom,\" or \"Manual\" setup, depending on your TV model.
- Select Wireless Network: Choose the option to connect via WiFi, then select \"Manual Input\" or \"Other Network\" to enter network details manually.
- Enter Network Information: Input your network\"s SSID (name) manually. Ensure accuracy as WiFi names are case-sensitive.
- Specify Security Type: Select the security protocol used by your WiFi network (e.g., WPA, WPA2, WEP). This must match your router\"s settings.
- Input Password: Enter your WiFi network\"s password. Double-check for accuracy, considering case sensitivity.
- Advanced Settings: If necessary, enter additional settings such as IP address, subnet mask, default gateway, and DNS servers. This step is typically required only in specific network configurations or for troubleshooting purposes.
- Test Connection: After entering all details, select the option to test the connection. Your TV will attempt to connect to the network with the provided settings.
- Save and Exit: Once the connection is successfully established, save the settings and exit the menu. Your Sony Bravia TV is now connected to your WiFi network with manual settings.
This manual setup process allows advanced users to fine-tune their network connection, ensuring compatibility with specific network requirements or configurations.
Troubleshooting Connection Issues
If you encounter issues while trying to connect your Sony Bravia TV to WiFi, don\"t worry. Here are some steps to troubleshoot and resolve common connection problems:
- Check Your WiFi Network: Ensure that your WiFi router is on and functioning properly. Try connecting with another device to confirm the network is active.
- Restart Your TV and Router: Sometimes, a simple restart can resolve connection issues. Turn off your TV and router, wait a minute, and then turn them back on.
- Verify the Password: Double-check the WiFi password you entered. Passwords are case-sensitive and must be entered exactly as set on your router.
- Update Your TV\"s Firmware: An outdated firmware can cause connection problems. Check for any available updates for your Sony Bravia TV and install them.
- Reduce WiFi Interference: Devices like cordless phones, microwaves, and Bluetooth speakers can interfere with your WiFi signal. Move these devices away from your router and TV.
- Change WiFi Channel: Your router\"s current WiFi channel may be congested. Access your router settings and try switching to a less crowded channel.
- Factory Reset: If all else fails, consider performing a factory reset on your TV. Note that this will erase all settings and return the TV to its original state.
- Contact Support: If you\"re still experiencing issues, it may be time to contact Sony support for further assistance or to inquire about potential hardware issues.
By following these troubleshooting steps, you can resolve most WiFi connection issues and enjoy uninterrupted streaming and online content on your Sony Bravia TV.
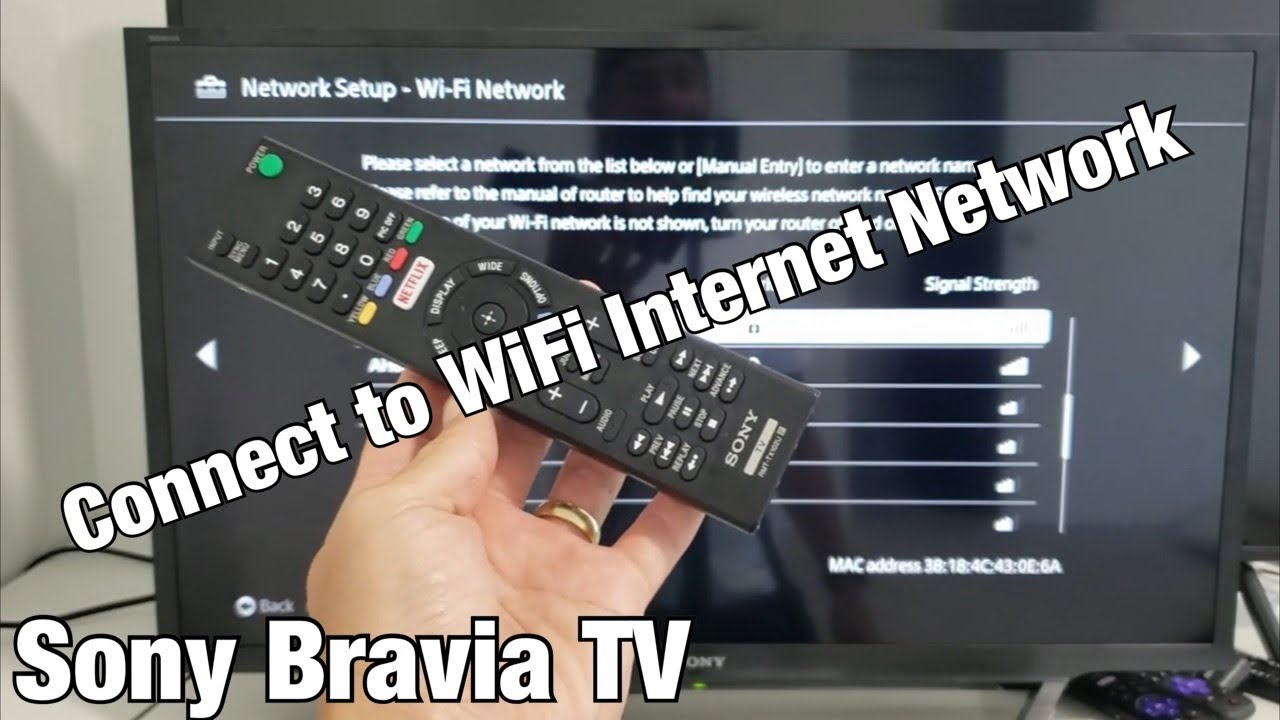
Sony Bravia TV: Connect to Wifi Network
Experience breathtaking visuals and immersive sound with the Sony Bravia TV! Dive into a world of vibrant colors, lifelike details, and crystal-clear resolution that will bring your favorite movies and shows to life like never before. Prepare to be enchanted by the stunning picture quality of Sony Bravia TV – a true feast for your eyes!
Connect BRAVIA to wireless network
Want to unlock a world of endless entertainment options? It\'s time to connect your BRAVIA TV to the wireless network! With this simple tutorial video, you\'ll learn how to seamlessly connect your TV to the internet and unlock a whole range of streaming services, apps, and online content. Get ready to enjoy your favorite shows, movies, and music at the touch of a button!
Updating Your Sony Bravia Firmware
Keeping your Sony Bravia TV\"s firmware updated is crucial for optimal performance and access to the latest features and security improvements. Here’s how to update your TV\"s firmware:
- Check for Updates: Press the HOME or MENU button on your remote, navigate to \"Settings,\" then select \"Customer Support,\" \"Product Support,\" or \"Software Update.\"
- Connect to the Internet: Ensure your TV is connected to the internet. You can update the firmware via WiFi or a wired Ethernet connection.
- Download the Update: If an update is available, select \"Network Update\" or \"Download\" to start the process. The TV will download the firmware update from Sony\"s servers.
- Install the Update: Once the download is complete, you may be prompted to install the update. Confirm the installation, and the TV will restart to apply the update. During this time, do not turn off the TV or disconnect it from the power source.
- Manual Update: If your TV is not connected to the internet, you can download the latest firmware update from the Sony support website onto a USB drive and insert it into your TV. Navigate to the \"Software Update\" section in the settings and select \"USB\" to initiate the update process from the USB drive.
- Confirmation: After the update is installed, the TV will restart. You can verify the update by going back to the \"Software Update\" section and checking the current software version.
Regular firmware updates ensure your Sony Bravia TV runs efficiently with the latest functionalities and security features, enhancing your viewing experience.

Maximizing WiFi Connection Performance
To ensure your Sony Bravia TV maintains a strong and stable WiFi connection, follow these tips to maximize performance:
- Optimal Router Placement: Place your WiFi router in a central location away from walls and metal objects to reduce signal interference.
- Limit Interfering Devices: Keep other electronic devices that may cause interference, such as microwaves and cordless phones, away from your router and TV.
- Use a WiFi Extender: If your TV is far from the router, consider using a WiFi extender to boost the signal strength and extend the coverage area.
- Connect to 5GHz Band: If your router is dual-band, connecting to the 5GHz band can offer faster speeds and less interference compared to the 2.4GHz band.
- Limit Bandwidth-Heavy Activities: Avoid running bandwidth-intensive activities, like large downloads or streaming on multiple devices, while using your TV to ensure it gets enough bandwidth.
- Regularly Update Router Firmware: Keeping your router\"s firmware up to date can improve performance and security. Check the manufacturer\"s website for updates.
- Change WiFi Channel: Switching to a less congested WiFi channel on your router can reduce interference and improve connection quality.
- Enable QoS Settings: If your router supports Quality of Service (QoS) settings, configure them to prioritize your TV\"s traffic to ensure smooth streaming.
By following these tips, you can enjoy a smoother and more reliable WiFi connection on your Sony Bravia TV, ensuring the best possible streaming experience.

Connecting to WiFi Without a Remote
If you find yourself needing to connect your Sony Bravia TV to WiFi but can\"t locate the remote, don\"t worry. There are still ways to accomplish this task:
- Use the TV Buttons: Most Sony Bravia TVs have physical buttons on the TV itself. These can include a power button, volume controls, and sometimes a menu or home button. Use these buttons to navigate to the network settings and enter your WiFi details.
- Download the Sony TV Remote App: Sony offers a remote control app for smartphones. Download the Sony TV Remote app on your smartphone, connect your phone to the same WiFi network as your TV, and use the app to control your TV and navigate to the WiFi settings.
- USB Keyboard or Mouse: Some Sony Bravia models support USB keyboards and mice. Connect a USB keyboard or mouse to your TV and use it to navigate through the settings menu to the network options and connect to your WiFi network.
- Using a Universal Remote: If you have a universal remote, you can program it to work with your Sony Bravia TV. Once programmed, use it just like the original remote to access the network settings and connect to WiFi.
- Connecting via WPS: If your router has a WPS button, you can press this button and then select the WPS option in your TV’s network settings using one of the alternative methods mentioned above. This bypasses the need to enter a WiFi password.
Even without the original remote, these alternatives provide viable ways to connect your Sony Bravia TV to your WiFi network, ensuring uninterrupted access to smart TV features and online content.

_HOOK_
Advanced WiFi Features and Settings
Unlock the full potential of your Sony Bravia TV by exploring its advanced WiFi features and settings. These can enhance your streaming experience, provide more control over your network connection, and even improve security. Here\"s a look at some of the advanced options available:
- WiFi Direct: This feature allows your TV to connect directly with other WiFi Direct-enabled devices without needing a router, facilitating easier sharing and streaming of content.
- IP Control Setup: For users integrating their Sony Bravia TV into a home automation system, IP control over WiFi can be enabled, allowing for remote control of the TV through the network.
- Network Service Disclaimer: Adjust settings related to the data sharing and privacy policies associated with Sony\"s network services, ensuring your preferences for how your data is handled are met.
- Static IP Configuration: For a more stable connection, you may assign a static IP address to your TV, avoiding IP conflicts and ensuring consistent access to your network resources.
- DNS Settings: Customize your DNS server settings to potentially speed up your internet connection and even bypass regional restrictions for certain streaming services.
- Proxy Server Setup: If your network requires a proxy server, you can enter the proxy settings manually, allowing your TV to connect to the internet through the specified proxy.
- Bandwidth Optimization: Some Sony Bravia TVs offer settings to prioritize bandwidth usage, ensuring that your TV streaming does not get interrupted or slowed down by other devices on your network.
By diving into these advanced settings, you can tailor your WiFi connection to better suit your viewing habits, security needs, and overall home network environment, making your Sony Bravia TV a more integrated part of your digital life.
READ MORE:
Securing Your WiFi Connection
Ensuring the security of your WiFi connection not only protects your personal information but also enhances the performance of your Sony Bravia TV by preventing unauthorized access. Follow these steps to secure your network:
- Use a Strong Password: Create a strong, unique password for your WiFi network. Avoid common words and include a mix of letters, numbers, and special characters.
- Enable WPA3 Encryption: If your router supports it, enable WPA3 encryption for the highest level of security. If not available, WPA2 is a good alternative.
- Change the Default Network Name: Changing your network\"s SSID (name) from the default can help deter potential hackers by making it less obvious which network is yours.
- Disable WPS: While WPS (WiFi Protected Setup) is convenient, it can also be a security vulnerability. Disable it in your router settings if you\"re not using it.
- Keep Your Router\"s Firmware Updated: Manufacturers often release firmware updates that include security patches. Regularly check for and install these updates.
- Limit Network Access: Use your router\"s settings to control which devices can connect to your network. MAC address filtering is one method to allow only known devices.
- Enable Network Firewall: Most routers have a built-in firewall. Ensure it\"s activated to protect your network from unwanted external access.
- Regularly Monitor Your Network: Keep an eye on the devices connected to your network. Unrecognized devices could indicate a security breach.
By taking these steps to secure your WiFi connection, you can enjoy your Sony Bravia TV\"s online features with peace of mind, knowing your network and personal information are well-protected.
Connecting your Sony Bravia to WiFi unlocks a world of endless entertainment and smart features. Follow our comprehensive guide to enjoy seamless streaming, enhanced performance, and secure browsing on your smart TV.