Topic motion tracking sony vegas: Discover the transformative power of motion tracking in Sony Vegas, unlocking unparalleled precision and creativity in your video editing projects. Elevate your storytelling with this comprehensive guide.
Table of Content
- How to use motion tracking in Sony Vegas?
- Overview of Motion Tracking in Sony Vegas
- Starting with Bézier Masking
- Creating and Adjusting Your Mask
- Applying Motion Tracking to Your Mask
- Planar Motion Tracking with Mocha in VEGAS Pro 21
- YOUTUBE: Motion Tracking Title & Text in Sony Vegas Pro 18
- Using Picture-in-Picture for Motion Tracking
- Importing 2D Motion Tracking Data with Vegasaur
- Advanced Motion Tracking Features in VEGAS Pro
- Enhancing Videos with Motion Tracking Effects
- Comparing VEGAS Pro to Other Video Editing Software
- Utilizing AI Features for Motion Tracking in VEGAS Pro
- Learning Resources and Tutorials for Motion Tracking
How to use motion tracking in Sony Vegas?
To use motion tracking in Sony Vegas, follow these steps:
- Select the video clip that you want to apply motion tracking to and drag it to the timeline.
- Right-click on the video clip in the timeline and select \"Track Motion\" from the context menu.
- In the Track Motion dialog box, you\'ll find the Preview Window that displays the video clip.
- Click and drag the handles on the outer edge of the Preview Window to resize and reposition it as needed.
- Inside the Preview Window, you\'ll see a crosshair cursor. Place this cursor on the object or area that you want to track.
- Click the \"Start Tracking\" button above the Preview Window to begin the motion tracking process.
- Sony Vegas will analyze the video clip and track the movement of the selected object or area.
- Once the tracking is complete, you can adjust the settings like tracking type, search region, and tracker size from the controls provided in the Track Motion dialog box.
- Additionally, you can apply keyframes to the position, scale, rotation, or opacity of the tracked object to create dynamic effects.
- When you are satisfied with the motion tracking, click \"OK\" to close the Track Motion dialog box.
READ MORE:
Overview of Motion Tracking in Sony Vegas
Motion tracking in Sony Vegas Pro enables editors to seamlessly integrate text, objects, or special effects with the movement within their video footage. This powerful feature enhances storytelling by allowing for dynamic visual effects that follow the action in your scenes.
- Introduction to Motion Tracking: Learn the basics of motion tracking, including its purposes and how it can transform your video projects.
- Accessing Motion Tracking Tools: A step-by-step guide to accessing the motion tracking features within Sony Vegas, including the Planar Motion Tracking with Mocha and the Bézier Masking tool.
- Applying Motion Tracking: Instructions on how to apply motion tracking to your video clips, adjusting for precision and effect.
- Advanced Techniques: Explore advanced motion tracking techniques, such as picture-in-picture effects and using external motion data for more complex projects.
Whether enhancing the realism of your scenes with subtle motion effects or creating engaging visual narratives, motion tracking in Sony Vegas Pro offers a suite of tools to elevate your video editing capabilities. Through its intuitive interface and robust features, editors can execute precise motion tracking to attach graphics or text to moving objects within their footage, making it an indispensable tool for post-production workflows.

Starting with Bézier Masking
Bézier masking in Sony Vegas is a foundational tool for motion tracking, allowing editors to define and isolate objects within a video frame with precision. This technique is crucial for attaching graphics, text, or effects to moving elements in your footage.
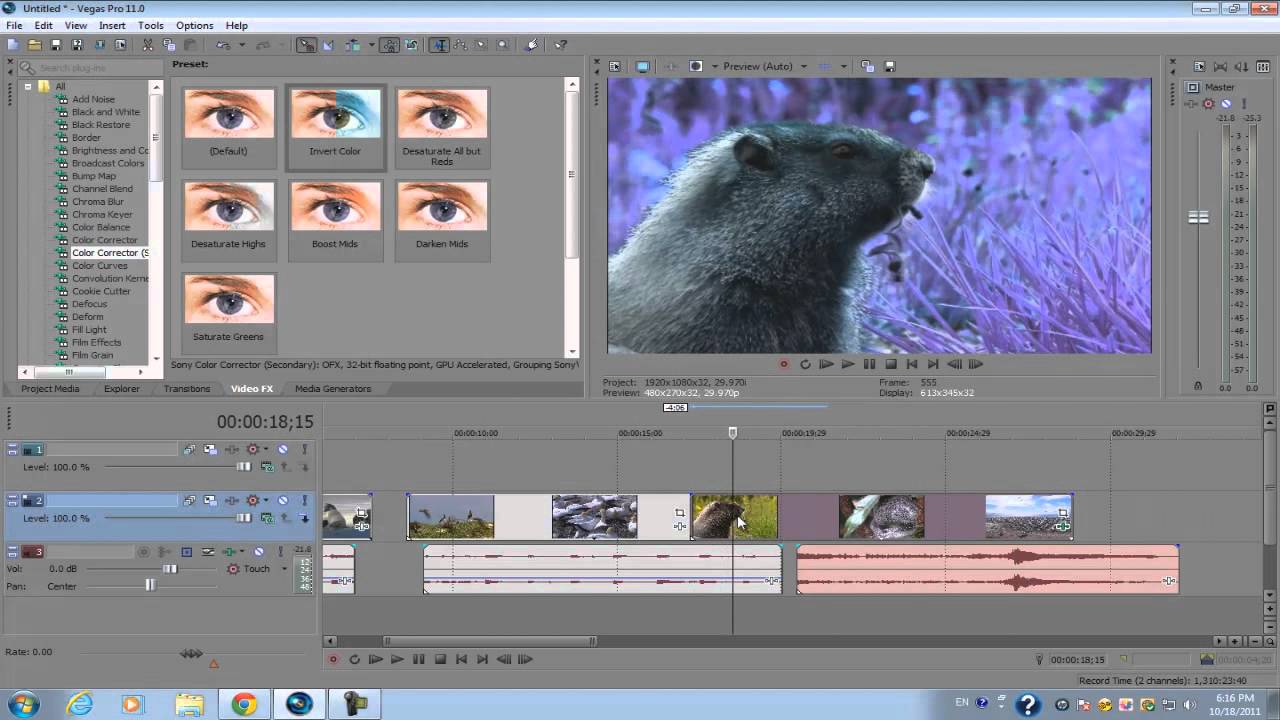
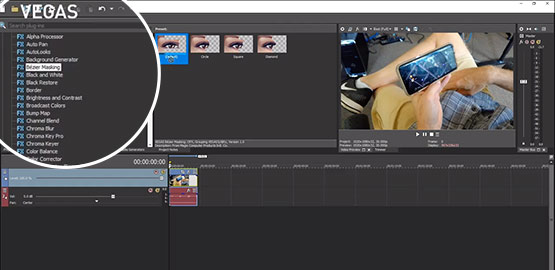
- Accessing Bézier Masking: Navigate to the Video FX tab, select Bézier Masking from the list of effects, and apply it to your clip.
- Creating Your Mask: Use the pen tool to draw around the object you wish to track. Adjust the anchor points to fit the object\"s shape accurately.
- Adjusting Mask Properties: Fine-tune your mask with feathering and opacity controls to blend it naturally into the scene.
- Animating the Mask: Keyframe the mask path to match the movement of the object across frames, ensuring a seamless tracking experience.
Starting with Bézier masking sets the stage for effective motion tracking in Sony Vegas. By meticulously defining the area to be tracked, editors can leverage the software\"s robust tracking capabilities to produce dynamic, engaging video content that captivates audiences.
Creating and Adjusting Your Mask
Creating and adjusting a mask in Sony Vegas for motion tracking involves a detailed process to ensure your tracked object is accurately followed throughout your clip. This precision is critical for adding effects, text, or other elements seamlessly.
- Drawing the Mask: Select the Bézier Mask tool from the Video FX options and begin drawing around the object you wish to track. Click to add points and close the loop to create your initial mask.
- Adjusting Anchor Points: Fine-tune the shape of your mask by moving the anchor points. This ensures the mask closely matches the contours of your object, even if it\"s irregular.
- Feathering the Mask: Adjust the mask\"s feathering to soften the edges, allowing it to blend more naturally with the background and the tracked object.
- Keyframing for Movement: Go frame by frame to adjust the mask’s position, ensuring it stays aligned with the moving object. This may involve adding keyframes to the mask path to accommodate for changes in direction or speed.
- Testing Your Mask: Preview your video to check the mask’s effectiveness. Adjust as necessary, paying close attention to areas where the mask might slip or reveal edges.
This meticulous process of creating and adjusting your mask is fundamental for effective motion tracking in Sony Vegas, enabling you to apply effects with precision to moving objects within your video.

Applying Motion Tracking to Your Mask
Applying motion tracking to your mask in Sony Vegas Pro involves a series of steps to ensure your effects, text, or other elements follow the movement of your object precisely throughout the scene. This capability significantly enhances the impact and professionalism of your videos.
- Setting Up Motion Tracking: Once your mask is created, select the motion tracking option within the Bézier Masking tool. This prepares your project for tracking the movement of the masked object.
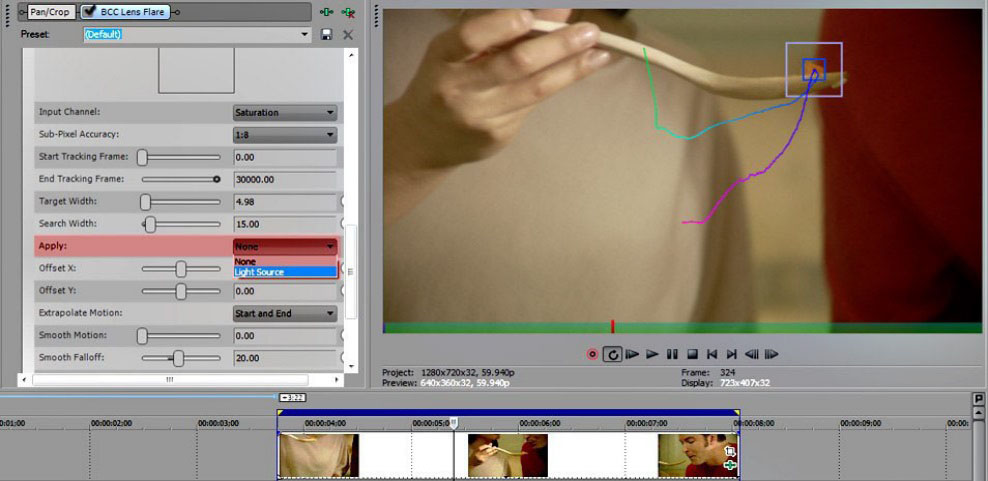
- Choosing Tracking Points: Identify and select points on the object that will serve as references for the tracking process. These should be distinct, high-contrast areas that are visible throughout the clip.
- Initiating the Track: Start the tracking process. Sony Vegas will analyze the movement of your selected points frame by frame. Adjust the tracking settings as necessary to improve accuracy.
- Adjusting Keyframes: Review the automatically generated keyframes for the mask\"s movement. You may need to manually adjust some keyframes to ensure the mask follows the object accurately, especially in challenging sequences.
- Applying the Tracked Data: Once satisfied with the tracking, apply the tracked motion data to your mask. This will ensure that any effects or elements you attach to the mask will move in unison with the tracked object.
- Finalizing Your Track: Review your video in full to ensure the tracking looks natural and adjust any areas as needed. This step is crucial for maintaining the illusion that the tracked elements are a part of the original scene.
By carefully applying motion tracking to your mask in Sony Vegas, you can create dynamic, engaging content that showcases your technical skill and creative vision.
_HOOK_
Planar Motion Tracking with Mocha in VEGAS Pro 21
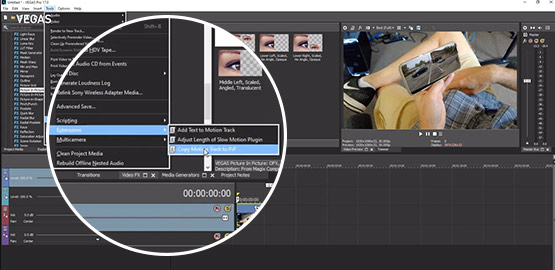
Planar Motion Tracking allows for the tracking of objects not square to the camera, enabling the pinning of video or images to follow the tracked object\"s perspective. VEGAS Pro 21 incorporates this feature using two effects: Bézier Masking and Picture In Picture. This functionality enables creative possibilities like adding moving posters to walls or replacing content on screens within a video scene.
- Add the video you wish to track and apply the Bézier Masking Effect.
- Create your mask around the object to track, then apply motion tracking to follow the object through its motion.
- Add and pin a new video or image using the Picture In Picture effect, adjusting it to match the tracked object\"s movement.
- Refine the pinning with manual adjustments for precision, ensuring seamless integration of the new content into the tracked object.
Additionally, VEGAS Pro 21 includes Mocha VEGAS, a planar tracking tool developed by Boris FX, enhancing motion tracking capabilities for effects work such as screen replacements. The software also features the Z-Depth OFX plug-in for foreground and background layer management, Adjustment Events for applying effects across multiple layers, and AI-powered Smart Masking for automatic object identification and mask creation.
These tools collectively expand the creative potential in video editing, offering sophisticated motion tracking and stabilization, object pinning, and effects application in VEGAS Pro 21.

Motion Tracking Title & Text in Sony Vegas Pro 18
Discover the fascinating world of motion tracking in this mind-blowing video! Witness how this advanced technology captures every movement with precision, allowing for seamless integration of graphics and effects. Don\'t miss out on this incredible visual experience!
Using Picture-in-Picture for Motion Tracking
The Picture-in-Picture (PiP) feature in Sony Vegas is a versatile tool that can be creatively used for motion tracking in video editing projects. This method allows editors to attach a secondary video or image overlay to a moving object within the main video frame. Here\"s a step-by-step guide on how to utilize the PiP feature for motion tracking:
- Identify the Target Video Clip: Start by selecting the video clip on which you want to apply the PiP motion tracking. This could be footage where you want to overlay graphics, text, or another video clip onto a specific moving object.
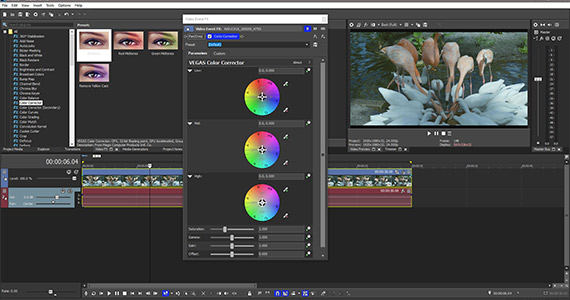
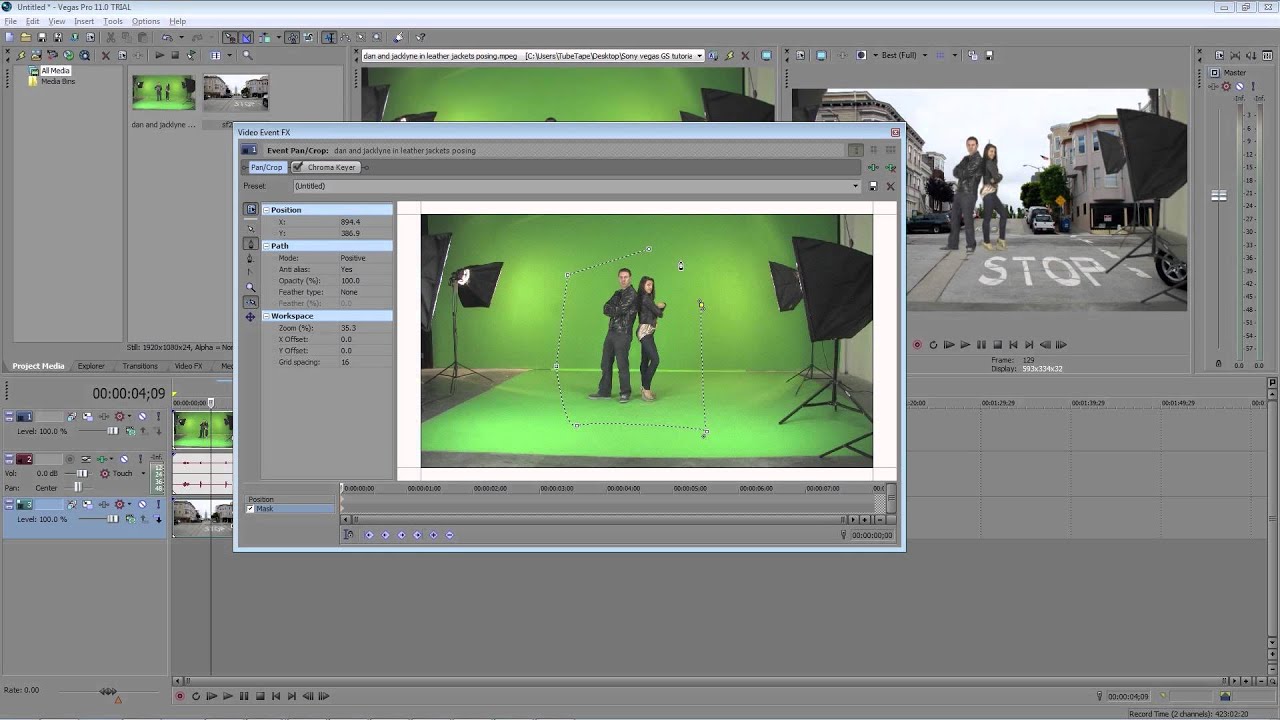
- Add the PiP Effect: Go to the Video FX tab, find the Picture-in-Picture effect, and drag it onto the target video clip. This will open the PiP effect settings in the Video Event FX window.
- Configure the Overlay: Import the video or image you want to overlay onto your target clip and add it to a track above the main video. Use the PiP settings to position, scale, and rotate the overlay as needed to match the starting point of the object you\"re tracking.
- Keyframe the Motion: Manually keyframe the movement of the overlay by adjusting its position, scale, and rotation to follow the moving object frame by frame. This requires patience and precision to ensure the overlay seamlessly follows the object\"s motion.
- Refine the Tracking: Use the masking tools, if necessary, to refine the overlay\"s appearance on the moving object. For example, you might need to mask out parts of the overlay to make it look like it\"s behind certain elements in the video.
- Preview and Adjust: Regularly preview your work to ensure the motion tracking looks natural. Adjust the keyframes and settings as needed until you\"re satisfied with the result.
While the PiP feature does not automate motion tracking, it provides a powerful way to achieve the effect through manual keyframing. For more complex motion tracking needs, consider using dedicated motion tracking software or plugins that offer automatic tracking capabilities.
Remember, mastering the PiP motion tracking technique in Sony Vegas requires practice and patience, but it can greatly enhance your video projects by allowing for dynamic visual effects and storytelling elements.
Easy Locked-On Stabilization Effect Sony Vegas Pro 18 Tutorial
Experience the magic of stabilization effect in action as you watch this awe-inspiring video. Say goodbye to shaky footage and hello to smooth, professional-looking videos. Be amazed at how this feature effortlessly transforms your content into a cinematic masterpiece!
Importing 2D Motion Tracking Data with Vegasaur
Importing 2D motion tracking data into Sony Vegas enhances your video projects by allowing precise tracking of objects with externally acquired data. Vegasaur, an extension for Sony Vegas Pro, streamlines this process, offering tools to import and apply motion tracking data directly within your projects. Follow these steps to import 2D motion tracking data using Vegasaur:
- Install Vegasaur: Ensure that Vegasaur is installed and properly set up within Sony Vegas Pro. Vegasaur integrates directly into the Vegas Pro interface, providing additional functionality through the Extensions menu.
- Prepare Your Tracking Data: Motion tracking data should be prepared in a compatible format. Vegasaur typically supports common formats such as CSV or XML, which can be exported from motion tracking software.
- Import the Tracking Data: Open the Vegasaur toolkit, navigate to the motion tracking section, and select the option to import tracking data. Browse to the location of your tracking data file and select it for import.
- Apply the Tracking Data to Your Clip: Once imported, you\"ll have the option to apply the tracking data to a specific video clip within your timeline. Select the clip you wish to track and apply the data. Vegasaur will align the tracking data points with the clip\"s movement.
- Adjust the Tracking Parameters: After applying the tracking data, you may need to adjust parameters such as scale, rotation, and position offsets to ensure the tracking aligns perfectly with your video content.
- Review and Refine: Play back the tracked clip to review the accuracy of the motion tracking. Use Vegasaur\"s tools to refine the tracking data further if necessary, ensuring seamless integration with your video.
Importing 2D motion tracking data with Vegasaur significantly enhances the post-production workflow in Sony Vegas Pro, enabling advanced tracking scenarios that would otherwise be difficult or time-consuming to achieve directly within the software. By following these steps, editors can leverage external motion tracking data to create dynamic, engaging video content with precision and efficiency.

Advanced Motion Tracking Features in VEGAS Pro
VEGAS Pro\"s advanced motion tracking features enable precise and detailed video editing capabilities, allowing users to enhance their projects with sophisticated visual effects. Utilizing the Bézier Masking and Picture-in-Picture effects, editors can accurately track objects in motion, pinning additional elements like videos or text with precision to moving objects within their footage.
- Begin with Bézier Masking to define and track the area of interest, ensuring that perspective changes in moving objects are accurately followed.
- Use the Picture-in-Picture effect to overlay new video elements onto tracked objects, adjusting their position and size to match the movement and orientation of the underlying video.
- Apply motion tracking to the Picture-in-Picture effect using scripts for seamless integration of the tracked data, allowing for dynamic adjustments and real-time effects application.
- Enhance video stabilization with advanced tools, providing a shake-free and professional look to your footage.
- Explore the integration of Mocha VEGAS, a planar tracking tool developed specifically for VEGAS Pro, offering Emmy-winning tracking technology for complex effect work.
- Delve into the capabilities of the VEGAS Z-Depth OFX plug-in, enabling the differentiation of video layers as foreground and background, adding depth and dimension to your edits.
These features, alongside GPU acceleration, HDR support, and advanced color grading, make VEGAS Pro a powerful tool for video editors seeking to incorporate motion tracking into their projects.
Enhancing Videos with Motion Tracking Effects
Enhancing videos with motion tracking effects in VEGAS Pro leverages advanced features to add dynamic elements to your footage. From simple text overlays to complex scene integrations, motion tracking opens a myriad of creative possibilities.
- Planar Motion Tracking with Mocha VEGAS: Utilize Mocha VEGAS for detailed planar tracking. This tool, specifically developed for VEGAS Pro, is perfect for effects such as replacing screens on devices within your video. Its Emmy-winning technology ensures precision and ease of use.
- Bézier Masking and Picture-in-Picture Effects: Combine these effects for seamless object tracking and overlay. Start with Bézier Masking to define and track your subject, then use Picture-in-Picture to attach new video elements accurately to the moving object.
- Importing External Motion Tracking Data: With Vegasaur, you can import 2D motion tracking data from external applications into Sony Vegas Pro. This feature expands your creative toolkit by allowing the integration of motion data for enhanced visual effects and stabilization.
- Applying Video Stabilization: Improve your footage quality by stabilizing it within VEGAS Pro. Use the video stabilization plugin to smooth out unwanted camera movements, creating a more professional look for your videos.
- Z-Depth OFX Plugin: Add depth to your scenes with the Z-Depth OFX plug-in. This tool allows you to manipulate layers by setting them as foreground or background, applying effects like blur or color correction to create a sense of depth.
These advanced motion tracking features in VEGAS Pro enable editors to achieve professional-grade visual effects, making it an invaluable tool for enhancing your video projects with dynamic motion elements.

_HOOK_
Comparing VEGAS Pro to Other Video Editing Software
When comparing VEGAS Pro to other leading video editing software like DaVinci Resolve, Filmora 12, and others, several key aspects stand out, including pricing models, editing workflows, color grading, visual effects, audio features, and export capabilities.
- Pricing: VEGAS Pro and many of its competitors offer both perpetual licenses and subscription models, providing flexibility based on users\" budget and preferences. While upfront costs may be higher for perpetual licenses, they eliminate ongoing fees associated with subscriptions.
- Editing Workflow: VEGAS Pro is renowned for its intuitive, logical, and easy-to-learn workflow, contrasting with DaVinci Resolve\"s steeper learning curve. Features like drag-and-drop timeline editing, customizable interfaces, and support for a wide range of professional codecs highlight VEGAS Pro\"s user-centric design.
- Color Grading: Both VEGAS Pro and DaVinci Resolve offer advanced color grading tools, but DaVinci Resolve is particularly noted for its industry-leading color correction capabilities. VEGAS Pro, however, integrates AI-driven tools like colorization and style transfer, adding unique creative possibilities.
- Visual Effects: VEGAS Pro provides a robust set of visual effects, including AI Smart Mask and planar motion tracking, which are not available in some competing software like Filmora 12. DaVinci Resolve stands out with its extensive collection of visual effects and support for multi-camera editing.
- Audio: VEGAS Pro offers full DAW capability and supports VST3 audio FX, providing a superior audio editing experience. While competitors like Filmora 12 offer built-in audio effects, they may lack the comprehensive DAW capabilities of VEGAS Pro.
- Export: VEGAS Pro excels with features like batch rendering and support for professional advanced format support, distinguishing it from other software which may offer more basic export options.
Each software has its strengths, with VEGAS Pro standing out for its flexibility, comprehensive feature set, and ease of use, making it a compelling choice for both beginners and professionals. Whether you prioritize advanced color grading, extensive visual effects, or powerful audio editing capabilities, VEGAS Pro offers a competitive package that matches up well against other top video editing platforms.
Utilizing AI Features for Motion Tracking in VEGAS Pro
VEGAS Pro leverages cutting-edge AI features for enhanced motion tracking, significantly streamlining video editing workflows. This guide explores how to harness these capabilities for dynamic and precise motion tracking.
- Planar Motion Tracking with Mocha VEGAS: Incorporate Mocha VEGAS for sophisticated planar tracking. Developed by Boris FX, Mocha VEGAS is an industry-standard tool that excels in tracking flat surfaces within footage, ideal for special effects like screen replacements on mobile devices.
- Importing 2D Motion Tracking Data: With Vegasaur, import motion tracking data from external applications such as After Effects and Boris Continuum Complete into VEGAS Pro. This feature converts imported data into Pan/Crop or Track Motion keyframes, expanding your creative possibilities.
- Bézier Masking for Precision: Utilize Bézier Masking to define areas for replacement or enhancement, followed by applying motion tracking to ensure the new elements move cohesively with the original footage. This process is detailed through a step-by-step approach, from adding the video to pinning the new content accurately.
- Enhanced Video Stabilization: Apply the Video Stabilization plug-in to smooth out shaky footage, a prerequisite for effective motion tracking. This basic yet powerful tool prepares your video for further editing and motion tracking applications.
- Z-Depth and Adjustment Events: Use the Z-Depth OFX plug-in for layer management, allowing text and effects to appear in front or behind specific layers. Pair this with Adjustment Events to apply effects across multiple layers for cohesive motion tracking and effects integration.
These AI-driven tools in VEGAS Pro not only simplify the motion tracking process but also open up new creative avenues for video editing. By leveraging these features, editors can achieve more dynamic and complex visual effects with greater efficiency and precision.
READ MORE:
Learning Resources and Tutorials for Motion Tracking
Mastering motion tracking in VEGAS Pro is accessible through a variety of tutorials and resources designed to enhance your video editing skills. Whether you are a beginner or an experienced editor, these resources offer step-by-step guidance and insights into using motion tracking tools effectively within your projects.
- Official VEGAS Pro Tutorials: The VEGAS Creative Software website offers official tutorials that cover the basics and advanced techniques of movie making with VEGAS Pro. These tutorials are perfect for getting started and exploring the software\"s capabilities.
- User-Generated Tutorials: Learn from the VEGAS Pro community with tutorials created by artists and users. These resources provide practical insights and creative tips for applying motion tracking in your video projects.
- Comprehensive Guides: Detailed guides on planar motion tracking illustrate the process from beginning to end, including applying the Bézier Masking effect, creating masks, and pinning videos or images to moving objects in your footage.
- Video Stabilization Workflows: Discover how to stabilize your videos before applying motion tracking for smoother results. These workflows guide you through using the VEGAS Video Stabilization plug-in and enhancing video quality.
- ProVideo Coalition Insights: Learn about the new stabilization and motion-tracking features in VEGAS Pro 16, with tutorials showcasing how to isolate moving objects and apply creative effects that follow them across the scene.
By exploring these resources, you can unlock the full potential of motion tracking in VEGAS Pro, enhancing your video editing projects with dynamic and precise object tracking.
Discover the power of motion tracking in Sony VEGAS to elevate your video projects with dynamic precision and creativity. Whether you\"re a novice or a seasoned editor, our comprehensive guide offers valuable insights and tutorials to master motion tracking effortlessly.