Topic sony vegas overlay: Discover the art of enhancing your videos with "Sony Vegas Overlay" techniques, unlocking creative possibilities and transforming your visual storytelling. Elevate your editing skills to captivate your audience.
Table of Content
- What is the process of overlaying video in Sony Vegas?
- Adding Overlays in Sony Vegas
- Picture in Picture Effect
- Resizing and Moving Overlays
- Rotating and Reshaping Overlays
- Advanced Overlay Techniques
- Creating Outros with Overlays
- YOUTUBE: How to Overlay Video Tutorial Vegas Pro 17
- Supporting Content Creators
- Adding Text Overlays
- Alternative Video Editing Solutions
What is the process of overlaying video in Sony Vegas?
To overlay video in Sony Vegas, follow these steps:
- Open Sony Vegas on your computer.
- Import the video you want to overlay and the video you want to use as the overlay.
- Drag both videos onto the timeline in separate tracks.
- Position the overlay video track above the base video track on the timeline.
- Select the overlay video track.
- On the video event FX, click the \"Add\" button.
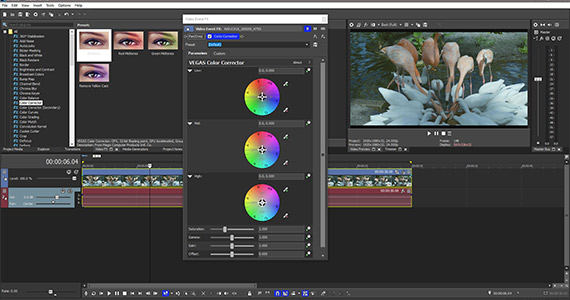
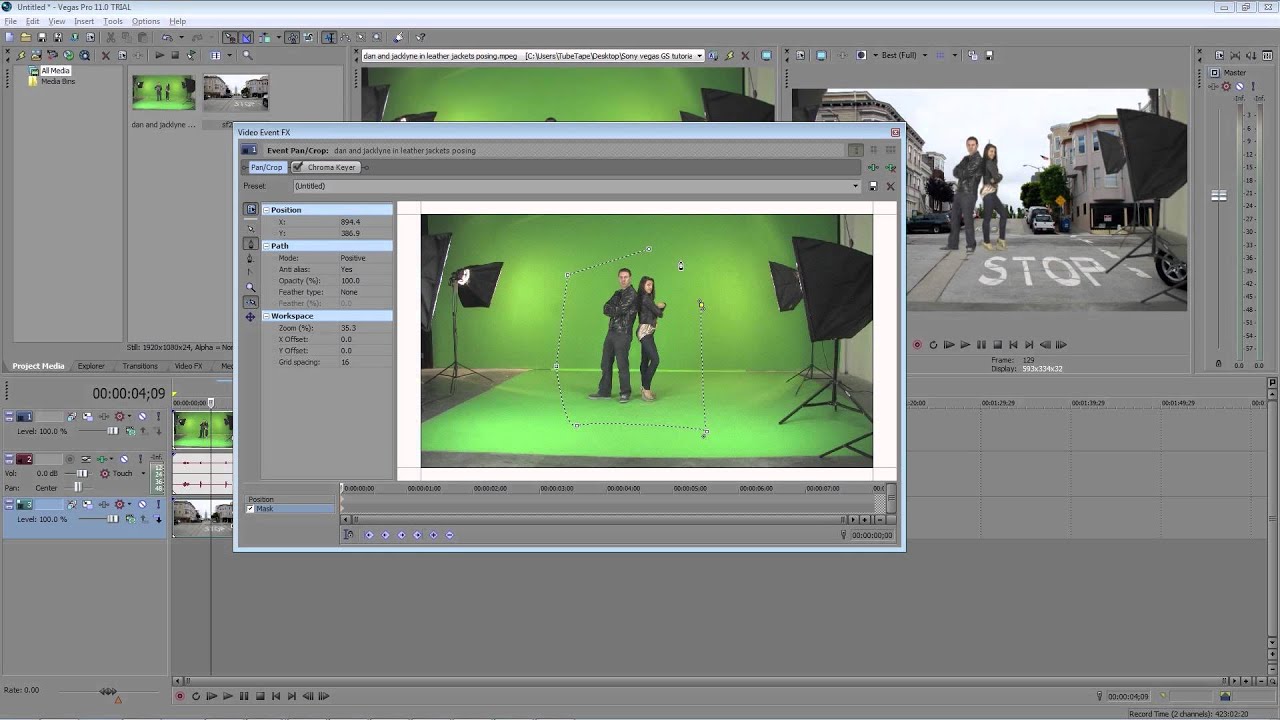
- A list of video effects will appear, select \"Chroma Keyer\".
- In the Chroma Keyer settings, click the eyedropper tool next to \"Key Color\" and select the color you want to make transparent in the overlay video. Adjust the threshold if needed.
- Now, the overlay video will appear transparent where the selected color was.
- Position and resize the overlay video as desired using the transform controls.
- Preview the overlay effect by playing the timeline.
- Once satisfied, render the video with the overlay effect.
By following these steps, you can successfully overlay a video in Sony Vegas.
READ MORE:
Adding Overlays in Sony Vegas
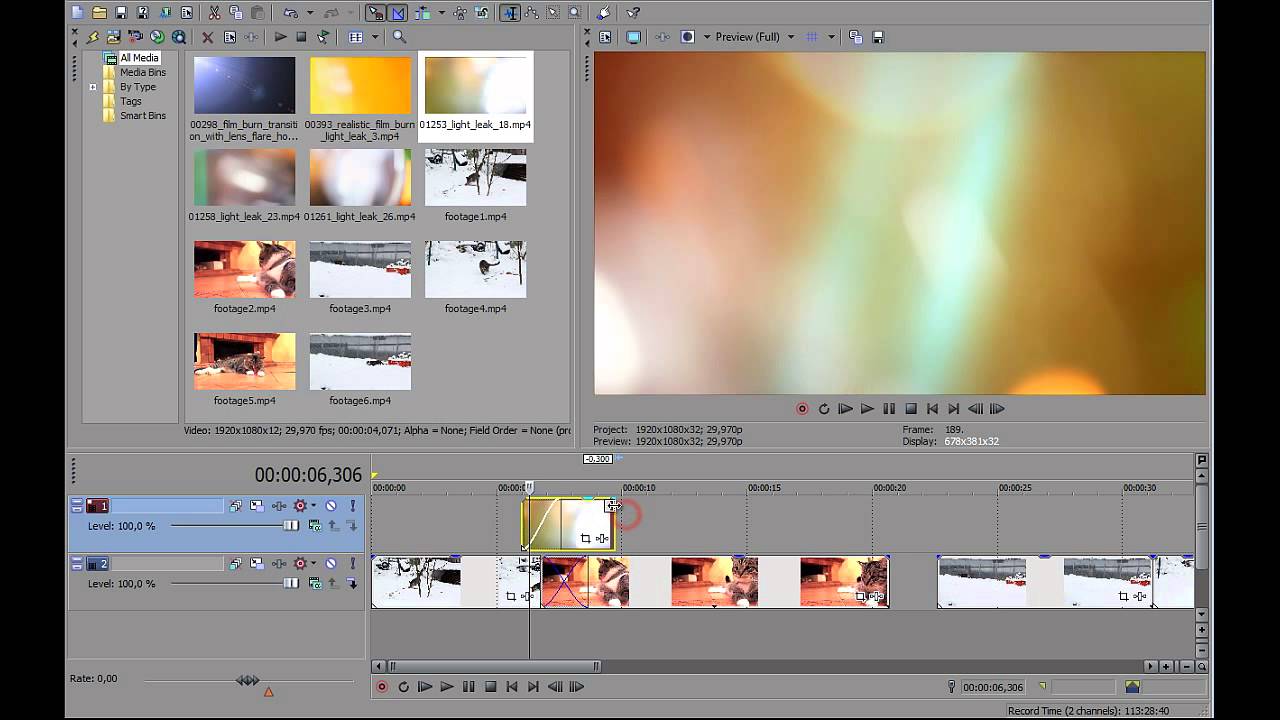
To add overlays in Sony Vegas, you\"ll enhance your videos by incorporating additional visual elements. Follow these steps to seamlessly integrate overlays into your projects:
- Open your project in Sony Vegas and navigate to the timeline where you want to add an overlay.
- Import the media you intend to use as an overlay by selecting File > Import and choosing your file.
- Drag your overlay media onto a track above the video track where you want the overlay to appear. Sony Vegas uses a layer-based system, so overlays must be placed on higher tracks to be visible over the main video.
- To adjust the overlay, click on the event (overlay clip) and use the Edit Tool to resize, move, or crop the overlay directly on the preview screen.
- For more advanced adjustments like opacity, blending modes, or animation, right-click on the overlay clip, select Video Event FX, and choose from the available effects.
- Use keyframes within the Video Event FX window to animate the overlay\"s properties over time for dynamic effects.
Experiment with different overlays, such as text, images, or additional video clips, to create compelling and visually interesting content. Remember, the key to effective overlays is blending them seamlessly with the main video, enhancing the narrative or aesthetic without overshadowing it.

Picture in Picture Effect
The Picture in Picture (PiP) effect in Sony Vegas allows you to display one video clip or image inside another, creating dynamic content that can enhance storytelling or provide additional context. Here’s how to create a PiP effect:
- Open your project in Sony Vegas and ensure you have two clips on your timeline: one for your main video and one for the PiP.
- Drag the clip you want to use as the PiP overlay onto a new track above the main video track.
- Select the overlay clip and navigate to the Video Event FX button. Look for the Picture In Picture effect in the effects menu and apply it to the clip.
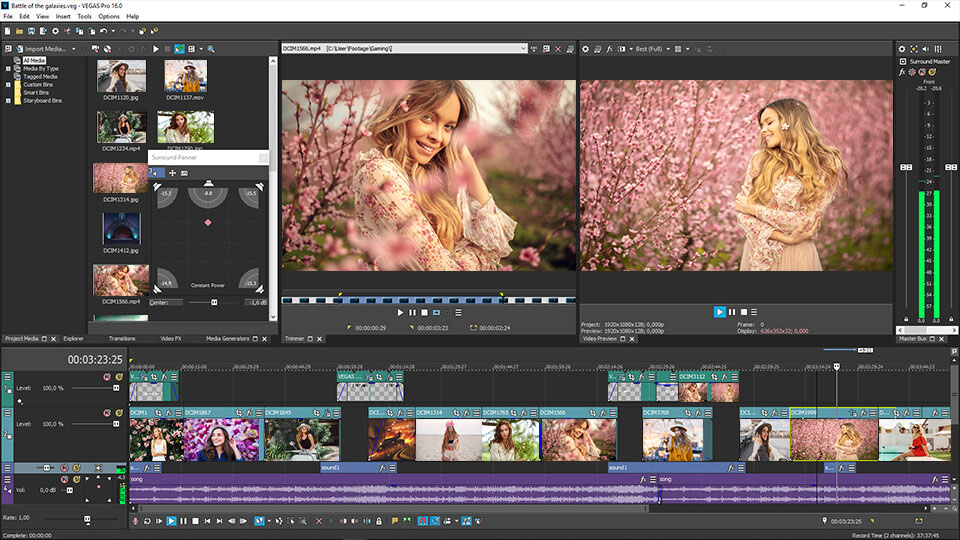
- Once applied, a preview window will show the overlay clip within the main video. You can resize and position the PiP window as desired directly in the preview or by adjusting the effect settings in the Video Event FX window.
- To further customize the PiP effect, you can adjust its border, shadow, and opacity levels to better blend with the main video or to highlight the overlay content.
- If needed, keyframe the position and size of the PiP effect to animate it over time, creating movement within your video.
Utilizing the Picture in Picture effect efficiently can greatly enhance your video\"s visual appeal and narrative depth. Experiment with different placements, sizes, and animations to discover creative ways to engage your audience.

Resizing and Moving Overlays
Adjusting the size and position of overlays in Sony Vegas is crucial for creating a professional-looking video. Here\"s a detailed guide to help you master these adjustments:
- First, ensure your overlay (image, video, or text) is placed on the appropriate track above your main video track in the timeline.
- Select the overlay clip in the timeline to activate the editing handles in the preview window. You\"ll see corners and side handles appear on the selected overlay.
- To resize the overlay, click and drag any of the corner handles. Dragging inward makes the overlay smaller, while dragging outward enlarges it. Hold the Shift key while dragging to maintain the overlay\"s aspect ratio.
- To move the overlay, simply click inside the overlay boundary (avoiding the resizing handles) and drag it to your desired position within the video frame.
- For precise adjustments, you can use the Track Motion feature. Right-click on the overlay track header and select Track Motion. Here, you can numerically adjust the position, scale, and rotation of the overlay.
- If you need to keyframe the movement or resizing of your overlay, enabling animation in the Track Motion window will allow you to set keyframes for different points in time, creating dynamic movement or changes in size throughout the clip.
Remember, subtle adjustments can significantly impact your video\"s storytelling, guiding your audience\"s focus. Take the time to experiment with different sizes and positions to see what best enhances your project.
Rotating and Reshaping Overlays
Rotating and reshaping overlays in Sony Vegas can add a dynamic touch to your video projects. Here’s how to effectively manipulate your overlays for a professional finish:
- Ensure your overlay is correctly placed on the timeline above your main video track.
- Select the overlay in the timeline to activate editing controls in the preview window. If you\"re working with text, open the Video Event FX window and select your text media to access rotation options.
- To rotate an overlay, look for the rotation handle usually located above the overlay in the preview window. Click and drag the handle to rotate the overlay. A guideline will appear, showing the angle of rotation.
- For reshaping, particularly with images or text, access the Track Motion feature by right-clicking on the overlay track header. This allows for more complex transformations, such as skewing or distorting the overlay.
- In the Track Motion window, you can independently adjust the X and Y axis to stretch or compress the overlay, offering a range of reshaping possibilities.
- To animate these transformations, turn on keyframing in the Track Motion window and set keyframes at different points in your timeline. This can create motion effects such as spinning or oscillating shapes.
Experimenting with rotation and reshaping can bring a new level of interest and engagement to your videos. With Sony Vegas, you have the tools at hand to easily apply these creative adjustments.
_HOOK_
Advanced Overlay Techniques
Mastering advanced overlay techniques in Sony Vegas can take your video projects to the next level. Here are some sophisticated strategies to enhance your editing skills:
- Dynamic Picture in Picture Effects: Utilize the Picture in Picture effect to creatively resize, move, rotate, and reshape your overlays. Experiment with different proportions and angles to achieve unique perspectives.
- Event Pan/Crop Tool: This tool offers precision in cropping and panning your overlays. Use it for detailed adjustments and to create motion effects, such as the Ken Burns effect, enhancing the visual storytelling of your project.
- Masking with Smart Mask: Leverage AI technology like Smart Mask for automated object tracking and masking, simplifying complex editing tasks and saving valuable editing time.
- Text to Speech and Speech to Text: Enhance accessibility and engagement by using AI-powered text to speech for voiceovers and speech to text for captions, making your content more inclusive.
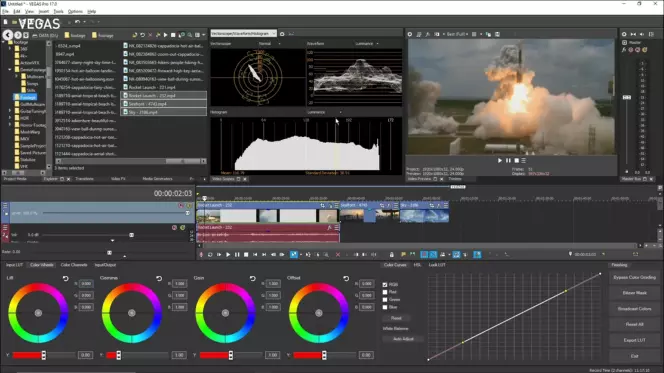
- AI-Enhanced Editing Tools: Incorporate AI-driven tools for tasks like colorization, style transfer, and video upscaling to bring creativity and high-quality production values to your videos.
- Customizable Animated Transitions: Explore Vegas Pro\"s wide range of animated transitions, including wipes and fades, to add professional polish to your edits.
- Sound Design: Don\"t forget the auditory aspect of your video. Use Vegas Pro\"s advanced audio editing features to create a soundscape that complements your visual content.
By integrating these advanced techniques, you can transform your video projects into professional-grade productions. Each tool and feature offered by Vegas Pro provides a pathway to unleash your creativity, whether through dynamic overlays, sound design, or the innovative use of AI technology.

Creating Outros with Overlays
Creating compelling outros for your videos using Sony Vegas involves overlaying elements such as videos, images, and text to guide your viewers to the next steps, like subscribing to your channel or watching more content. This guide will walk you through the process.
- Adding a Video or Picture Overlay: Begin by importing the video or picture you wish to use as an overlay. Place it on a new video track above your main video to create a layered effect.
- Adjusting Size and Orientation: Use the Event Pan/Crop tool to adjust the overlay\"s size and position, ensuring it complements the outro\"s design without obscuring important video content.
- Enhancing with Effects: Apply effects such as Picture in Picture, which allows you to resize, move, and even rotate the overlay for dynamic presentation. Experiment with different shapes and angles for creative flair.
- Dynamic Motion: Utilize Track Motion to animate the overlay, adding movement to your outro. This can be used to draw attention to calls to action, such as subscribing or watching another video.
- Final Touches: Add text overlays with your call to action, using Vegas Pro\"s Media Generators. Customize font, color, and positioning to match your video\"s style and outro\"s purpose.
- Outro Templates: For efficiency, consider using free outro templates compatible with Sony Vegas. These can provide a professional look with minimal effort and can be customized to fit your brand.
Remember, the outro is your last chance to leave an impression on the viewer, so make it count. Use overlays creatively to encourage viewers to engage further with your content, whether through subscribing, visiting social media, or watching more videos.
How to Overlay Video Tutorial Vegas Pro 17
\"Looking to learn something new? Check out this amazing tutorial video! Get ready to master new skills and elevate your knowledge with step-by-step instructions and expert guidance. Expand your horizons and unlock your potential!\"
How to Use Overlays in Vegas Pro 15
\"Add a touch of magic to your content with stunning overlays! This video showcases a variety of beautiful overlays that will instantly enhance your visuals. From subtle effects to bold and vibrant designs, discover the perfect overlays to take your creativity to the next level!\"
Supporting Content Creators
Supporting content creators is essential in nurturing a vibrant and diverse digital content ecosystem. Here are several ways you can support your favorite creators to ensure they can continue producing the content you love:
- Subscribe and Follow: Engage with creators by subscribing to their channels on platforms like YouTube, following them on social media, and turning on notifications to stay updated with their latest content.
- Engage with Content: Like, comment, and share their content. Engagement not only boosts their visibility but also encourages creators by showing appreciation for their work.
- Support Financially: If possible, support creators financially through subscriptions, memberships, donations, or purchasing their merchandise. Platforms like Patreon, Ko-fi, and the YouTube Join button offer ways to contribute directly.
- Word of Mouth: Promote their content by word of mouth. Recommending your favorite creators to friends and family helps expand their audience and support network.
- Feedback and Ideas: Offer constructive feedback and ideas. Many creators appreciate feedback that helps improve their content or gives them new ideas to explore.
- Collaborate and Promote: If you\"re a content creator yourself, consider collaborations. Cross-promotion can help both parties reach wider audiences.
- Respectful Interaction: Always interact respectfully. Creators put significant effort into their content, and respectful, supportive interactions can make their creative journey more rewarding.
Supporting creators is about more than just financial contributions; it\"s about building a community that values and uplifts creative work. By taking these steps, you can play a crucial role in the success and sustainability of content creators across the digital landscape.

Adding Text Overlays
Adding text overlays in Sony Vegas is a straightforward process that enhances your videos with informational or stylistic elements. Follow these steps to incorporate text overlays into your projects:
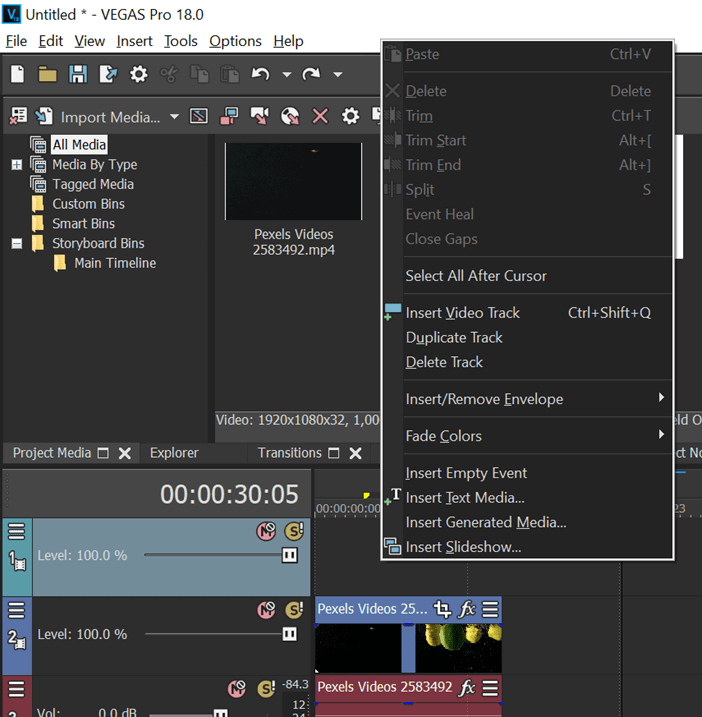
- Open the Media Generators Tab: Start by navigating to the Media Generators tab, which you can find on the lower left side of the interface. Here, you\"ll see a variety of options for generating text, backgrounds, and other elements.
- Select Text: Within the Media Generators tab, look for the \"Text\" or \"Titles & Text\" section. Clicking on this will reveal different text styles and templates you can use as a starting point.
- Drag and Drop: Choose the text style you want to use and drag it onto your timeline, placing it above the video track where you want the text to appear. This creates a new video track dedicated to your text overlay.
- Edit Your Text: Double-click the text event on the timeline to open the text editor. Here, you can type your desired text, adjust font properties, color, size, and positioning to fit your video\"s aesthetics and message.
- Customize Animations and Effects: Sony Vegas offers various effects and animations that you can apply to your text to make it more dynamic. Explore the \"Animation\" tab within the text editor or use the Video FX tab to add effects such as shadows, outlines, or glows.
- Preview and Adjust: After customizing your text, preview your video to see how the overlay interacts with your content. You can always go back and make adjustments to the text properties, positioning, or duration on the timeline to perfect its appearance.
Text overlays can significantly impact your video, providing context, enhancing storytelling, or adding a professional touch to your content. With Sony Vegas, the flexibility and variety of text options allow for creative and impactful additions to any video project.

READ MORE:
Alternative Video Editing Solutions
While Sony Vegas is a powerful video editing software, there are various other tools available that cater to different editing needs and skill levels. Here’s a look at some alternative video editing solutions you might consider:
- Adobe Premiere Pro: A professional-grade video editing software that is part of the Adobe Creative Cloud. It offers a wide range of editing tools, effects, and integration with other Adobe apps, making it ideal for complex video production projects.
- Final Cut Pro X: Exclusive to macOS, Final Cut Pro X is known for its powerful media organization capabilities, magnetic timeline, and optimization for Apple’s hardware, providing efficient editing workflows for Mac users.
- DaVinci Resolve: A standout for color grading and correction, DaVinci Resolve combines professional offline and online editing, audio post-production, and visual effects all in one software. It offers a free version with a robust set of features.
- HitFilm Express: A great option for beginners and those on a budget, HitFilm Express offers a comprehensive set of features for free, including video editing, visual effects, and 3D compositing.
- iMovie: For those new to video editing, iMovie provides a simple, intuitive interface and enough editing capabilities to create high-quality videos without overwhelming beginners. Available on macOS and iOS devices.
- Lightworks: Known for its professional-grade editing tools, Lightworks offers both free and paid versions. It supports a wide range of formats and includes powerful tools for editing, grading, and effects.
Each of these alternatives offers unique features and capabilities, making them suitable for different types of video projects. Whether you’re a professional editor or a hobbyist, exploring different editing software can help you find the tool that best fits your needs and workflow.
Exploring Sony Vegas overlays unlocks a world of creative possibilities for your video projects. Whether you\"re a seasoned editor or just starting out, mastering overlays can elevate your content, making it more engaging and visually appealing. Dive into the world of video editing with Sony Vegas and unleash your creative potential today.

_HOOK_