Topic how to pair sony wf 1000xm4 to pc: Discover the seamless way to enhance your audio experience with our guide, "How to Pair Sony WF 1000XM4 to PC." This article provides easy-to-follow steps and tips to connect your high-quality Sony earbuds to your PC, ensuring a superior listening journey.
Table of Content
- How do I pair Sony WF-1000XM4 to my PC?
- Initial Setup and Requirements
- Enabling Bluetooth on Your PC
- Putting WF-1000XM4 in Pairing Mode
- Finding and Connecting to WF-1000XM4 on Your PC
- Confirmation and Troubleshooting
- Utilizing the Sony Headphones Connect App
- YOUTUBE: How to Pair Sony WF-1000XM4 with Windows Laptop or PC
- Connecting to Multiple Devices
- Maintaining and Managing Your WF-1000XM4
How do I pair Sony WF-1000XM4 to my PC?
To pair Sony WF-1000XM4 to your PC, please follow these steps:
- On your PC, click on the Start menu and go to Settings.
- In the Settings window, click on the Devices option.
- In the Devices window, select Bluetooth & other devices from the left-hand menu.
- Make sure Bluetooth is turned on by toggling the switch to On.
- Take your Sony WF-1000XM4 earbuds and put them in pairing mode. You can do this by pressing and holding the button on the earbuds until the LED lights start flashing.
- Back in the Bluetooth & other devices window on your PC, click on the Add Bluetooth or other device button.
- A new window will appear. Select Bluetooth from the available options.
- Your PC will start searching for nearby Bluetooth devices. Wait for it to detect your Sony WF-1000XM4 earbuds.
- When your earbuds appear in the list, click on them to connect.
- If prompted, enter the pairing code or passkey for your earbuds. This code may be displayed on your PC or in the user manual of your Sony WF-1000XM4.
- After entering the pairing code, click OK or Pair to establish the Bluetooth connection between your PC and the earbuds.
- Once the pairing is successful, you should see a confirmation message on your PC.
- Your Sony WF-1000XM4 earbuds are now paired and connected to your PC. You can start using them for audio playback, calls, and other supported functions.
READ MORE:
Initial Setup and Requirements
To start pairing your Sony WF-1000XM4 earbuds with your PC, ensure a few preliminary requirements are met. Firstly, verify that your PC has Bluetooth functionality that supports music playback connections, such as A2DP. Place the computer within 1 meter (3 feet) of the headset for optimal connectivity. The earbuds should be sufficiently charged to establish a stable connection.
- Begin by activating the Bluetooth on your computer. This may involve turning on a Bluetooth adapter, depending on your computer\"s model. For Windows 10, Swift Pair is available for use if you have OS version 1803 or later.
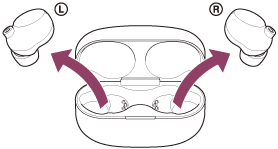
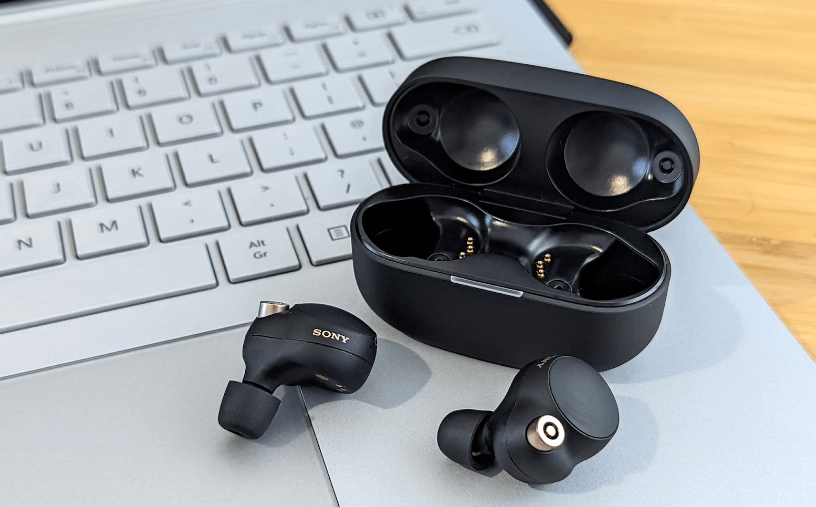
- Take the WF-1000XM4 earbuds out of their charging case. This action turns them on and makes them ready for pairing.
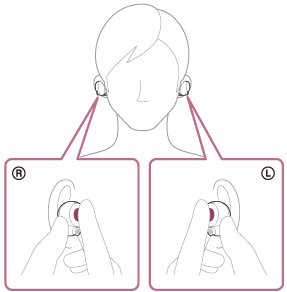
- To put the earbuds in pairing mode, place them in your ears and hold the touch sensors for about 5 seconds until you hear a beep, indicating that they are ready to pair.
- On your computer, navigate to the Bluetooth settings. This might involve going through the Start menu, into Settings, and then selecting \"Devices\" followed by the \"Bluetooth & Other Devices\" tab.
- Turn on Bluetooth on your computer and look for the WF-1000XM4 in the list of available devices. Select them to initiate the pairing process.
- If prompted for a password, enter “0000” to proceed. You will hear a voice prompt saying, “Bluetooth connected” from the earbuds, confirming the successful connection.
Note that if pairing is not successful within 5 minutes, pairing mode will be canceled. In this case, place the earbuds back into the charging case and start the process again from step 1. The WF-1000XM4 can pair with multiple devices but can only play music from one paired device at a time.
Enabling Bluetooth on Your PC
To pair your Sony WF-1000XM4 earbuds with a PC, the first step is to ensure Bluetooth is enabled on your computer. Here’s a comprehensive guide to activating Bluetooth for a successful pairing experience.
- Start by ensuring your PC has Bluetooth functionality. If your PC doesn\"t have built-in Bluetooth, you might need an external Bluetooth adapter.
- On your PC, click the Start button, usually located at the bottom left of your screen.
- Navigate to the settings menu. You can find this by clicking on the gear icon in the Start menu.
- In the settings menu, select \"Devices\" to access the devices connected to your PC.
- Click on the \"Bluetooth & Other Devices\" tab. Here, you’ll find options to manage Bluetooth and other peripheral connections.
- Look for a switch labeled “Bluetooth” and slide it to turn it on. This action activates the Bluetooth function on your PC, making it discoverable to other Bluetooth devices like your Sony earbuds.
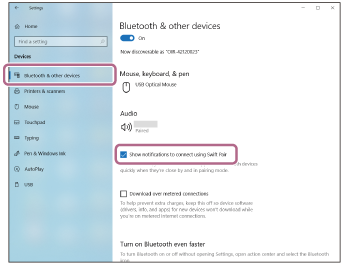
- If your PC runs Windows 10 and has OS version 1803 or later, you can use the Swift Pair feature for a more straightforward pairing process. To use Swift Pair, check the box that says “Show notification to connect using Swift pair” in the Bluetooth settings.
With these steps, your PC’s Bluetooth should now be active, ready to connect with your Sony WF-1000XM4 earbuds. If you encounter any issues turning on Bluetooth, refer to the computer\"s manual for specific instructions related to your model.

Putting WF-1000XM4 in Pairing Mode
Setting your Sony WF-1000XM4 earbuds in pairing mode is an essential step to connect them to your PC. Follow these simple steps to activate the pairing mode:
- Start by taking your WF-1000XM4 earbuds out of the charging case. This action automatically powers them on and makes them ready for pairing.
- Place the earbuds in your ears. This step ensures that you can hear the voice prompts and confirm when the earbuds are in pairing mode.
- Touch and hold the sensors on both earbuds for about 5 seconds. You will hear a beep sound indicating that the earbuds are now in pairing mode and ready to be connected to your device.
Once you hear the beep, your WF-1000XM4 earbuds are in pairing mode and ready to be discovered by your PC\"s Bluetooth. Proceed to your computer\"s Bluetooth settings to find and pair the earbuds. Remember, if the earbuds do not enter pairing mode, ensure they are charged and try these steps again.
Finding and Connecting to WF-1000XM4 on Your PC
After putting your Sony WF-1000XM4 earbuds into pairing mode, the next step is to connect them to your PC. Here\"s how to do it:
- Ensure that your computer\"s Bluetooth is turned on. You can do this by going to the Start menu, navigating to Settings, and selecting the Bluetooth & Devices option.
- With Bluetooth enabled, your computer will start searching for available Bluetooth devices. Make sure your WF-1000XM4 earbuds are in pairing mode and close to your computer for easy detection.
- Look for \"WF-1000XM4\" in the list of available devices on your computer. Once you find it, select it to initiate the pairing process.
- If prompted, you might need to input a passkey for security purposes. Typically, the passkey is “0000”.
- Upon successful pairing, you will hear a voice prompt from the earbuds saying, “Bluetooth connected”. This confirms that the earbuds are now connected to your PC.
If you do not see the WF-1000XM4 listed or if you encounter any issues during the pairing process, ensure that the earbuds are properly charged and in pairing mode. If problems persist, you may need to delete previous pairing information and try reconnecting.
_HOOK_
Confirmation and Troubleshooting
Once you\"ve attempted to pair your Sony WF-1000XM4 earbuds with your PC, it\"s important to confirm the connection and know how to troubleshoot any issues that may arise.
- Confirmation: When the pairing is successful, you will hear the voice guidance saying, “Bluetooth connected” from the earbuds. This is your indication that the earbuds and computer are paired and connected.
- Checking Connection: If you don\"t hear the voice guidance, ensure that your earbuds are within range of your computer and that the Bluetooth settings on your PC are correctly configured.
- Reattempt Pairing: If the WF-1000XM4 doesn\"t appear on your computer screen or if pairing isn\"t established within 5 minutes, cancel the current attempt. Then, put the headset back into the charging case and start the pairing process again from the beginning.
- Deleting Pairing Information: In some cases, previously stored pairing information can interfere with new pairing attempts. If so, you may need to delete the existing pairing information for the WF-1000XM4 from your PC and then try pairing them again.
- Multiple Devices: Remember, the WF-1000XM4 can be paired with up to 8 devices, but can only play music from one paired device at a time. If you\"re trying to connect to a ninth device, the oldest paired device\"s information will be overwritten.
- Check for Firmware Updates: Occasionally, connectivity issues can be resolved by updating the firmware of your WF-1000XM4 through the Sony | Headphones Connect app.
- Sound Quality Issues: If you experience poor sound quality during playback, check if the A2DP function, which supports music playback connections, is enabled in your PC settings.
If problems persist, consulting the operating instructions supplied with your computer or the Sony WF-1000XM4 might provide additional solutions specific to your device setup.
Utilizing the Sony Headphones Connect App
The Sony Headphones Connect App enhances the experience of using the Sony WF-1000XM4 earbuds with your PC. To use the app effectively, follow these steps:
- Install the App: Download and install the Sony Headphones Connect App from your smartphone\"s app store.
- Open the App: Launch the app on your smartphone.
- Pair Your Earbuds: Ensure that your WF-1000XM4 earbuds are paired with your smartphone. This is usually done through the Bluetooth settings of your phone.
- Customize Settings: Once connected, the app allows you to customize various settings of the earbuds, such as equalizer settings, ambient sound control, and noise cancellation levels.
- Software Updates: Use the app to check for and install firmware updates for your WF-1000XM4, ensuring you have the latest features and optimal performance.
- Access Additional Features: The app provides access to additional features like Adaptive Sound Control, which adjusts ambient sound settings based on your activity and location.
- Manage Connections: The app can be used to manage connections between your earbuds and other devices, making it easier to switch between multiple devices.
By utilizing the Sony Headphones Connect App, you can fully exploit the capabilities of your WF-1000XM4 earbuds, personalizing them to your listening preferences and activities.

How to Pair Sony WF-1000XM4 with Windows Laptop or PC
The Sony WF-1000XM4 wireless earbuds redefine the audio experience with their superior sound quality and noise-canceling technology. Watch the video to witness how these sleek and sophisticated earbuds elevate your music listening to a whole new level of bliss.
How to Pair Sony WH1000XM3 or 1000XM4 with Windows 10 Laptop
Immerse yourself in the ultimate sound sanctuary with the Sony WH1000XM3/1000XM4 headphones. This video unveils the genius behind the industry-leading noise-canceling technology and unrivaled audio performance that will transport you to another realm of sonic bliss. Don\'t miss out on this auditory journey!
Connecting to Multiple Devices
The Sony WF-1000XM4 earbuds support connecting to multiple devices, allowing seamless switching between them. To set this up, follow these steps:
- Initial Pairing: Start by pairing the earbuds with the first device via Bluetooth.
- Pair with Second Device: Turn off Bluetooth on the first device, then put the earbuds in pairing mode again to connect with the second device.
- Reconnect to the First Device: Re-enable Bluetooth on the first device. The earbuds should now be recognized in the list of paired devices.
- Switching Between Devices: To switch audio output, select the WF-1000XM4 from the Bluetooth settings of the desired device. Some devices may connect automatically.
Note: The WF-1000XM4 can remember multiple devices but can only connect to one device at a time for audio playback. Switching devices may require selecting the earbuds from the device\"s Bluetooth menu.
READ MORE:
Maintaining and Managing Your WF-1000XM4
Maintaining and managing your Sony WF-1000XM4 earbuds is crucial for ensuring their longevity and optimal performance. Here are some key steps and tips:
- Regular Cleaning: Gently clean the earbuds and charging case with a soft, dry cloth. Avoid using any liquids or abrasive materials.
- Earbud Tips Replacement: Replace the earbud tips periodically to maintain comfort and hygiene. Use only compatible replacements.
- Battery Care: To preserve battery life, avoid overcharging the earbuds and store them in the charging case when not in use.
- Software Updates: Regularly update the earbuds\" software through the Sony Headphones Connect App for improved performance and new features.
- Managing Bluetooth Connections: Regularly review and manage your device\"s Bluetooth connections. Disconnect and forget unused devices to prevent connection issues.
- Avoid Exposure to Extreme Conditions: Protect the earbuds from extreme temperatures, moisture, and direct sunlight.
- Handling: Handle the earbuds and charging case with care to avoid drops and impacts.
- Regular Charging: Ensure the earbuds are charged regularly, even when not in use, to maintain battery health.
By following these maintenance and management tips, you can enjoy a consistently high-quality audio experience with your Sony WF-1000XM4 earbuds.
Unlock the full potential of your Sony WF-1000XM4 with our comprehensive guide, making Bluetooth pairing with your PC simple and enhancing your audio experience effortlessly.