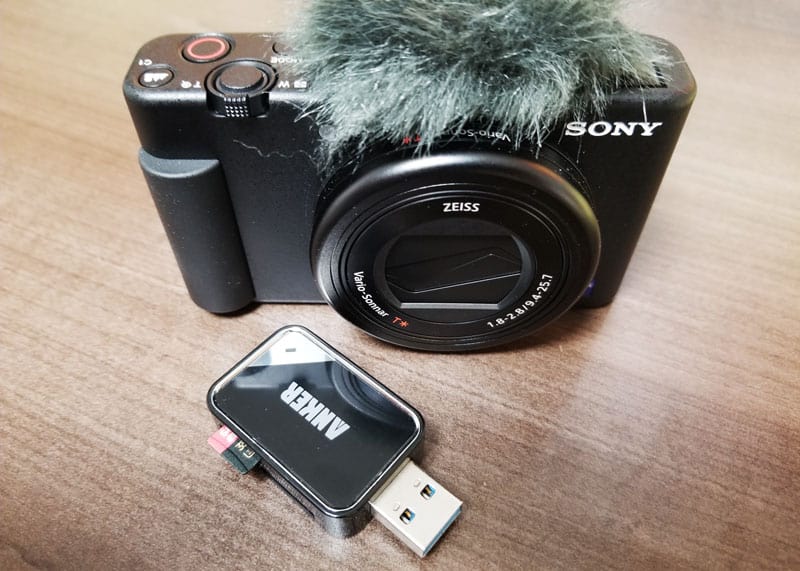
Topic connect sony camera to mac: Discover the simplest ways to connect your Sony camera to a Mac, ensuring a seamless transfer of your precious photos and videos for editing and sharing.
Table of Content
- How to connect a Sony camera to a Mac?
- Essential Requirements Before Connecting
- Step-by-Step Guide to Connect via USB
- Using Your Sony Camera as a Webcam on Mac
- Wireless Connection Options
- Software Installation and Updates
- Transferring Photos and Videos to Your Mac
- YOUTUBE: Tethering Sony A7IV camera to Mac with Imaging Edge Desktop and USB-C
- Troubleshooting Common Connection Issues
- Advanced Tips for Professional Use
- Ensuring Your Camera\"s Compatibility
- Maintaining Your Camera for Connectivity
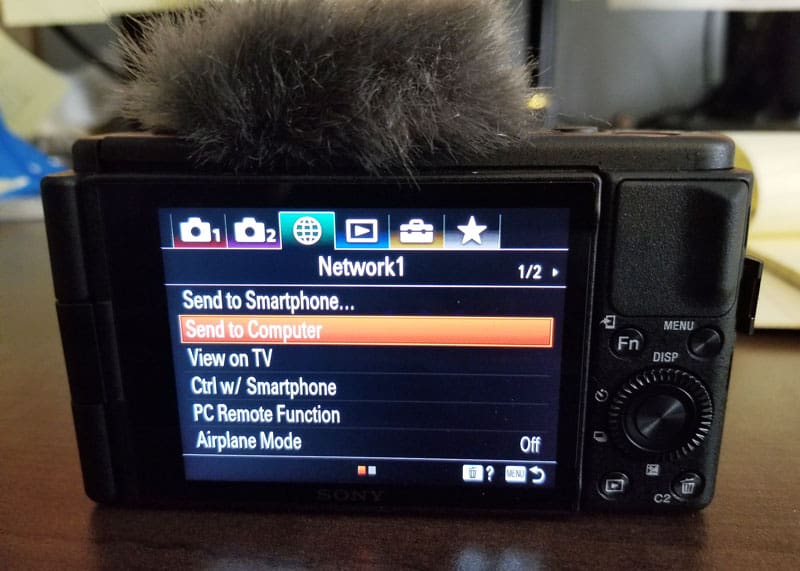
How to connect a Sony camera to a Mac?
To connect a Sony camera to a Mac, follow these steps:
- Turn on the camera.
- Connect the camera to the computer using the supplied USB cable.
- Set the camera to Mass Storage or USB mode.
- Make sure that a memory card is inserted into the camera.
- Power on the camera.
- On the camera, set the USB connection option to Mass Storage or Auto.
Once you have completed these steps, your Sony camera should be successfully connected to your Mac.
READ MORE:
Essential Requirements Before Connecting
Before you embark on connecting your Sony camera to a Mac, ensure you have all necessary prerequisites in place for a smooth and successful connection. This will enhance your experience and prevent any potential issues.
- Compatible Sony Camera: Verify that your Sony camera model supports connectivity with Mac devices.
- USB Cable: Have the specific USB cable that came with your camera or a compatible one ready.
- Camera Battery: Ensure your camera’s battery is fully charged or connected to a power source to avoid disruptions.
- MacOS Compatibility: Check that your Mac\"s operating system is up to date and compatible with the software required for your Sony camera.
- Software and Drivers: Install any necessary software or drivers from Sony\"s official website to facilitate the connection.
- Storage Space: Ensure your Mac has enough storage space available to accommodate the files you plan to transfer.
Meeting these requirements beforehand will save you time and help you avoid common pitfalls associated with connecting your Sony camera to a Mac.

Step-by-Step Guide to Connect via USB
Connecting your Sony camera to a Mac via USB is a straightforward process. Follow these detailed steps to ensure a successful connection and transfer of your images and videos.
- Turn off your Sony camera before connecting it to prevent any data corruption.
- Locate the USB port on your Sony camera and connect the small end of the USB cable to it.
- Connect the other end of the USB cable to an available USB port on your Mac.
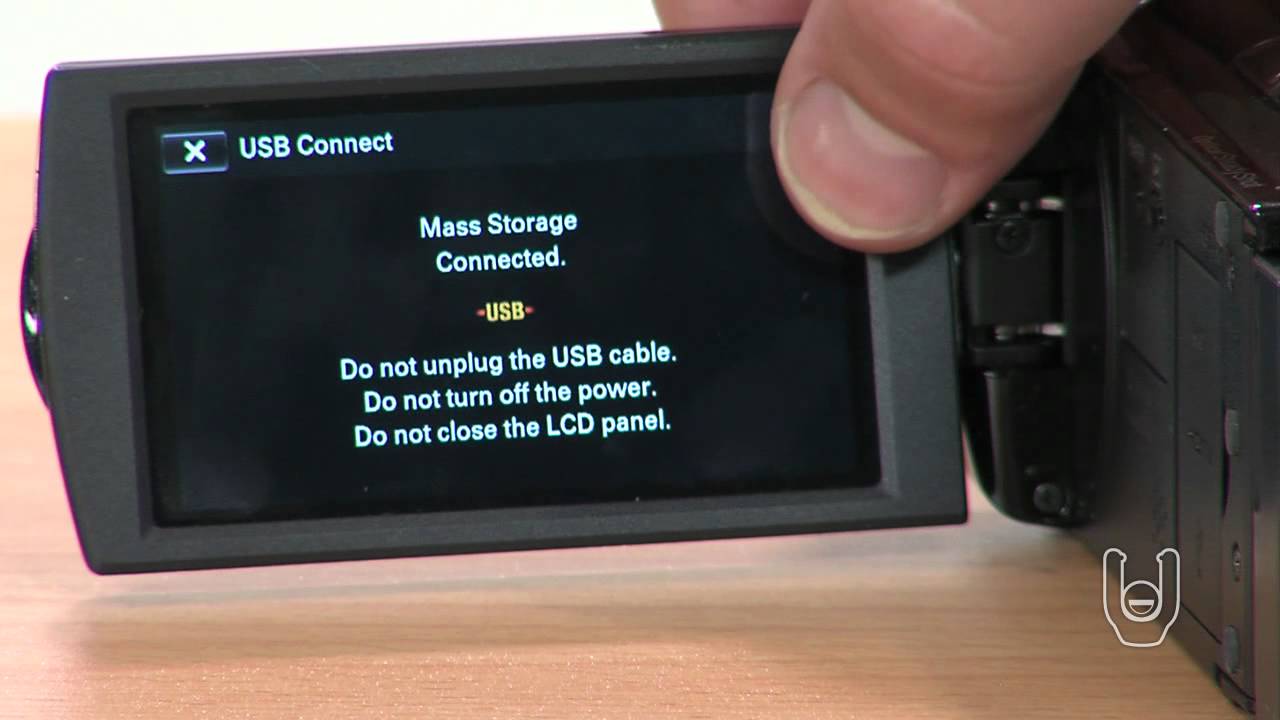
- Turn on your Sony camera. Your Mac should automatically recognize the camera as a storage device.
- If prompted, select the option on your camera to establish a connection with the computer. This might be labeled as \"Mass Storage,\" \"MTP,\" or similar.
- Open \"Finder\" on your Mac, and you should see your camera listed under \"Devices\" or \"Locations.\"
- Click on your camera\"s icon to access the storage and navigate through the folders to find your photos and videos.
- Drag and drop the files you wish to transfer from your camera to your Mac\"s hard drive or a specific folder.
- Once the transfer is complete, eject your camera by right-clicking on the device icon in Finder and selecting \"Eject.\"
- Turn off your Sony camera and disconnect the USB cable from both your camera and Mac.
By following these steps, you can easily connect your Sony camera to your Mac via USB for efficient file transfer.
Using Your Sony Camera as a Webcam on Mac
Transform your Sony camera into a high-quality webcam for your Mac with these simple steps, enhancing your video calls and live streaming experiences.
- Ensure your Sony camera is compatible with being used as a webcam. Check Sony\"s official website for a list of compatible models and any required firmware updates.
- Download and install the Sony Imaging Edge Webcam software from Sony\"s official website. This software enables your camera to function as a webcam.
- Connect your Sony camera to your Mac using a USB cable. Use the port on your camera designated for this purpose.
- Turn on your camera and set it to the mode recommended by Sony for webcam use, typically the movie mode.
- Launch the Imaging Edge Webcam software on your Mac. Follow the on-screen instructions to select your camera as the video source.
- Open your preferred video conferencing or streaming application. In the application\"s settings, select the Sony camera as your video input device.
- Adjust your camera\"s settings, such as focus and exposure, to suit your video needs. You may also want to use external microphones for better audio quality.
- Position your camera at a suitable angle and distance to capture the desired framing for your video calls or streams.
By following these steps, you can leverage the superior image quality of your Sony camera for all your video conferencing and live streaming needs on a Mac.

Wireless Connection Options
Connecting your Sony camera to a Mac wirelessly offers flexibility and convenience. Here are the steps to establish a wireless connection, allowing you to transfer images and control your camera remotely.
- Wi-Fi Connection: Most Sony cameras come with built-in Wi-Fi capabilities. Enable Wi-Fi on your camera and connect it to the same network as your Mac. Use the Sony Imaging Edge Mobile application to transfer images and videos directly to your Mac.
- Bluetooth Connectivity: Some models support Bluetooth for a low-power, constant connection. Pair your camera with your Mac via Bluetooth for remote control features, though this may not support direct file transfer.
- NFC (Near Field Communication): If your Sony camera and Mac support NFC, you can establish a connection by simply touching the camera to the Mac (or an NFC tag connected to it). This method is typically used to initiate a Wi-Fi connection for file transfer.
- QR Code Connection: Sony cameras can generate a QR code for easy connection setup. Scan this QR code with your Mac using any QR code reader to connect the devices via Wi-Fi.
Each wireless method offers different advantages, from easy setup via QR codes to the convenience of Bluetooth for remote shooting. Choose the one that best fits your needs for a hassle-free connection experience.

_HOOK_
Software Installation and Updates
Proper software installation and keeping your Sony camera and Mac software up to date are crucial for a seamless connection and optimal functionality. Here’s how to ensure everything is set correctly.
- Identify Required Software: Determine which software is needed for your Sony camera model. Sony Imaging Edge Desktop is commonly required for photo editing and remote shooting.
- Download from Official Sources: Always download software and drivers from Sony\"s official website to ensure security and compatibility.
- Installation Process: Follow the installation instructions carefully. This may include dragging the application to your Applications folder on a Mac.
- Software Updates: Regularly check for updates to your Sony camera software and the macOS to ensure compatibility and access to the latest features.
- Camera Firmware Updates: Check for any firmware updates for your camera. Firmware updates can improve functionality, add new features, and fix bugs.
- Reboot After Installation: Restart your Mac after installing new software or updates to ensure all changes are applied correctly.
Staying up-to-date with software and firmware ensures your Sony camera works seamlessly with your Mac, providing an enhanced user experience for all your photography needs.
Transferring Photos and Videos to Your Mac
Transferring your cherished photos and videos from your Sony camera to your Mac can be accomplished with ease. Follow these steps to ensure a smooth transfer process.
- Connect Your Camera: Use a USB cable to connect your Sony camera to your Mac, or establish a wireless connection if your camera supports it.
- Turn On Your Camera: Power on your camera after connecting it. Choose the correct connection mode if prompted on your camera screen.
- Access Your Camera on Mac: Your camera should appear on your Mac, either on the desktop or in Finder under \"Locations.\"
- Copy Files: Navigate to the DCIM folder on your camera through Finder. Select the photos and videos you wish to transfer, then drag and drop them into a folder on your Mac.
- Use Image Capture: Alternatively, you can use the Image Capture application on your Mac to select and transfer files. This application provides additional options for importing and organizing your images.
- Disconnect Safely: Once the transfer is complete, eject your camera properly from your Mac before disconnecting the USB cable.
By following these steps, you can effortlessly transfer your photos and videos, ensuring they are safely stored on your Mac for editing, sharing, or archiving.
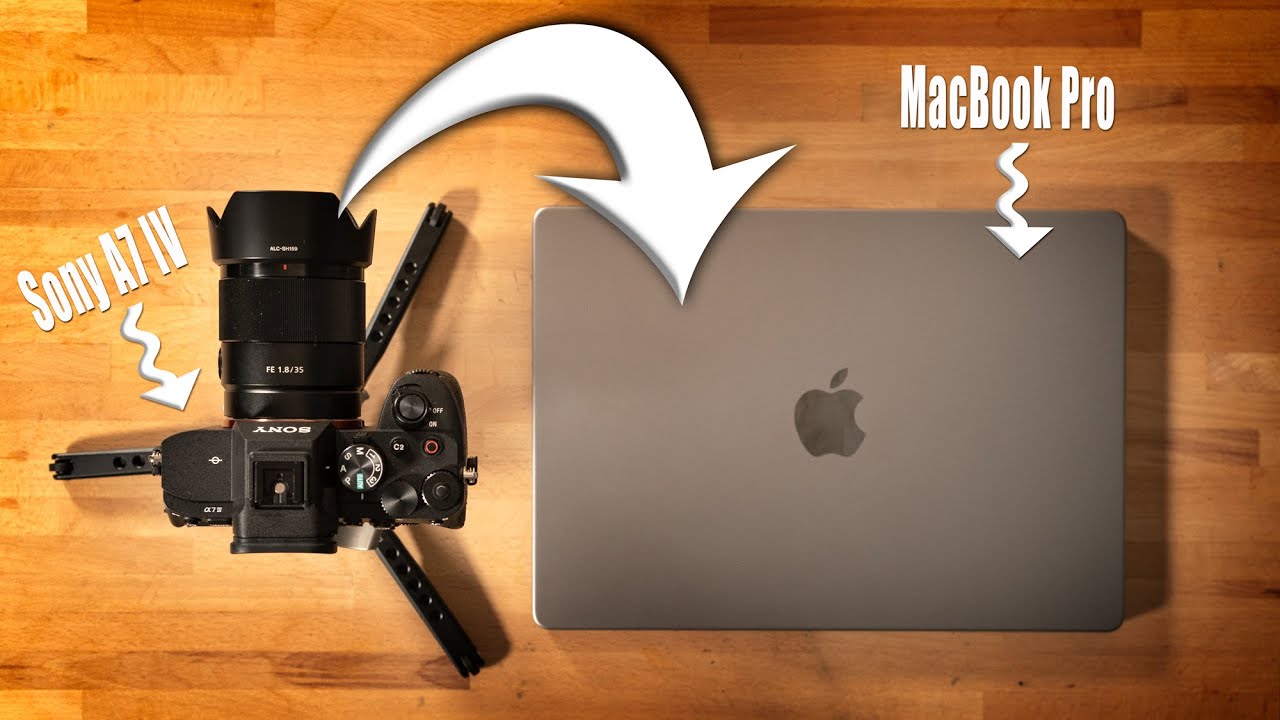
Tethering Sony A7IV camera to Mac with Imaging Edge Desktop and USB-C
Tethering: Unlock the power of seamless connectivity with our new video on tethering. Discover how this innovative feature allows you to effortlessly connect your devices and enjoy a reliable internet connection wherever you go. Stay connected and watch our video now!
Connecting Sony Camera to Computer with Sony Imaging Edge
Connecting: Experience the magic of connecting with our captivating video that explores the beauty of human connections. From heartfelt conversations to shared adventures, witness the power of bonds that bring people together. Immerse yourself in the joy of connecting and hit play to watch our inspiring video now!
Troubleshooting Common Connection Issues
Encountering issues when connecting your Sony camera to your Mac can be frustrating. Here are some common problems and their solutions to help you resolve them quickly and get back to transferring your media.
- Camera Not Recognized: Ensure the camera is turned on and set to the correct connection mode. Try a different USB port or cable if the problem persists.
- Driver or Software Issues: Verify that you have the latest software from Sony and macOS updates installed. Reinstalling the software might also help.
- Connection Drops: If using Wi-Fi, ensure a stable connection and minimal interference. For USB, ensure the cable is securely connected and not damaged.
- Error Messages: Take note of any error messages and consult the Sony support website for specific troubleshooting tips related to the message.
- Slow Transfer Speeds: Transfer speed can be affected by the USB port type. Use a USB 3.0 port if available and ensure your camera supports it.
- Cannot Use as Webcam: Ensure you have the correct software (e.g., Imaging Edge Webcam) installed, and check your camera’s compatibility.
By systematically addressing these common issues, you can often quickly solve connection problems and enjoy a seamless interaction between your Sony camera and Mac.
Advanced Tips for Professional Use
For professionals looking to maximize the efficiency and quality of their workflow when connecting a Sony camera to a Mac, these advanced tips can provide significant benefits.
- RAW File Handling: Use software that can fully exploit the RAW files from your Sony camera, like Adobe Lightroom or Capture One, for greater post-processing flexibility.
- Color Calibration: Calibrate your Mac\"s display and your camera to ensure color consistency across your workflow, crucial for professional photo editing.
- Backup Strategies: Implement a robust backup strategy using external hard drives or cloud storage to protect your files against loss.
- Use Tethering: For studio shoots, consider tethering your Sony camera directly to your Mac using Imaging Edge Desktop. This allows for immediate viewing, editing, and saving of images as you shoot.
- Network Attached Storage (NAS): Use NAS for large-scale storage solutions, allowing you to access your photos and videos from any device on the network.
- Automate Your Workflow: Utilize software features or scripts to automate repetitive tasks like renaming files, applying presets, or backing up photos for increased efficiency.
- External Monitors: Connect external monitors to your Mac for a more extensive and detailed editing workspace, particularly beneficial for fine-tuning images or video editing.
Adopting these advanced techniques can significantly enhance your productivity and the quality of your output, making your Sony to Mac workflow seamless and more professional.
Ensuring Your Camera\"s Compatibility
Ensuring that your Sony camera is compatible with your Mac is a critical first step for a hassle-free connection. Follow these tips to verify compatibility and prepare for a successful connection.
- Check Sony’s Official Website: Visit Sony’s official website to find a list of cameras compatible with Mac computers. This list is regularly updated with new models and firmware updates.
- Verify MacOS Version: Ensure your Mac is running a MacOS version that supports connecting with your Sony camera. Compatibility information can usually be found in the camera’s user manual or online product page.
- Look for Software Requirements: Some Sony cameras require specific software for connectivity, such as the Imaging Edge Desktop application. Check for any software or driver requirements.
- Update Camera Firmware: Keep your camera’s firmware up to date to ensure compatibility with the latest MacOS versions and software. Firmware updates can often enhance functionality and connectivity.
- Read User Forums and Reviews: User forums and reviews can provide insight into the compatibility experiences of other Sony camera users with Mac computers. This can be especially helpful for troubleshooting specific issues.
- Consult Apple Support: Apple’s support website and customer service can offer guidance on connecting external devices, including cameras, to your Mac.
By taking these steps to ensure your camera\"s compatibility, you can enjoy a smooth and efficient workflow between your Sony camera and Mac.

_HOOK_
READ MORE:
Maintaining Your Camera for Connectivity
Maintaining your Sony camera not only ensures its longevity but also its reliability in connecting with your Mac. Follow these maintenance tips to keep your camera in top condition for any connectivity scenario.
- Regular Firmware Updates: Regularly update your camera\"s firmware to enhance its functionality and compatibility with external devices, including Mac computers.
- Clean Connectivity Ports: Keep the USB, HDMI, and any other connectivity ports clean and free from debris to ensure a stable connection. Use a can of compressed air or a soft brush for cleaning.
- Handle Cables with Care: Store USB and other cables properly to avoid damage. Avoid sharp bends and coil them loosely to prolong their life.
- Battery Maintenance: Ensure your camera’s battery is charged and in good condition. A malfunctioning battery can cause connectivity issues during transfers.
- Software Compatibility: Keep the software on your Mac updated, especially the applications used for transferring or editing photos and videos from your camera.
- Protect Your Camera: Use a camera bag or case to protect it from dust and damage during transport. This can prevent physical damage to connectivity ports.
- Consult the Manual: Familiarize yourself with the maintenance and troubleshooting sections of your camera\"s manual, as it may contain specific instructions for maintaining optimal connectivity.
By regularly maintaining your camera and its accessories, you can ensure a reliable and efficient connection with your Mac, ready for any project or transfer need.
Connecting your Sony camera to a Mac opens up a world of creative possibilities. With the right steps and maintenance, you can seamlessly transfer, edit, and share your visual stories with ease and precision.