Topic connect sony wh-1000xm5 to mac: Discover the seamless way to connect your Sony WH-1000XM5 headphones to a Mac, enhancing your audio experience with this simple and efficient guide.
Table of Content
- How to connect Sony WH-1000XM5 to Mac?
- Step 1: Prepare Your Sony WH-1000XM5 Headphones
- Step 2: Enable Bluetooth on Your Mac
- Step 3: Pairing the Headphones with Your Mac
- Step 4: Troubleshooting Connection Issues
- Step 5: Optimizing Your Connection
- Step 6: Adjusting Sound Settings via Sony Headphones Connect App
- YOUTUBE: How to Pair Sony WH-1000XM5 with MacBook
- Step 7: Configuring Microphone Settings for Mac
- Step 8: Setting Up Voice Assistant Compatibility
- Step 9: Updating Firmware for Best Performance
How to connect Sony WH-1000XM5 to Mac?
To connect Sony WH-1000XM5 headphones to a Mac, follow these steps:
- On your Mac, click on the Apple menu at the top left corner of the screen.
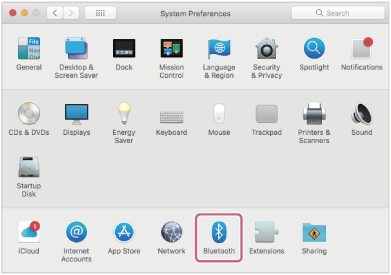
- From the drop-down menu, select \"System Preferences\".
- In the System Preferences window, click on \"Bluetooth\".
- Make sure Bluetooth is turned on by checking the box next to \"Turn Bluetooth On\".
- On your Sony WH-1000XM5 headphones, press and hold the pairing button (on/off button) for about 5-10 seconds until the headphones enter pairing mode.
- Back on your Mac, under the \"Devices\" section, you should see the \"WH-1000XM5\" listed as available devices.
- Click on \"WH-1000XM5\" to select it.
- Click on the \"Pair\" button next to the device name.
- Once the pairing process is complete, you will see a notification indicating that the headphones are connected to your Mac.
Your Sony WH-1000XM5 headphones are now successfully connected to your Mac and ready to use for audio playback or communication.
READ MORE:
Step 1: Prepare Your Sony WH-1000XM5 Headphones
Before connecting your Sony WH-1000XM5 headphones to your Mac, ensure they are ready for pairing. This initial preparation is crucial for a smooth connection process. Follow these detailed steps to prepare your headphones:
- Charge your WH-1000XM5 headphones to ensure they have enough battery life for the pairing process and subsequent use. A full charge provides the best experience without interruptions.
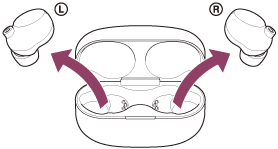
- Turn on the headphones by pressing the power button. If this is the first time you are using them, they will automatically enter pairing mode, indicated by the blue and red flashing lights.
- If the headphones have been used before, put them into pairing mode manually. Press and hold the power button for 7 seconds until you hear the voice prompt for Bluetooth pairing and see the indicator light flashing blue and red.
- Ensure no other devices are connected to the headphones. If necessary, disconnect or forget the WH-1000XM5 headphones from other devices to avoid connection conflicts.
With your Sony WH-1000XM5 headphones charged, powered on, and in pairing mode, they are now ready to be connected to your Mac.

Step 2: Enable Bluetooth on Your Mac
To connect your Sony WH-1000XM5 headphones to your Mac, the next essential step is enabling Bluetooth on your computer. This process is straightforward and allows your Mac to discover and pair with your headphones. Follow these steps to turn on Bluetooth:
- Click on the Apple menu at the top left corner of your screen and select \"System Preferences.\"
- In the System Preferences window, click on \"Bluetooth.\"
- If Bluetooth is turned off, click the \"Turn Bluetooth On\" button to activate it. You should now see the Bluetooth status as \"On,\" and your Mac is now discoverable to other Bluetooth devices.
- Keep the Bluetooth preferences window open to proceed with pairing your headphones in the next step. This window will display a list of devices available for pairing.
With Bluetooth enabled on your Mac, you\"re ready to proceed to the next step of pairing your Sony WH-1000XM5 headphones for a seamless audio experience.
Step 3: Pairing the Headphones with Your Mac
After ensuring your Sony WH-1000XM5 headphones are prepared and Bluetooth is enabled on your Mac, the next crucial step is to pair the devices. This process connects your headphones to your Mac, enabling audio playback through them. Follow these detailed steps to complete the pairing:
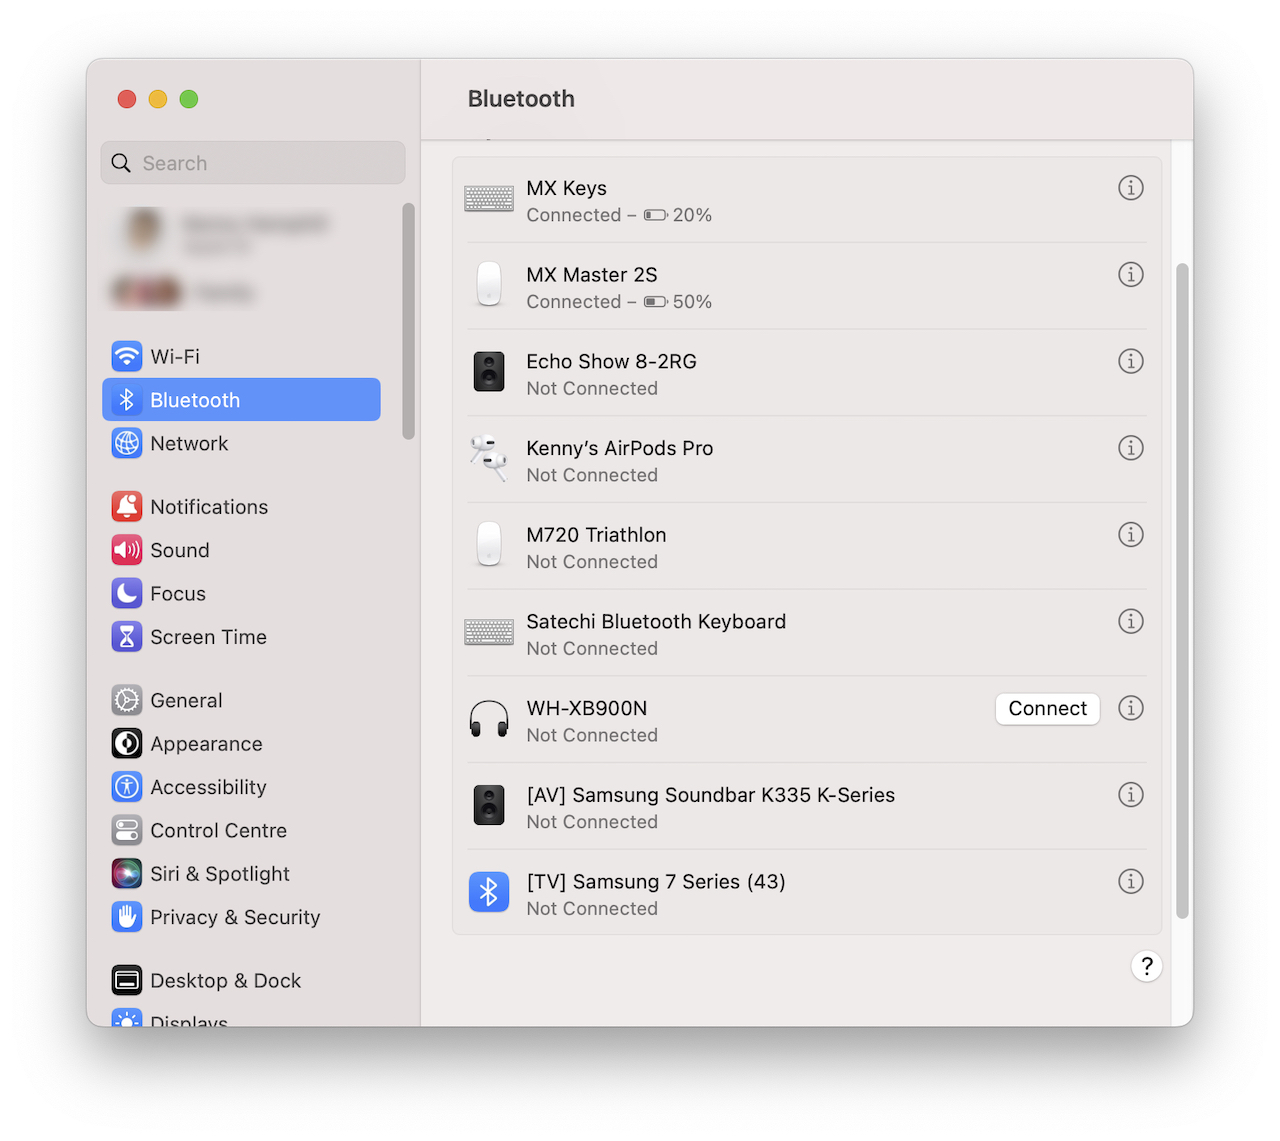
- With your headphones in pairing mode (indicated by the flashing blue and red light), return to the Bluetooth preferences on your Mac.
- Your Mac will search for available devices. Look for \"WH-1000XM5\" in the list of devices and click on it. If you don\"t see your headphones, ensure they are in pairing mode and click \"Search for Devices\" or refresh the list.
- Once you select your headphones, your Mac may prompt you with a pairing request. Click \"Pair\" or \"Connect\" to confirm the connection.
- Wait for a few seconds for the pairing to complete. You will know the connection is successful when the status changes to \"Connected\" next to your headphones\" name in the Bluetooth preferences.
- If you encounter any issues during pairing, make sure your headphones are close to your Mac and that there are no obstructions or sources of interference nearby. If necessary, turn Bluetooth off and on again on your Mac, or restart your headphones and retry the pairing process.
Once paired, your Sony WH-1000XM5 headphones should automatically connect to your Mac whenever both the headphones are turned on and Bluetooth is enabled on your computer. You are now ready to enjoy high-quality audio through your Sony headphones.

Step 4: Troubleshooting Connection Issues
If you encounter any issues connecting your Sony WH-1000XM5 headphones to your Mac, don\"t worry. Most connection problems can be resolved with a few simple steps. Follow these troubleshooting tips to ensure a smooth connection:
- Ensure your headphones are fully charged. Low battery levels can sometimes cause connectivity issues.
- Verify that your Mac\"s Bluetooth is turned on and functioning correctly. You can do this by trying to connect another Bluetooth device to your Mac.
- Make sure your headphones are in pairing mode. If you\"re having trouble entering pairing mode, refer back to Step 1 for instructions.
- Move your headphones closer to your Mac. Bluetooth has a limited range, and physical obstructions can affect the connection quality.
- Restart both your headphones and your Mac. This can resolve many connectivity issues by refreshing the Bluetooth connections.
- If your headphones are already paired with another device, disconnect or forget the headphones from that device. Bluetooth devices can sometimes struggle to connect to a new device if they\"re still connected to another.
- Check for any macOS updates or firmware updates for your headphones. Keeping both your Mac and headphones up to date can prevent and fix connectivity issues.
- If all else fails, reset your headphones to their factory settings. Consult your headphone\"s user manual for instructions on how to do this, as it can vary by model.
By following these steps, most connection issues can be effectively resolved, allowing you to enjoy a seamless audio experience with your Sony WH-1000XM5 headphones and Mac.
_HOOK_
Step 5: Optimizing Your Connection
Optimizing the connection between your Sony WH-1000XM5 headphones and your Mac ensures a stable and high-quality listening experience. Follow these steps to achieve the best connection:
- Ensure Proper Preparation: Before connecting, ensure that your headphones are fully charged and your Mac\"s Bluetooth is enabled. Put your WH-1000XM5 into pairing mode by holding the power button until the indicator flashes white.
- Pairing Your Devices: On your Mac, navigate to Bluetooth settings via System Preferences and select your WH-1000XM5 from the list of devices to pair.
- Minimize Interference: Keep your headphones and Mac close together, avoiding obstructions and areas with high wireless interference to maintain a stable connection.
- Adjust Sound Settings: Use the Sony Headphones Connect app to customize sound profiles and adjust noise cancellation settings. This app can be downloaded from the App Store.
- Configure Microphone Settings: If you\"re using your WH-1000XM5 for calls or recordings, ensure the microphone is properly configured in System Preferences under Sound > Input.
- Enable Voice Assistant: For Siri or Google Assistant, ensure it\"s enabled in your Mac\"s System Preferences. This allows easy access to voice commands.
- Firmware Updates: Regularly check for firmware updates through the Sony Headphones Connect app to access new features and bug fixes.
By following these steps, you can enjoy a seamless and enhanced audio experience with your Sony WH-1000XM5 headphones and Mac.

Step 6: Adjusting Sound Settings via Sony Headphones Connect App
Maximizing your audio experience with the Sony WH-1000XM5 headphones involves fine-tuning sound settings through the Sony Headphones Connect app. This application offers a plethora of options to personalize your listening experience. Here\"s how you can adjust the sound settings:
- Download and Install: First, download the Sony Headphones Connect app from the App Store or Google Play Store. Ensure your headphones are connected to your device via Bluetooth.
- Open the App: Launch the app and follow the on-screen instructions to connect your WH-1000XM5 headphones.
- Customize Sound Settings: Once connected, navigate to the \"Sound\" tab where you can adjust various settings:
- Equalizer: Customize the sound equalization to match your preferred listening profile or choose from presets such as \"Excited\", \"Mellow\", \"Relaxed\", or \"Vocal\".
- Surround (VPT) Settings: Simulate various audio environments like a concert hall, club, outdoor stage, or arena.
- Sound Position Control: Choose the direction from which the sound comes, offering a more immersive listening experience.
- Adjust Ambient Sound Control: Tailor how much of the ambient sound you want to hear by adjusting the noise cancellation levels or activating Ambient Sound Mode to stay aware of your surroundings.
- 360 Reality Audio Setup: For an even more immersive experience, use the app to set up 360 Reality Audio. This feature creates a sound field that makes it feel like the music is coming from all around you.
- Software Updates: Stay updated with the latest firmware and software enhancements to ensure the best performance and access to new features.
By utilizing the Sony Headphones Connect app, you can truly customize your WH-1000XM5 headphones to your personal taste and situational needs, enhancing your overall listening experience.
How to Pair Sony WH-1000XM5 with MacBook
\"Discover the art of pairing as we explore the magic that happens when two perfect elements come together. Get ready to witness a mesmerizing display of harmony and balance in our latest video!\"
How to Pair Sony WH-1000XM5 Headphones - Pairing Tutorial | Featured Tech 2022
\"Immerse yourself in the world of music like never before with our groundbreaking headphones. Experience crystal-clear sound and unrivaled comfort that will transport you to a whole new musical dimension. Don\'t miss the chance to elevate your audio experience!\"
Step 7: Configuring Microphone Settings for Mac
After successfully connecting your Sony WH-1000XM5 headphones to your Mac, configuring the microphone settings is crucial for clear communication during calls or recordings. Here\"s how to adjust the microphone settings on your Mac:
- Access System Preferences: Click on the Apple menu at the top left corner of your screen, and select \"System Preferences\" from the dropdown menu.
- Open Sound Settings: Within System Preferences, click on the \"Sound\" icon to open the sound settings.
- Select the Input Tab: At the top of the Sound window, click on the \"Input\" tab to view available microphone options.
- Choose Your Headphones: In the list of input devices, select \"Sony WH-1000XM5\". This sets your headphones as the default microphone device.
- Adjust Input Volume: With your WH-1000XM5 selected, use the input volume slider to adjust the microphone\"s sensitivity. Increasing the volume will make the microphone more sensitive to sound, while decreasing it will reduce background noise pickup.
- Test the Microphone: Speak into the microphone and watch the input level indicator beneath the volume slider. If it moves as you speak, your microphone is working correctly. Adjust the volume as needed to ensure your voice is clear without being too loud or soft.
Configuring your Sony WH-1000XM5 microphone settings on your Mac ensures optimal audio input quality for all your communication and recording needs. Adjust these settings as needed depending on your environment and specific use case.

Step 8: Setting Up Voice Assistant Compatibility
To enhance your experience with the Sony WH-1000XM5 headphones, setting up voice assistant compatibility allows you to access your favorite voice assistant directly from your headphones. This feature is compatible with Siri on Mac, enabling voice commands for various tasks without needing to access your device physically. Here’s how to set it up:
- Ensure Your Headphones Are Connected: First, make sure your Sony WH-1000XM5 headphones are connected to your Mac via Bluetooth.
- Access Siri Settings: On your Mac, go to System Preferences > Siri. Ensure that Siri is enabled by checking the box next to “Enable Ask Siri”.
- Configure Siri Preferences: In the Siri settings, you can customize the language, voice feedback, and the microphone input. Ensure the microphone selected is your Sony WH-1000XM5 if you wish to use it directly for Siri commands.
- Activate Voice Assistant on Headphones: Some Sony WH-1000XM5 headphones allow for activation of the voice assistant through a custom button. Refer to your headphone’s manual to set this feature up, as models may vary.
- Use Voice Commands: Once set up, you can activate Siri by pressing the custom button (if available) on your headphones or by using the wake word, if supported. You can then issue voice commands for music playback, information queries, setting reminders, and more.
By setting up voice assistant compatibility, you unlock hands-free control over your Mac and a more integrated experience with your Sony WH-1000XM5 headphones.

READ MORE:
Step 9: Updating Firmware for Best Performance
Keeping your Sony WH-1000XM5 headphones updated with the latest firmware is essential for ensuring optimal performance, accessing new features, and resolving any existing issues. Here is a step-by-step guide to updating your headphones\" firmware:
- Download Sony Headphones Connect App: If you haven\"t already, download the Sony Headphones Connect app from the App Store or Google Play Store. This app is necessary for updating your headphones\" firmware.
- Connect Your Headphones: Open the Sony Headphones Connect app and connect your WH-1000XM5 headphones to your smartphone or tablet via Bluetooth.
- Check for Firmware Updates: Once connected, the app will automatically check for available firmware updates. If an update is available, a notification will appear within the app.
- Start the Update: Tap on the notification to start the firmware update process. Make sure your headphones are adequately charged to prevent any interruptions during the update.
- Follow On-Screen Instructions: The app will provide step-by-step instructions on how to complete the update. It\"s important to keep the app open and your headphones connected during this process.
- Completion: Once the update is complete, the app will notify you, and your headphones will automatically restart. This may take several minutes, so be patient.
After updating, you can enjoy enhanced features, improved stability, and a better overall performance from your Sony WH-1000XM5 headphones. Regularly checking for firmware updates ensures you are always getting the best experience possible.
Connecting your Sony WH-1000XM5 to a Mac enhances your audio experience with seamless integration and superior sound quality. Follow our comprehensive guide to unlock the full potential of your headphones and elevate your listening journey.

_HOOK_